
DIY: How To Replace the Shift Coupler Boots on a Classic Air-cooled Porsche 911
The classic air-cooled 911 shifter linkage requires precise adjustment to ensure the best performance possible. Help maintain that adjustment by replacing your torn shift coupler boots.
Note: The following information is for educational use only. Before proceeding please read my disclaimer page.
Disclosure: This post contains links to Amazon products and other trusted vendors. As an Amazon Associate I earn from qualifying purchases.
Your air-cooled Porsche 911 shift mechanism needs to be clean and well-lubed to make shifting accurate and enjoyable. If you have already replaced your shifter bushings and adjusted your coupler, protect the coupler from the elements by replacing both inner and outer coupler boots in less than an hour.
Model Years Applicable:
All manual transmission Porsche 911 cars 1986 and earlier. The procedure shown here is on a 1983 911SC.
Tools Needed:
Parts Needed:
- One inner shift coupler boot
- One outer shift coupler boot
- One Shift coupler (if yours has too much play in the bushings)
- One Shift coupler screw (if yours is damaged)
- 2-4 medium zip-ties at least 8 inches long
Outer Shift Coupler Boot Installation
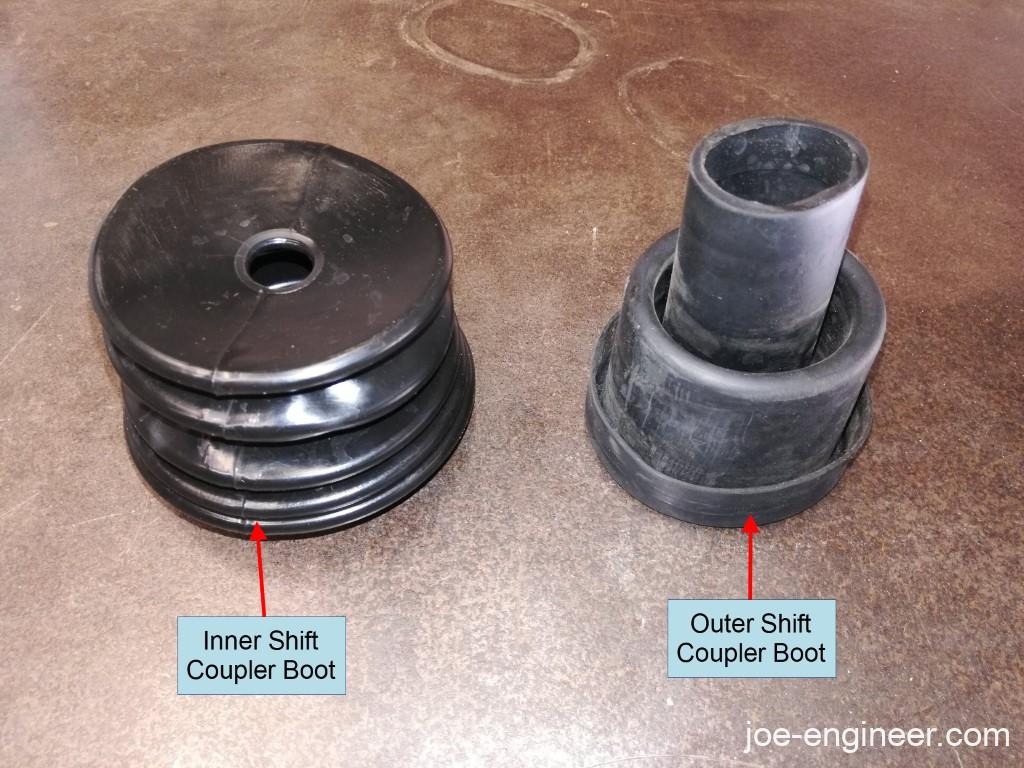
Below are the inner and outer shift coupler boots. The one on the right is the outer boot and seals the coupler and center tunnel from the elements by closing off the round opening where the gearbox shift rod enters the body center tunnel. The accordion shaped one on the left is the inner boot and it is more of a dust shield to keep existing dust and debris in the center tunnel off the shift coupler. This procedure is shown with no existing boots for greater clarity.
Step 1: Put Parking Brake On
With the car off and on a flat surface, put the shifter into neutral and put on the parking brake. If the parking brake is not adjusted correctly and cannot prevent the car from rolling, chock the front and rear of a tire as you will disable the shifter mechanism for the duration of the procedure.
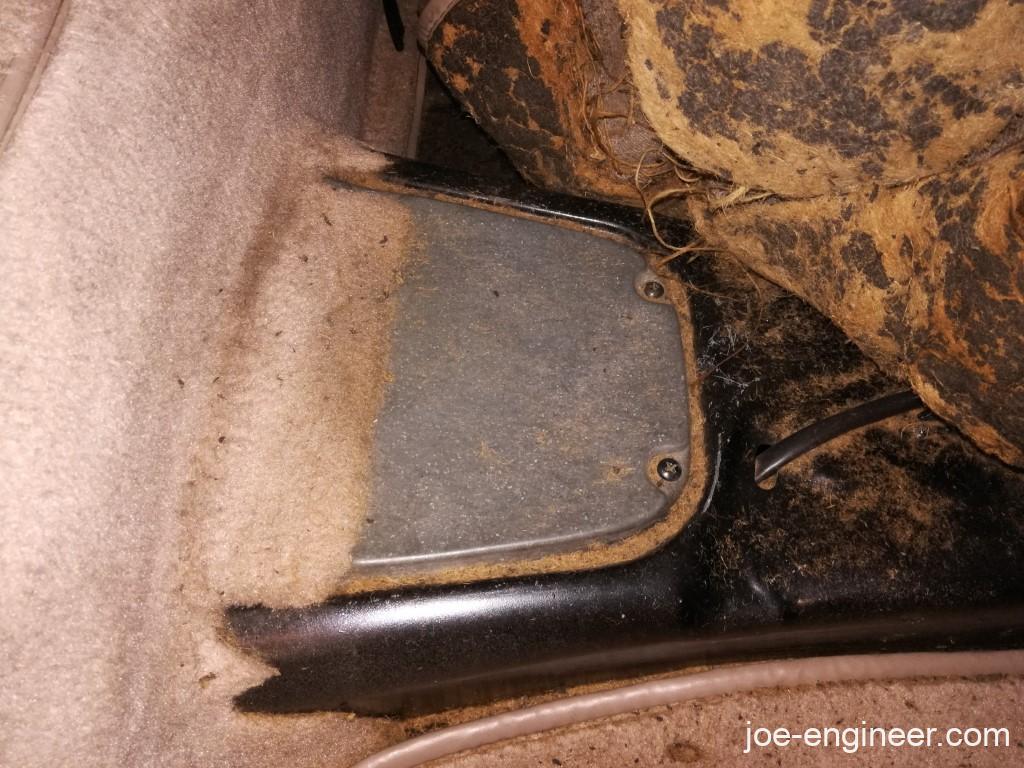
Step 2: Remove Floor Access Panel
In the floor directly behind the front seats and in front of the rear seats is a small access panel under the carpet. Remove the four screws and lift the cover off the access panel.
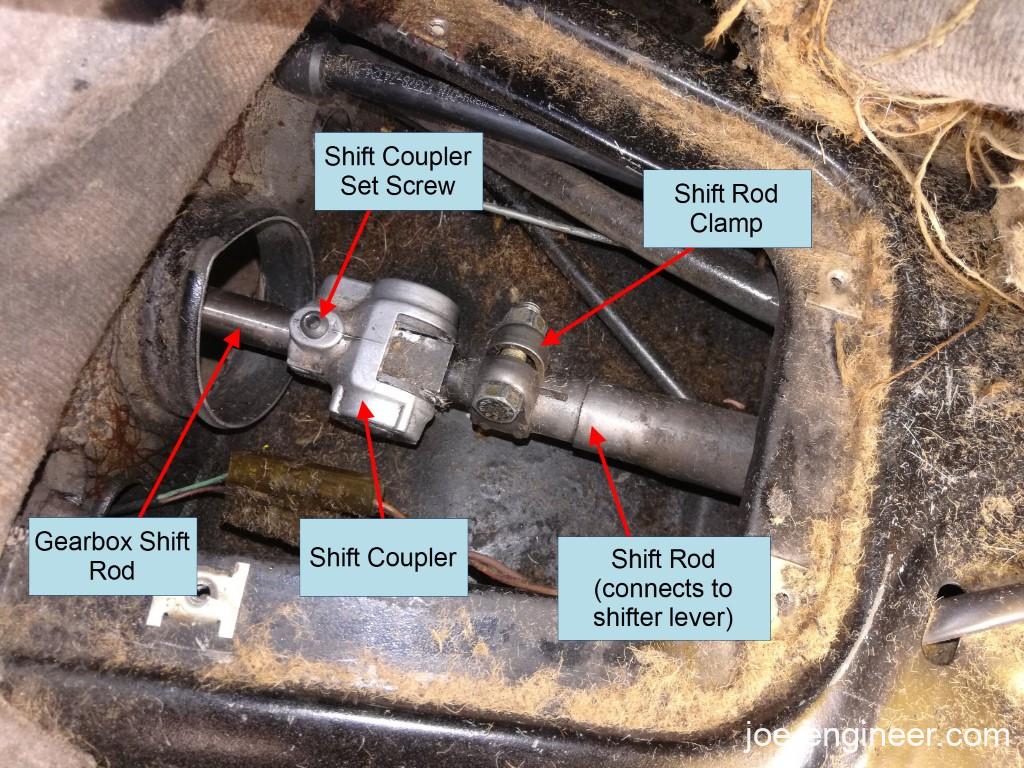
Step 3: Disconnect Coupler from Gearbox Shift Rod
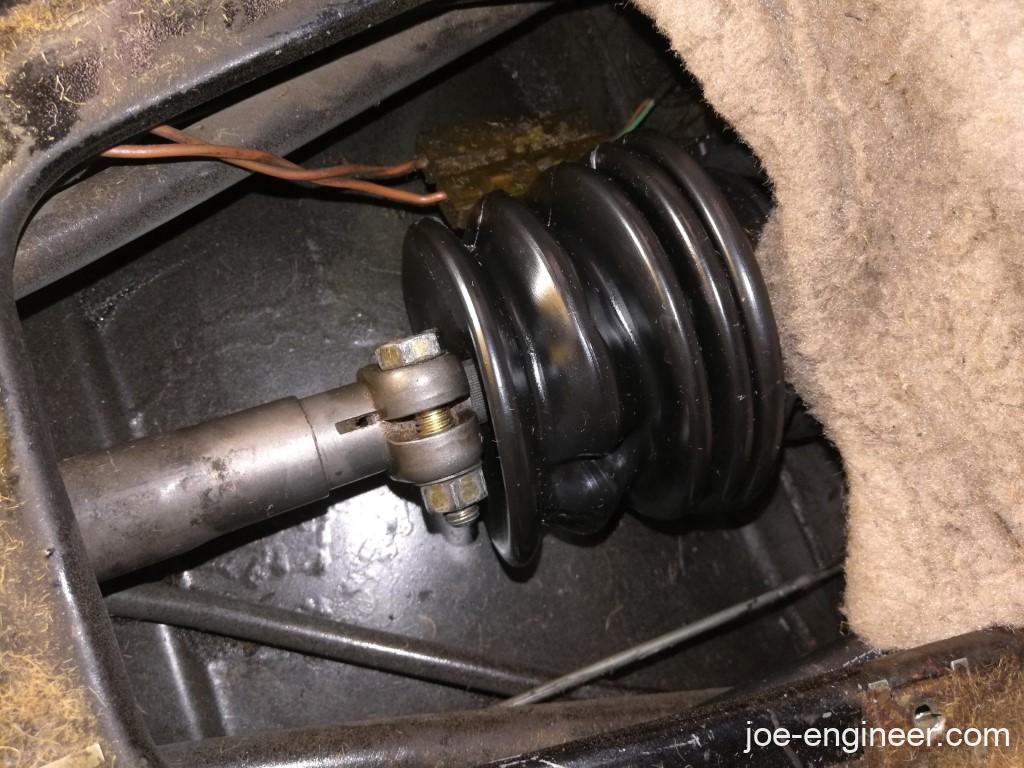
If it is present, you will see the accordion shaped inner boot covering the shift coupler, which resembles a small universal joint. If the outer boot is present, you will see it directly behind the inner boot, over a round flange on the center tunnel bulkhead. If it is not present you will just see a round flange and a hole with the gearbox shift rod in the center.
Pull the inner boot forward to expose the shift coupler. You may need to zip tie it or gently clamp the inner boot closed so it is not in the way. With the shifter lever still in neutral remove the small set screw in the coupler. Be careful not to push or pull on the shift coupler as this may cause the gearbox to shift into a gear.
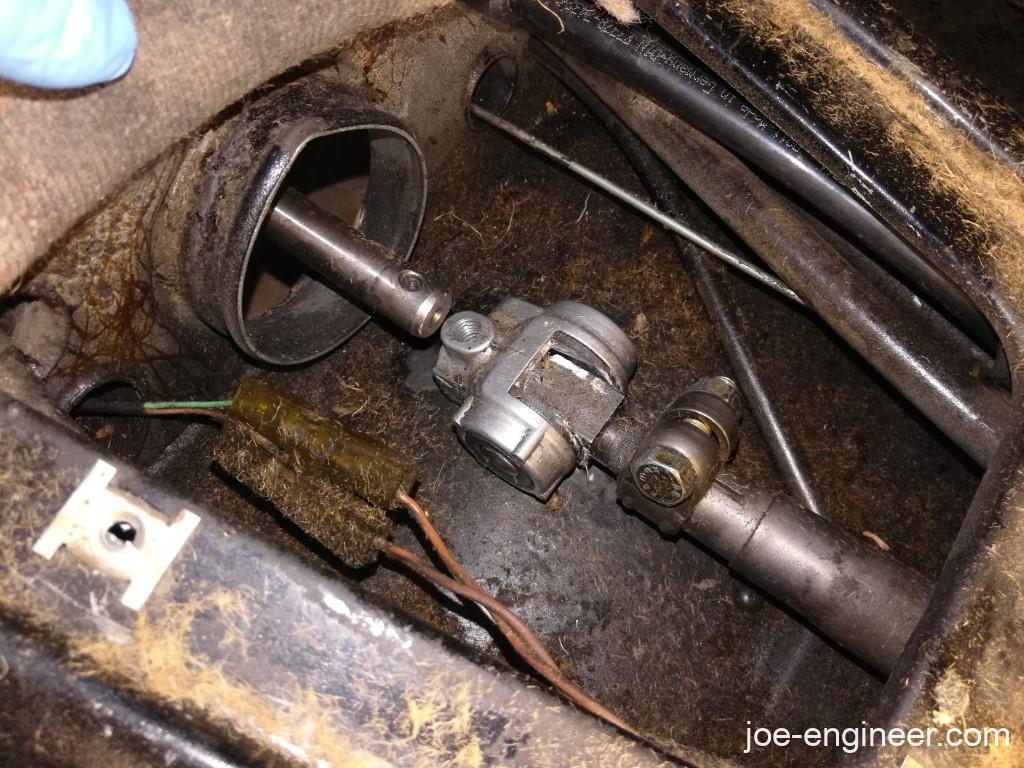
Once the set screw is completely removed, support the bottom of the shift coupler with one hand and with the other hand slowly move the shifter lever towards the fourth gear position. You will see the shift coupler slide forward off the gearbox shift rod.
Step 4: Replace Outer Boot
Once the coupler is off the shift rod, you should be able to flip it up or down to give you enough room to slip off the old outer shift boot and slip on the new one. If the old outer boot is stuck, use a plastic trim panel tool to pry it off. Seat the new outer boot over the center tunnel flange and push the inner part towards the gearbox as much as you can with your fingers.
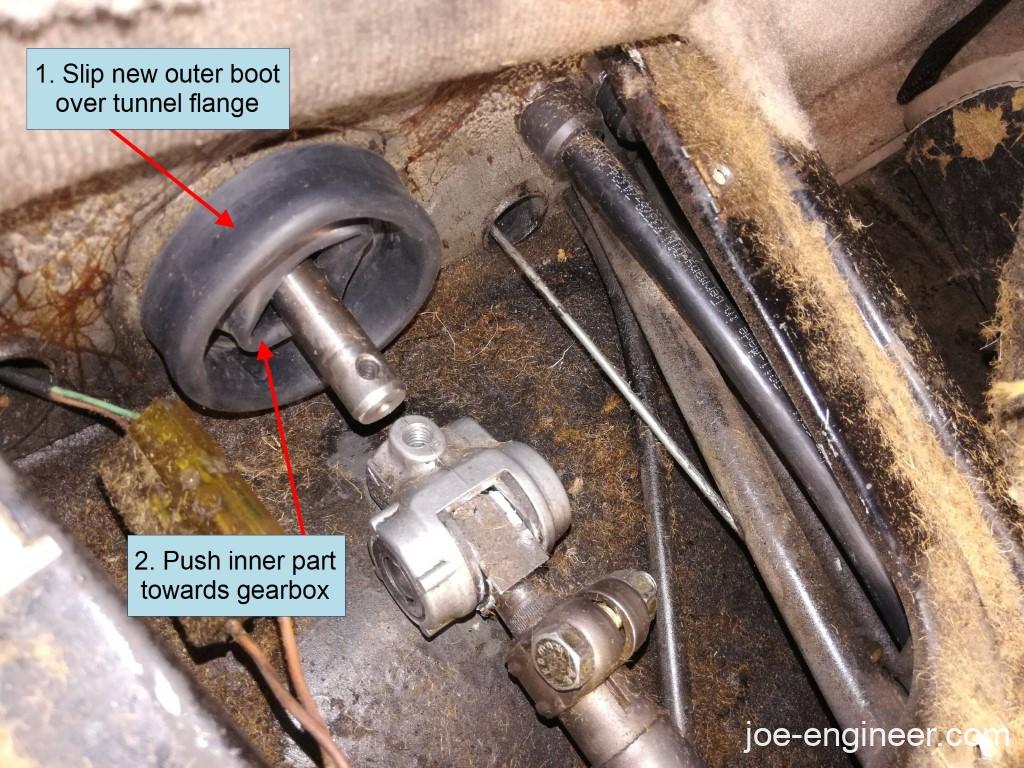
Check underneath the car to make sure the end of the outer boot is touching the snout of the gearbox. This will seal the shift rod from dirt and exterior debris.

Step 5: Re-connect Shift Coupler
Once again, with one hand supporting the shift coupler and another hand on the shift lever, carefully move the shift lever back towards the neutral position to allow the coupler to slip back on the shift rod. Once you see the threaded hole in the coupler line up with the cone shaped hole in the shift rod, stop and gently move the shift lever slightly left or right to get the holes to center as best as you can visually. Then thread in the set screw slowly so the cone end engages with the hole in the shift rod. If necessary, wiggle the shift lever slightly as you slowly thread in the set screw to get it to line up correctly in the shift rod. Be very careful to make sure you don’t strip the threads on the coupler or damage the set screw. Torque the set screw to no more than 23 Nm (17 ft-lbs).
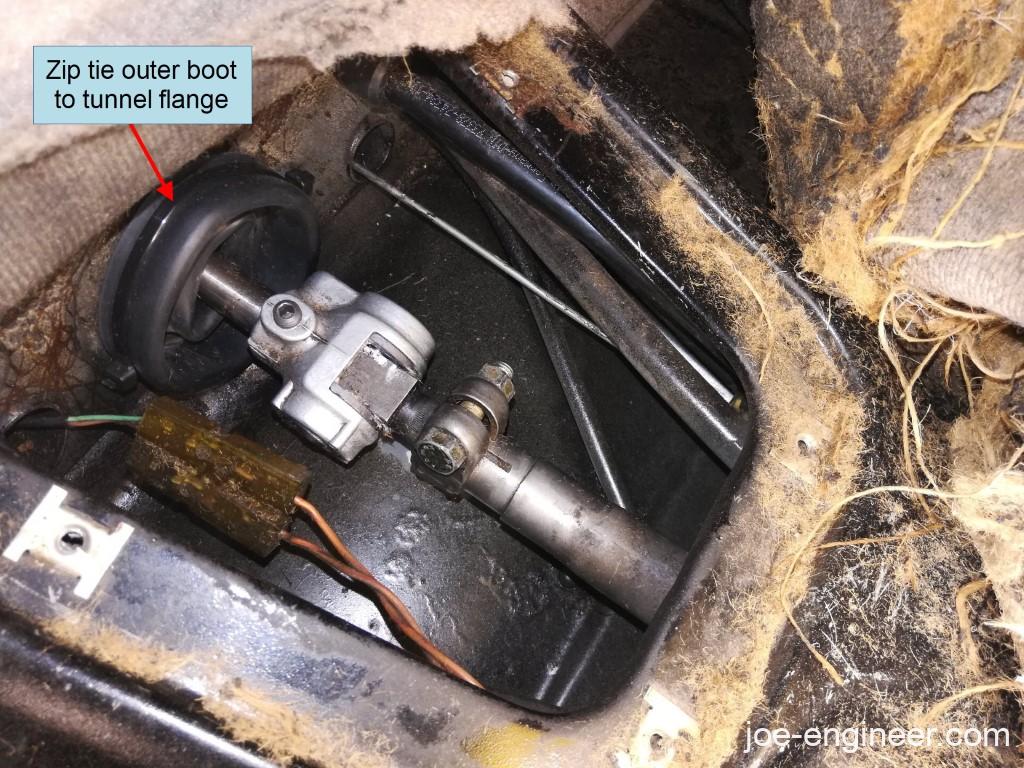
Make sure the shift lever engages in all gears including reverse. Zip tie the outer coupler to the center tunnel flange to secure it in place and clean the center tunnel of any oil and dirt to keep the shift coupler clean.
Note: If you find your center tunnel dirty from engine oil vapor, read this procedure to learn how to fix common engine leaks. If your center tunnel is dirty from gear oil (sticky and smellier than engine oil) read this procedure to learn how to fix common gearbox leaks.
The outer shift coupler boot installation is complete.
Inner Shift Coupler Boot Installation
Step 1: Disconnect Shift Coupler
Now we will service the other end of the shift coupler. If you have an existing inner shift coupler boot, zip tie it or clamp it closed so you can slide it out of the way as needed.
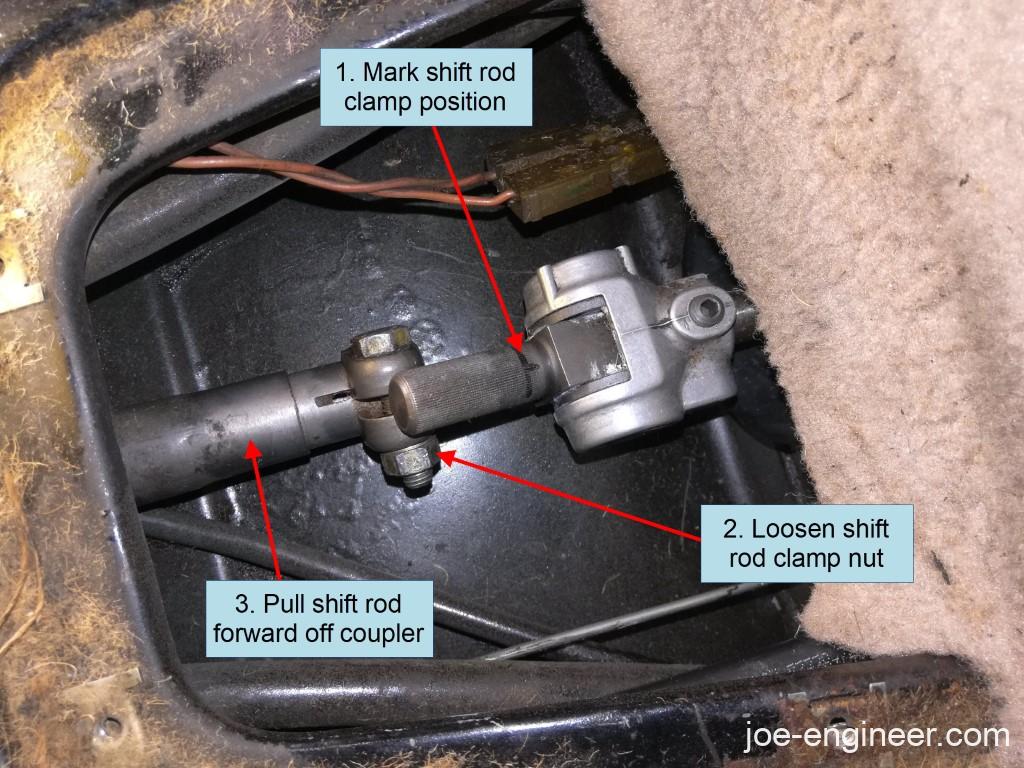
Using a permanent marker, mark the position of the shift rod clamp on the splined shaft of the shift coupler per Step 3 of this procedure. Then, with the shift lever in the neutral position, loosen the nut and bolt on the shift rod clamp attached to the splined shaft.
Once again, support the shift coupler and rod with one hand and with the other hand slowly move the shift lever towards the fourth gear position to slide the shift rod forward off the splined coupler shaft.
Step 2: Replace Inner Boot
Once the splined coupler shaft is free you can pull the old inner boot off.
Inspect the shift coupler for any damage, especially on the plastic bushings, per step 5 of this procedure. If it has excessive play or if the bushings are damaged, replace the coupler with a new one via the set screw. If it is still in good shape, add some lithium grease to the joint surfaces to keep it rotating smoothly.
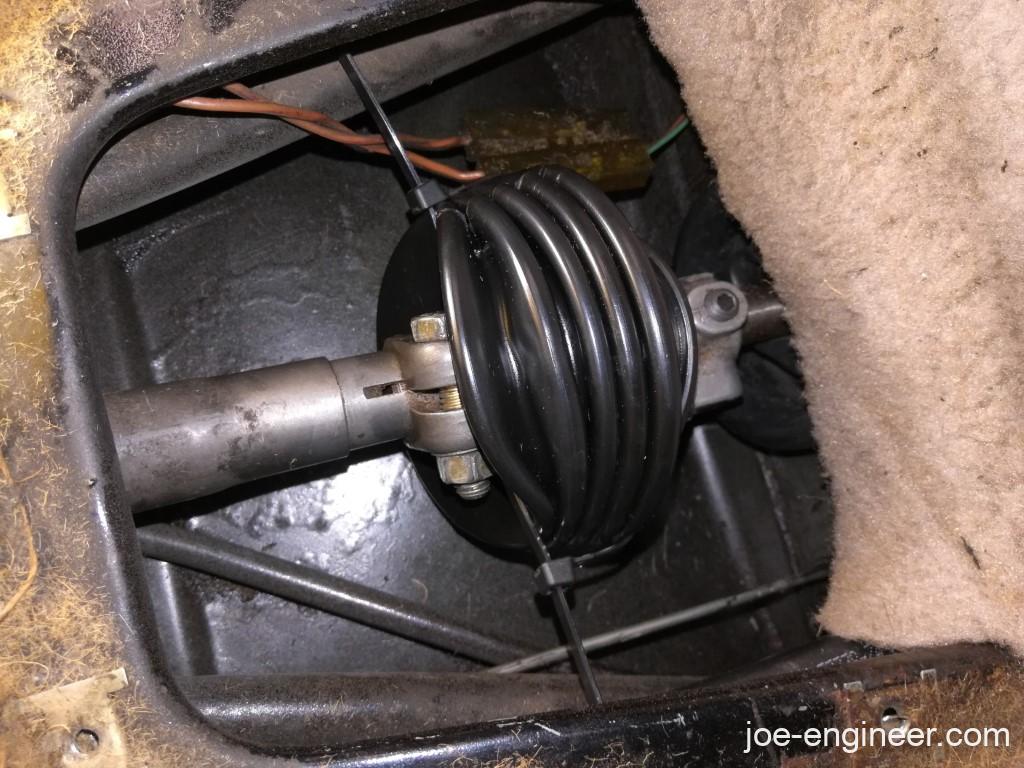
At this point you can re-install a new inner boot over the splined shaft, with the large open end facing the shift coupler and the back of the car. Keep the inner boot zip-tied or clamped shut so it doesnt get in the way of shift coupler adjustment.
Guide the shift rod clamp over the coupler splined shaft by slowly pulling the shift lever back into the neutral position, capturing the inner boot in between.
Step 3: Adjust Coupler and Shifting Action
Using the lines you drew on the shift coupler as a guide, orient the shift rod and coupler in the same location as best as possible without forcing the gearbox into any gear.
Adjust the shift coupler per step 6 of this procedure. Once you have adjusted the coupler, torque the nut on the shift rod clamp to 23 Nm (17 ft-lbs) and verify the shift lever engages all gears including reverse. Cut the zip ties on the inner boot and extend it over the shift coupler.
If you want the video version of the shift coupler adjustment process, here you go:
The inner shift coupler boot installation is complete.
Step 4: Replace Floor Access Panel
Replace the access panel with the 4 screws and the carpet that goes over it.
Your shift coupler boots are now ready to keep your shift linkage clean for years to come.