
Porsche 911 Pistons and Cylinders
I have to admit that the assembly of the engine case really tested my patience.
There were so many things to measure and re-measure very precisely to ensure the engine runs correctly that progress felt painfully slow. However as Wayne Dempsey states on page 18 of the rebuild book,
“The 911 engine is a precise machine, and very unforgiving of sloppy work. It has unique design features not found in conventional engines. Small errors in assembly can result in complete destruction of the engine, or at best, messy oil leaks.”
This statement put the fear in me to not slack off one bit. After assembling the case, I thought the worst was behind me. Well, I got to do more of that deep-dive measuring all over again with the re-assembly of the pistons and cylinders!
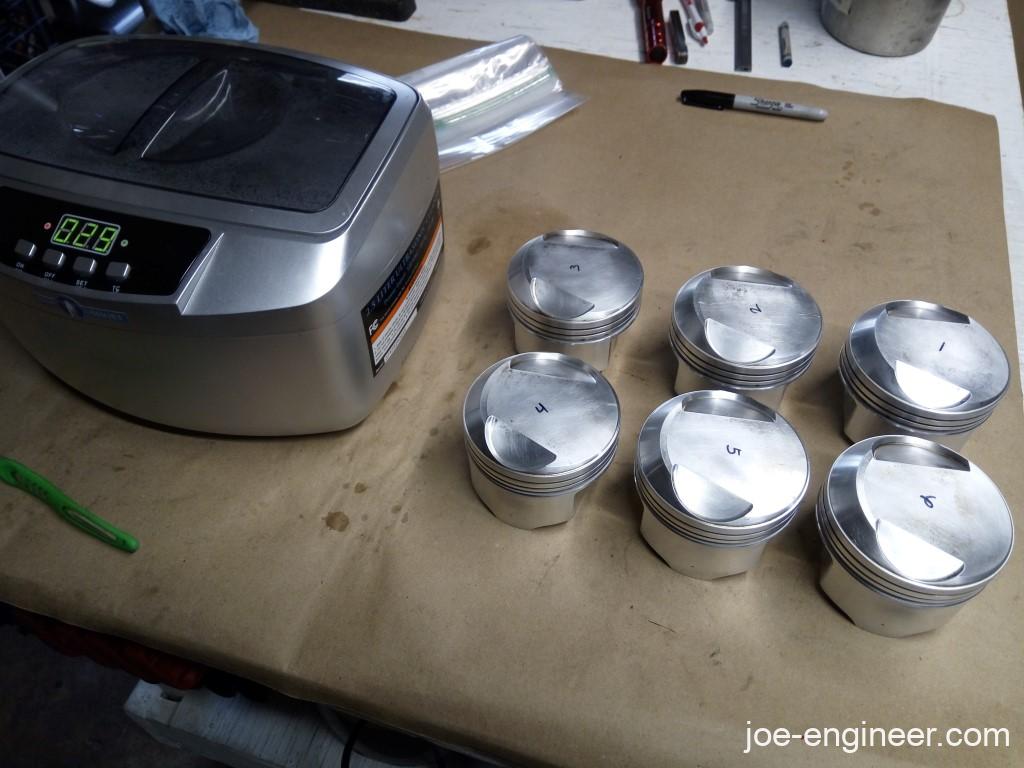
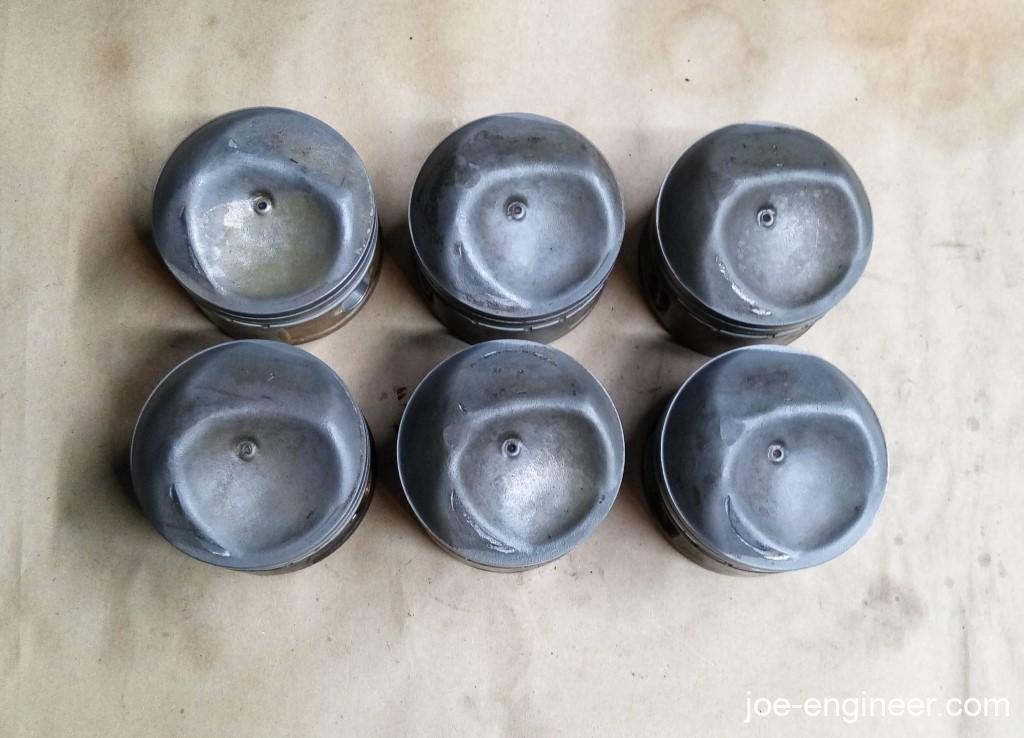
“New” Pistons and Cylinders
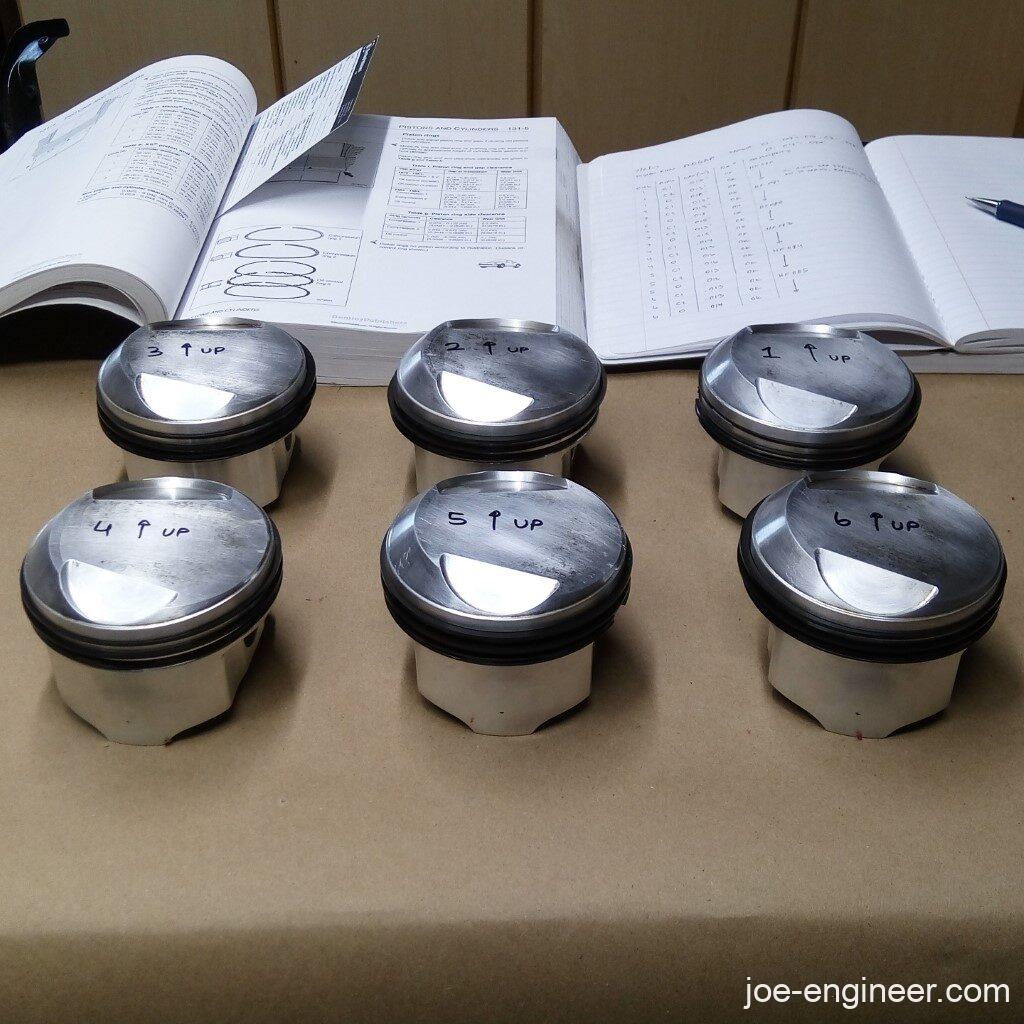
I wanted to upgrade to bigger cams for a bit more power. My reading found that the stock pistons cleared the valve lift from the 964 cams I wanted to run but just barely. In order to get a bit more valve clearance as well as upgrade from cast to forged pistons, I bought these slightly used JE Pistons that were still in great shape. They were already pretty clean when I received them but I got them ultra-clean with my ultrasonic cleaner. In case you haven’t noticed, this little machine has paid for itself many many times over.
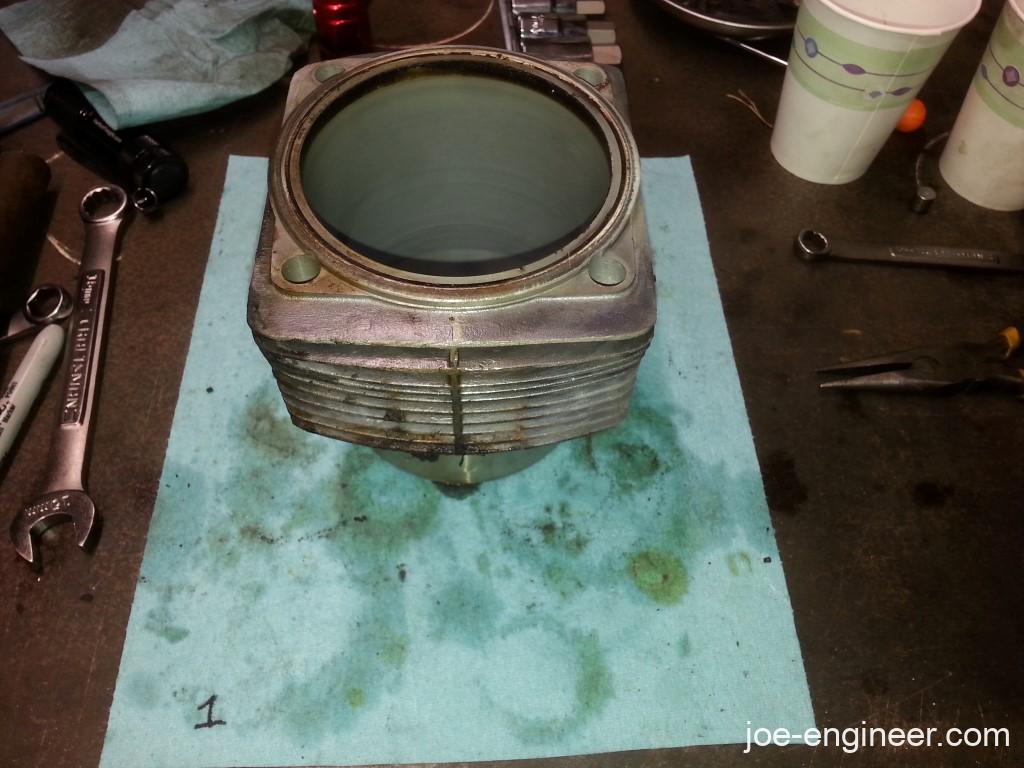
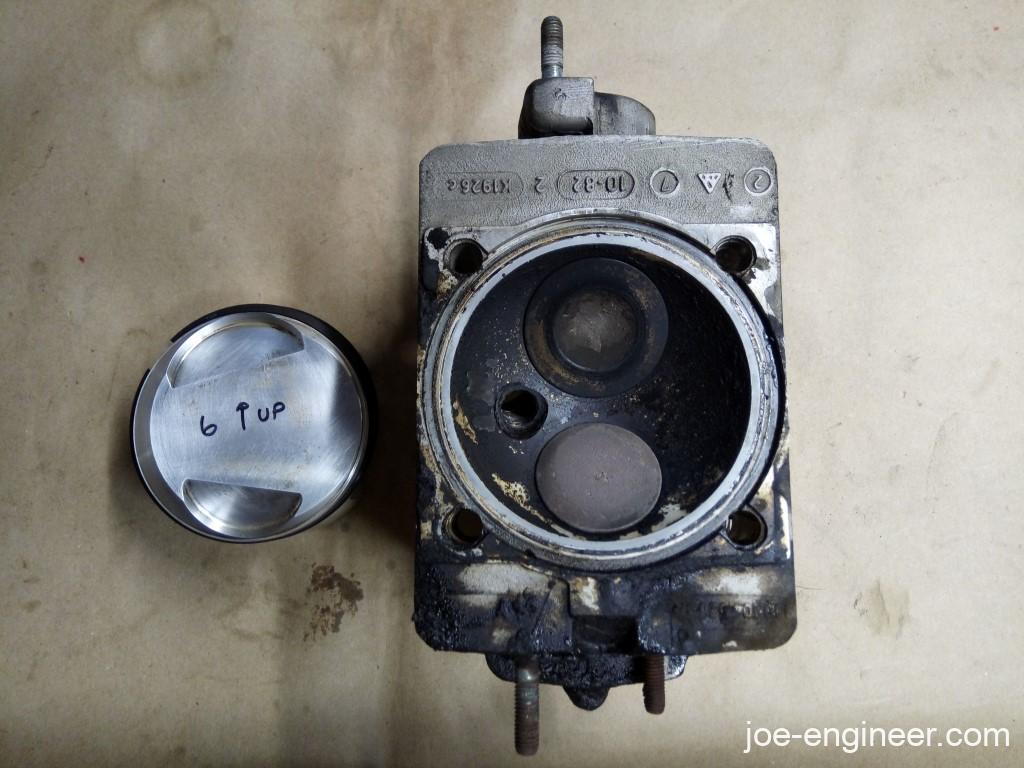
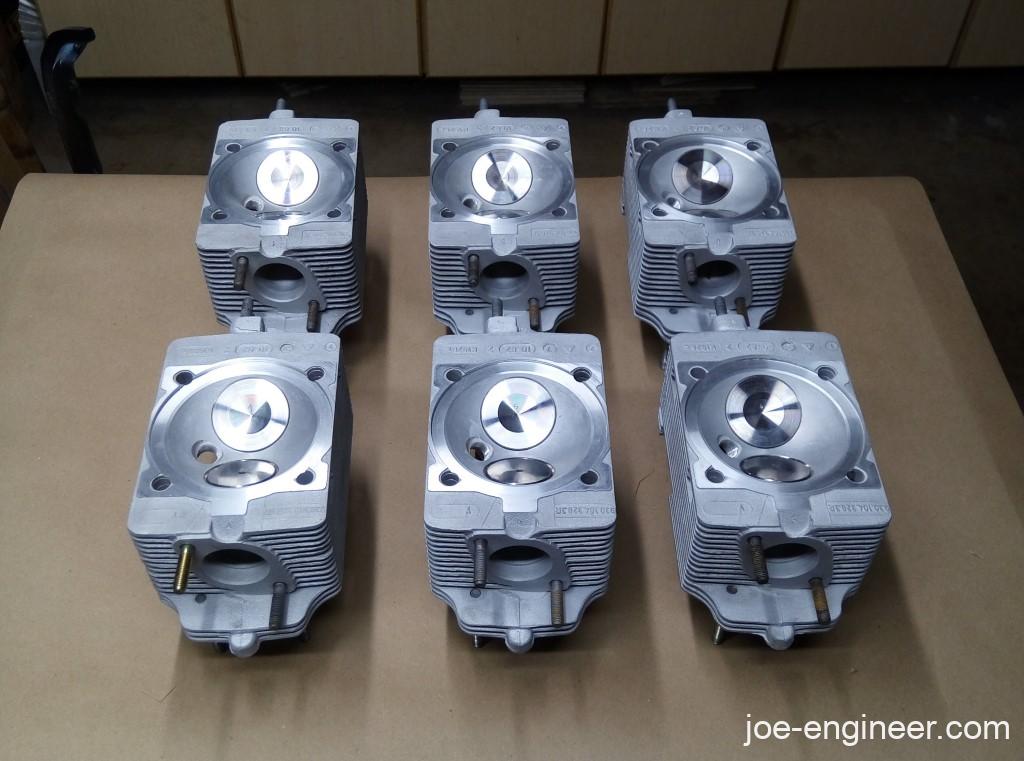
After doing more research, I confirmed that I did not need to buy new Nikasil cylinders, rather I could send my old Alusil units out to get replated in Nikasil and honed to spec. So thats exactly what I did. My old cylinders went from this:
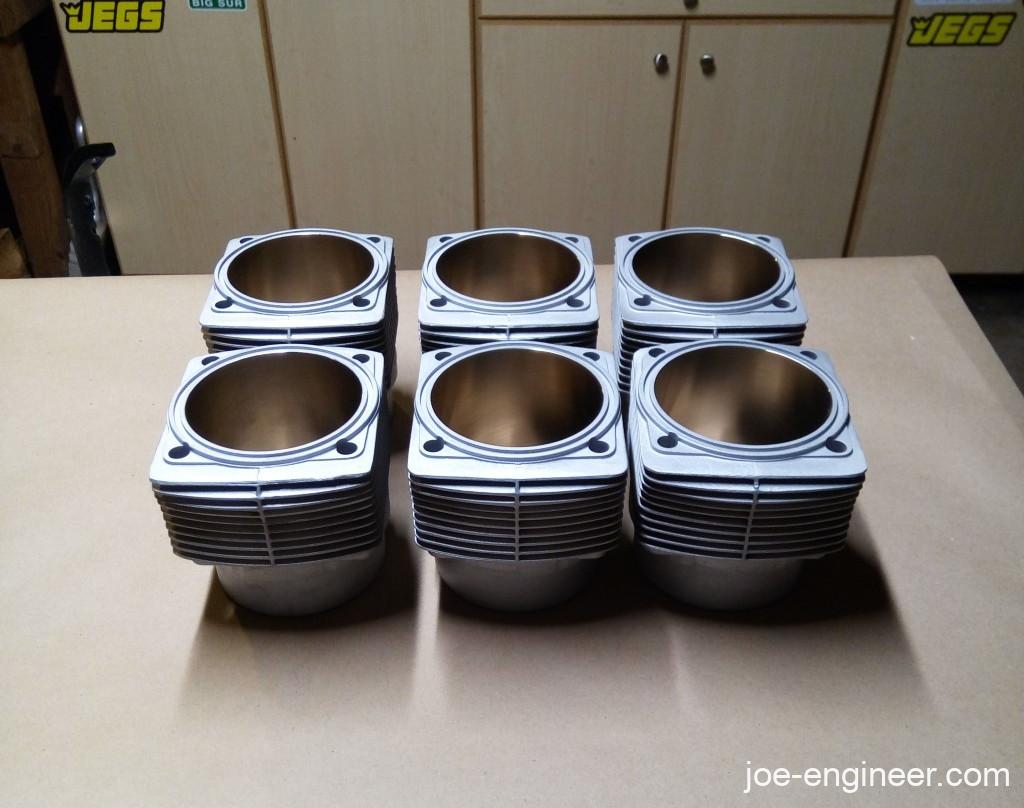
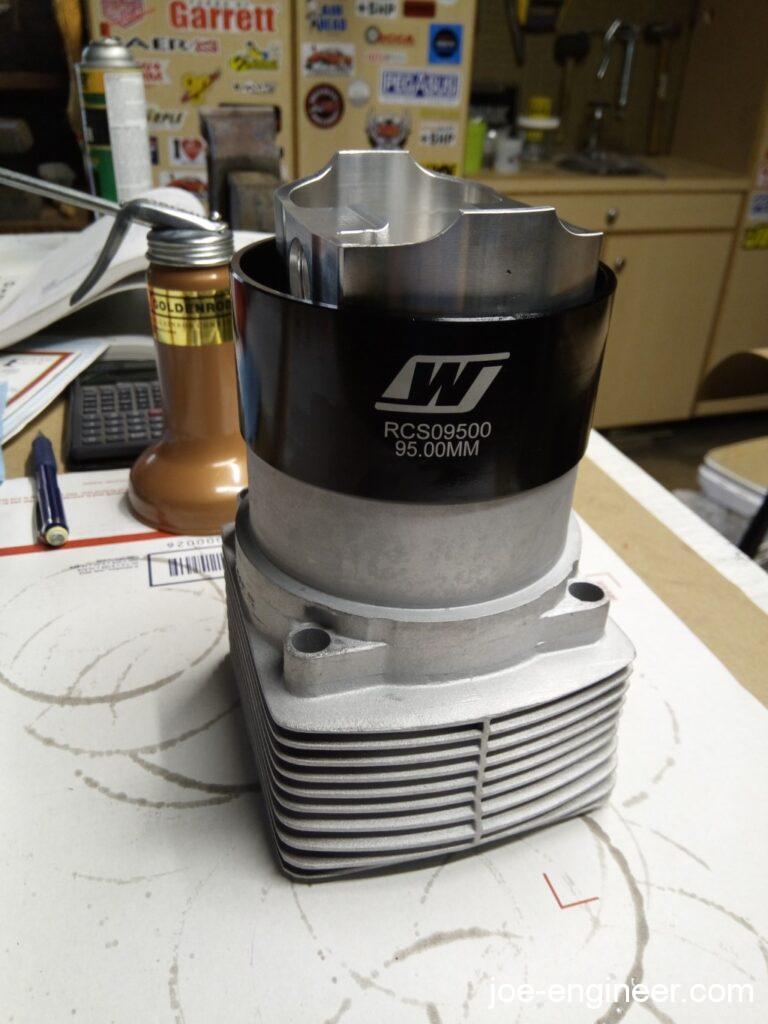
To these beauties. Reconditioned original parts make me so happy.
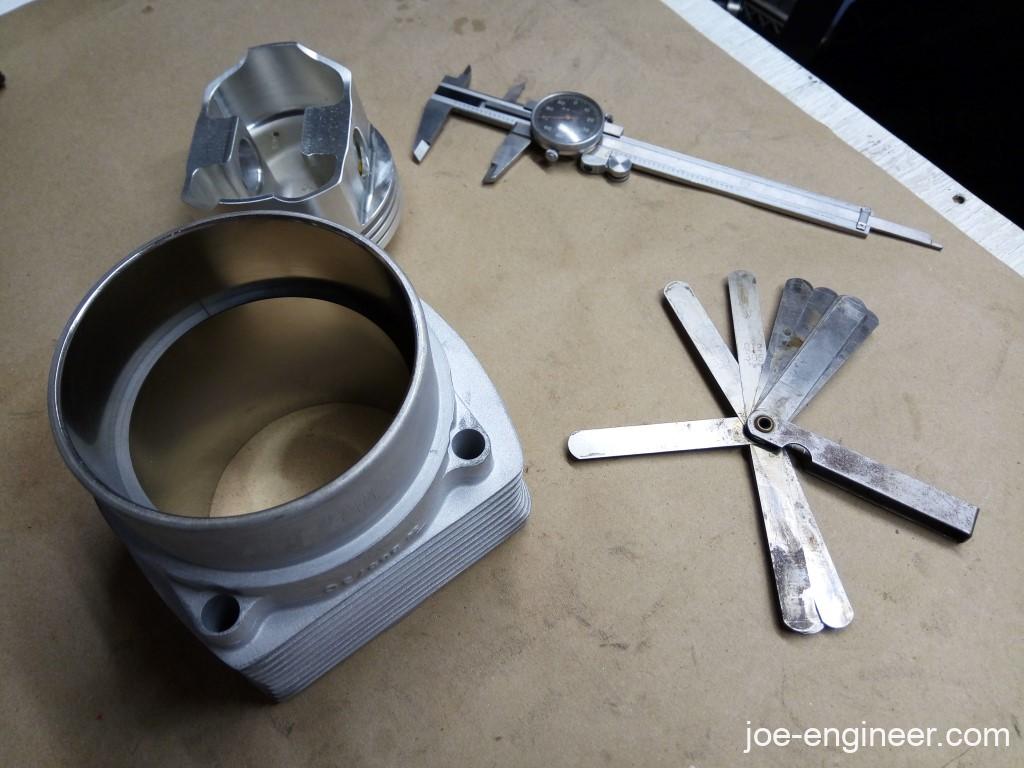
Then I was off to measure the cylinders, pistons, and new rings for all respective diameters and gaps…
Still More Measuring
Ill spare you the dry details but I measured the piston weights, piston diameters, cylinder roundness, ring end gaps, piston to wall clearance, then paired the right piston for each cylinder based on clearances.
Then I installed a new set of rings on each piston.
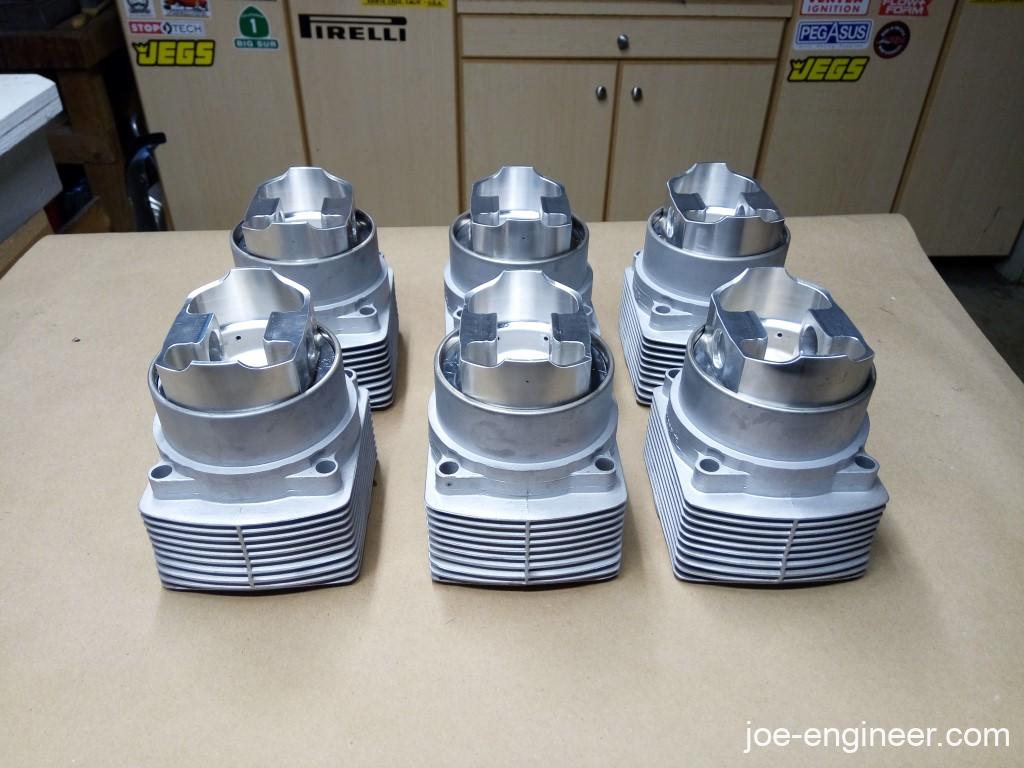
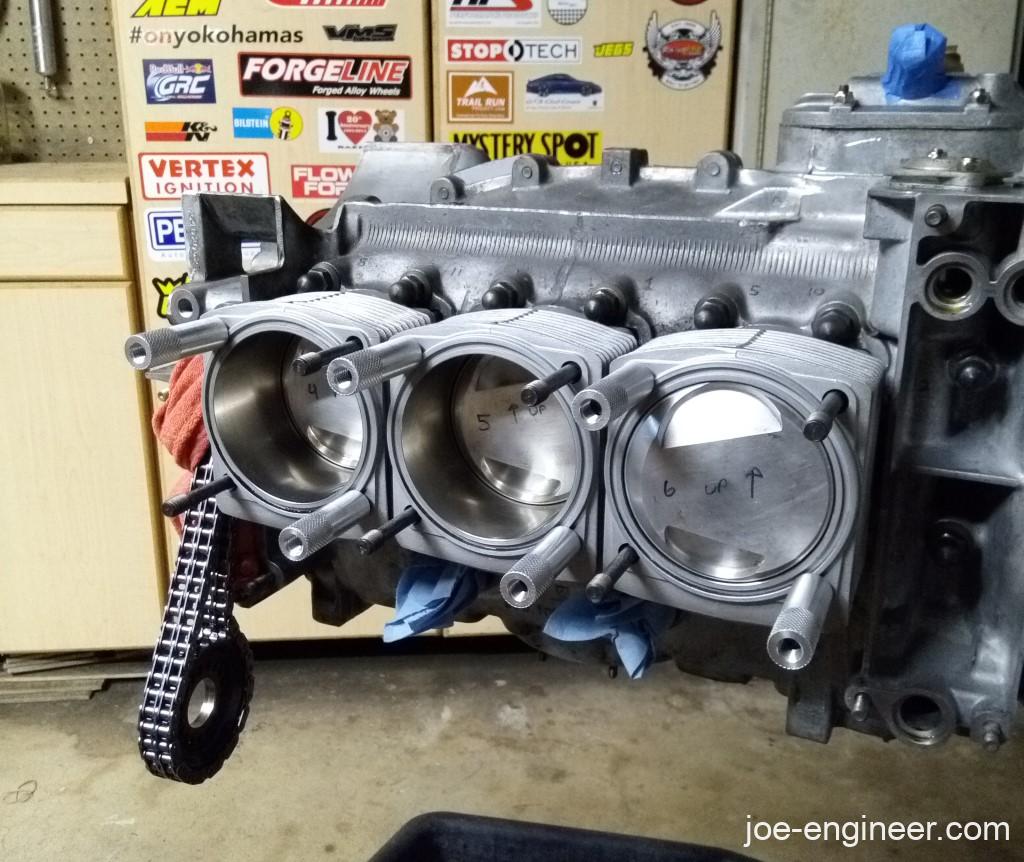
Piston and Cylinder Assembly
It was time to install the ringed pistons into each cylinder. Each individual piston ring has to be clocked a certain way depending on the orientation of the pistons. So to start we had to make sure the big intake valve pockets pointed up. I asked which way the big valves pointed on the head in an online Porsche ground and got flamed mercilessly. The one person who answered my question got the contract to rebuild my heads.
Then I clocked the rings per the Bentley manual and the instructions that came with the rings, then proceeded to slide each piston into each cylinder using a tapered ring compressor. I cant explain how simple and awesome this tool is. Just oil up the inside, slide the piston down and it will start to compress the rings and the whole thing slips down into the oiled cylinder.
Times six and we were done.
Rebuilt Heads and Piston Clearance Check
I sent my cylinder heads out for rebuilding and in the meantime I decided to clean my old CIS pistons for long term storage. After removing all the baked-on carbon I was surprised to find valve prints on each piston. At some point there was a chain tensioner or an overrev that caused the valves to kiss the pistons. And yet the bottom end survived to over 200,000 miles.
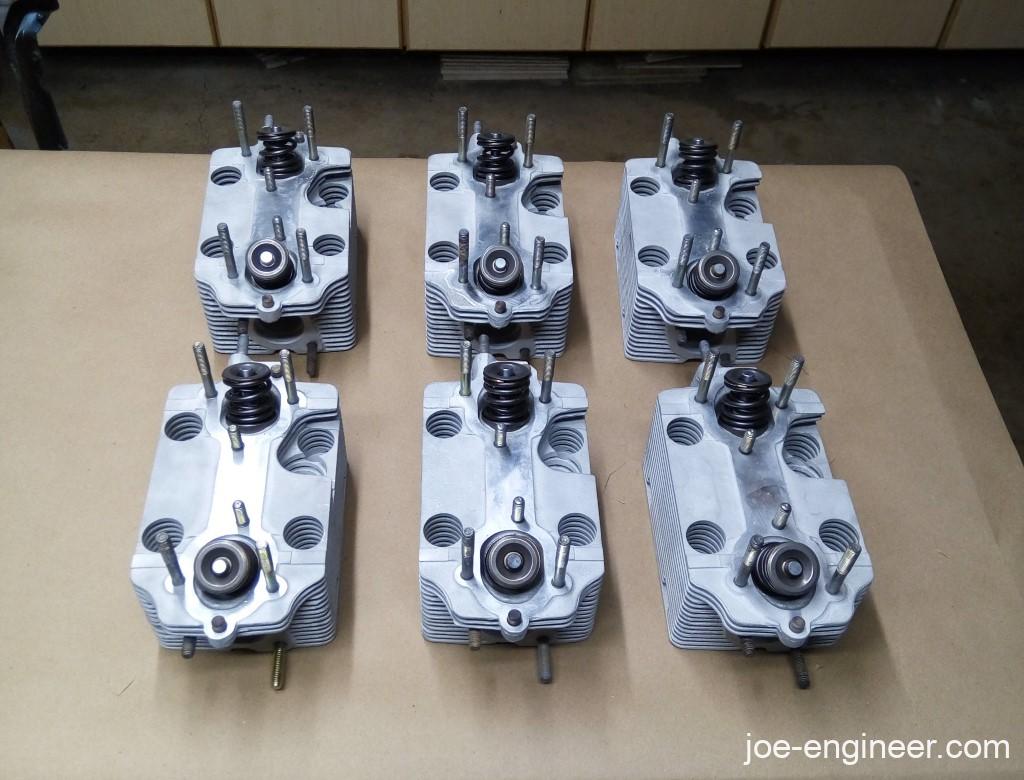
My rebuilt heads finally came back. They are setup for 964 cams and with 1mm larger intake valves. Rather breathtaking.
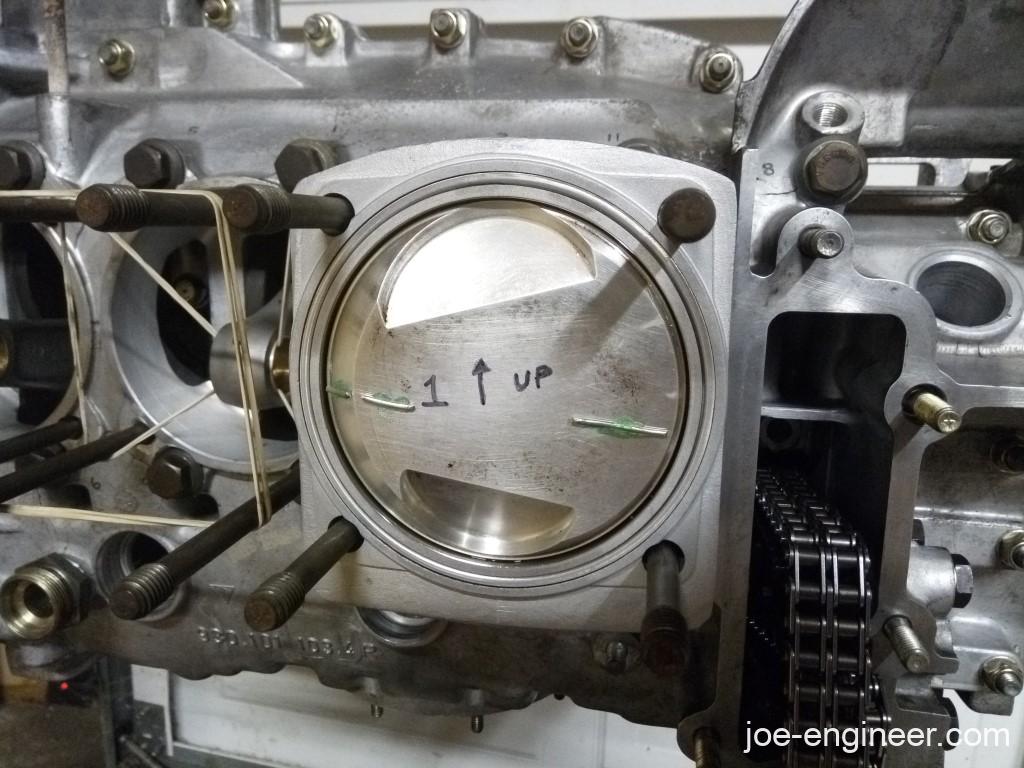
I temporarily installed a piston and cylinder to check deck height and then bolted on a head to check piston dome to head clearance. I stuck a little solder on the piston dome to check squish with the head on and there was plenty of clearance.
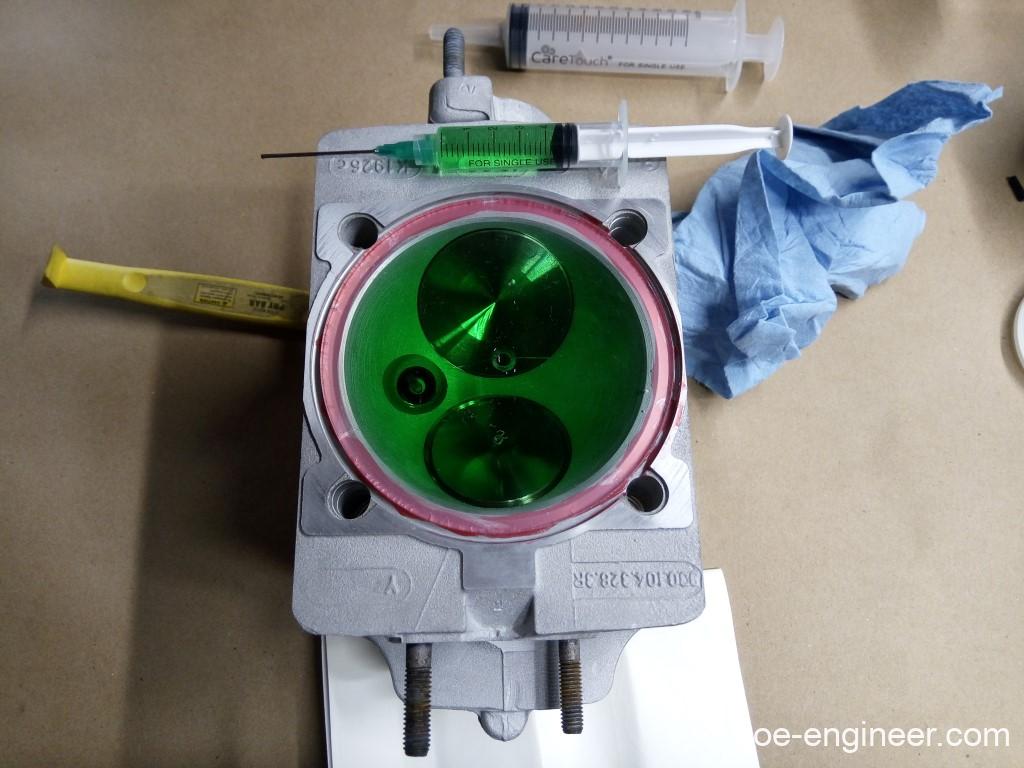
Then I CC’ed the heads. I did not have one of those really long and expensive graduated burettes to measure out the fluid so I had to get creative with a set of big and small syringes. It was a very clunky process but it was cheap and it worked quite well!
Circlip Adventures
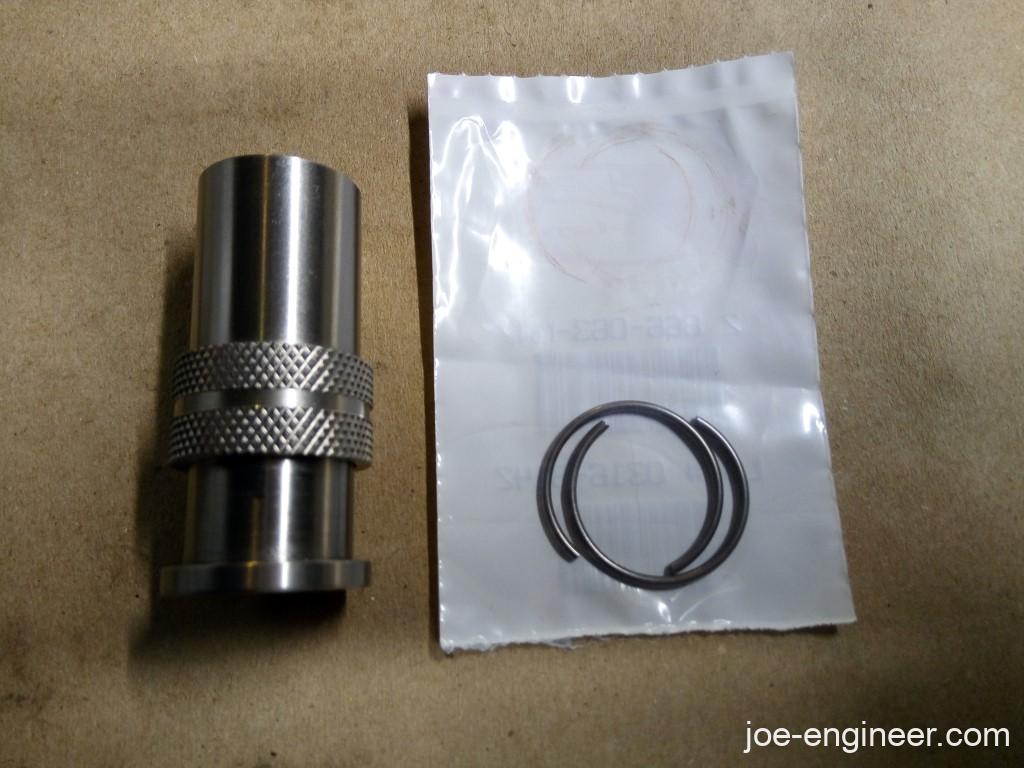
With all these checks complete it was time to permanently install the pistons and cylinders on the case, which meant installing wrist pin circlips. I had read horror stories about how JE circlips were super strong and nearly impossible to install. To mitigate that I bought this special circlip injector tool from Stomski Racing.
I launched the first one into orbit never to be seen again. I installed a second JE clip after an insurmountable amount of effort. When I got this one to seat into the groove it gave the loudest SNAP I have ever heard from any kind of circlip.
Even though it was super strong I didnt like how most of the clip cross-section was outside of the groove. It seemed to me that if the loads at high RPM were strong enough, the wrist pin could push the circlip right out. I tried a Genuine Porsche circlip next and it fit a bit better into the groove but was still mostly proud of the piston circlip groove.
Even though I was not happy with the fitment, I got ahead of myself with the circlip tool and popped in one bank of clips. I immediately regretted it.
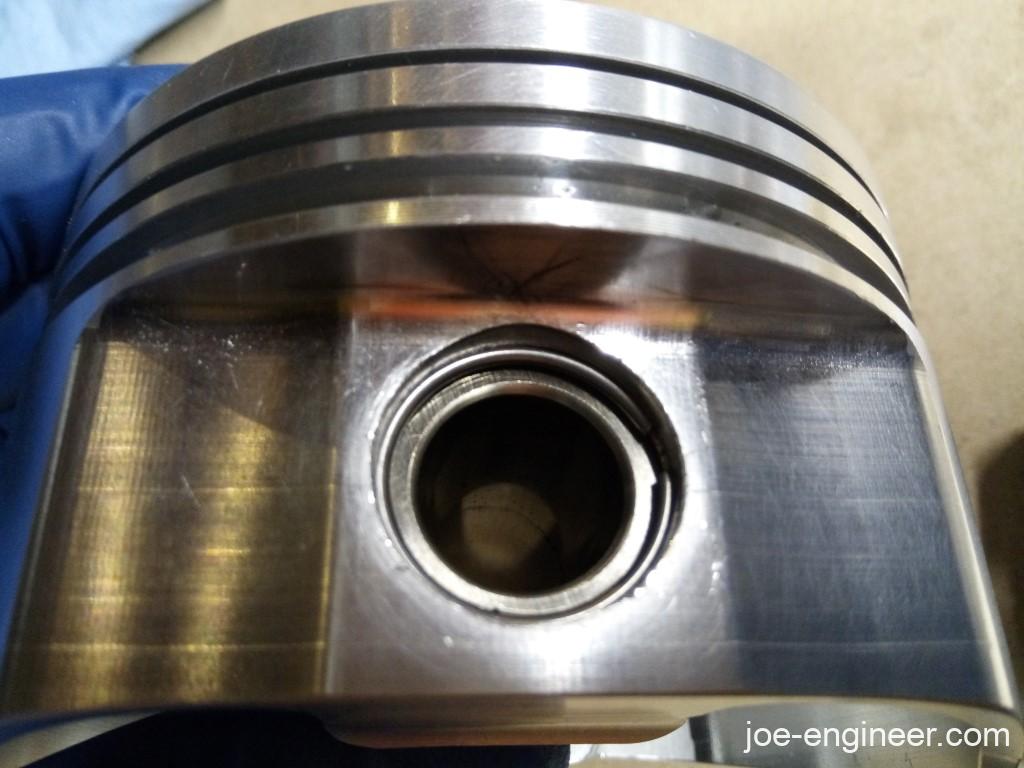
I lost a bit of sleep that night thinking about the circlips and how they weren’t quite right. Next day I popped an OE one into one of my OE pistons and noticed that exactly half the clip was inside the groove and half the clip was outside the groove. It seemed like this was the best way to make sure those little buggers didnt come flying out while the engine was spinning at full tilt. At least compared to either of the configurations I had tried. Also the OE piston had a round circlip groove for a round wire circlip and my JE pistons had square grooves. That was a big red flag that I noticed a bit too late. But at least I noticed it.
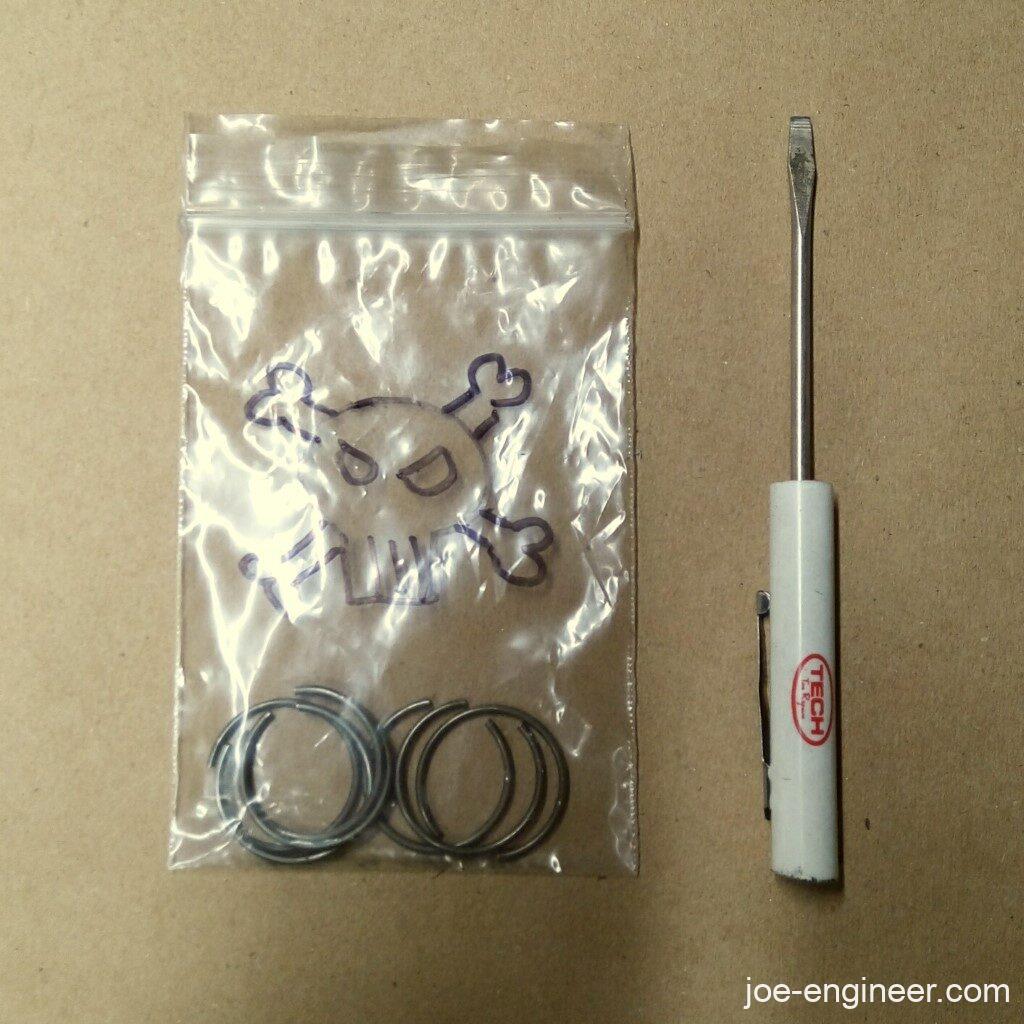
After consulting with an expert I decided to send in one of my pistons to JE so they could tell me what the right circlips were for this job. I had to send in a physical piston because mine didn’t have part numbers on them. As it turned out the correct circlips for these particular pistons were spiral locks. You have to wind them in and they snap into place. To come out you need to pry the end of one and unwind it back out.
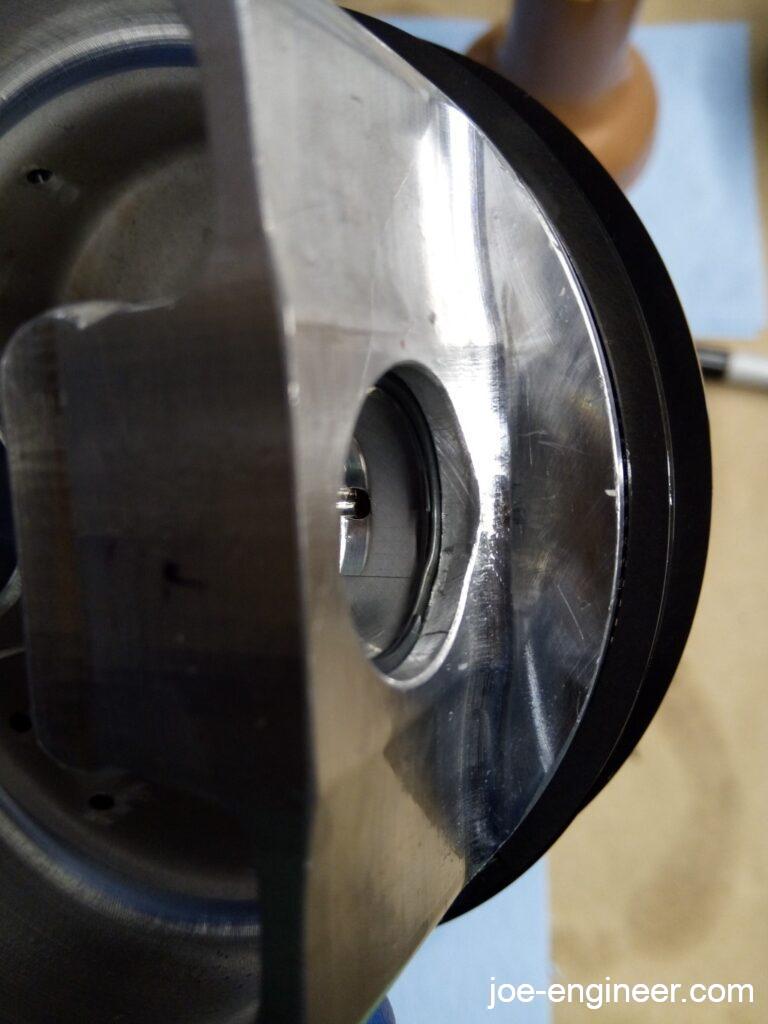
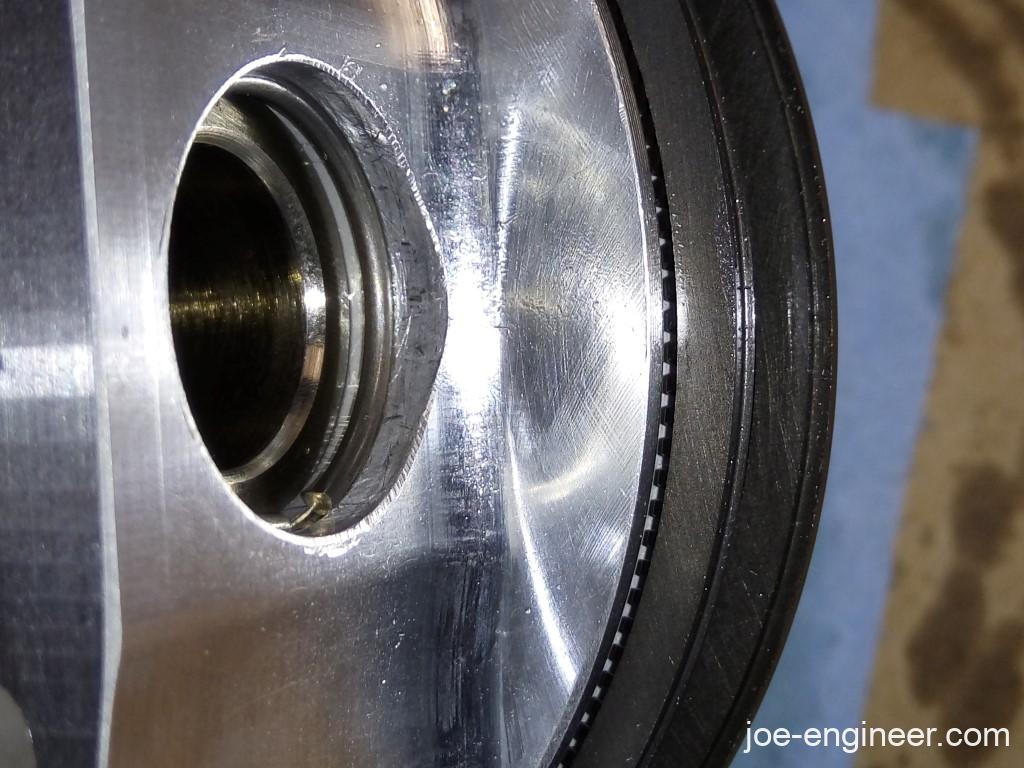
These fit much much better and half the lock height was seated all the way down in the square groove and half the height was above, holding the wrist pin in place. I feel exponentially better about these staying put.
I had to remove the bank of pistons and cylinders I had previously assembled with the wrong circlips and replaced them with the correct ones. I am now a circlip removal expert! I guess the lesson here was to make triple sure you have the right parts for critical assemblies like this.
Thankfully after that whole ordeal, I was greeted with something that is starting to look like an engine.
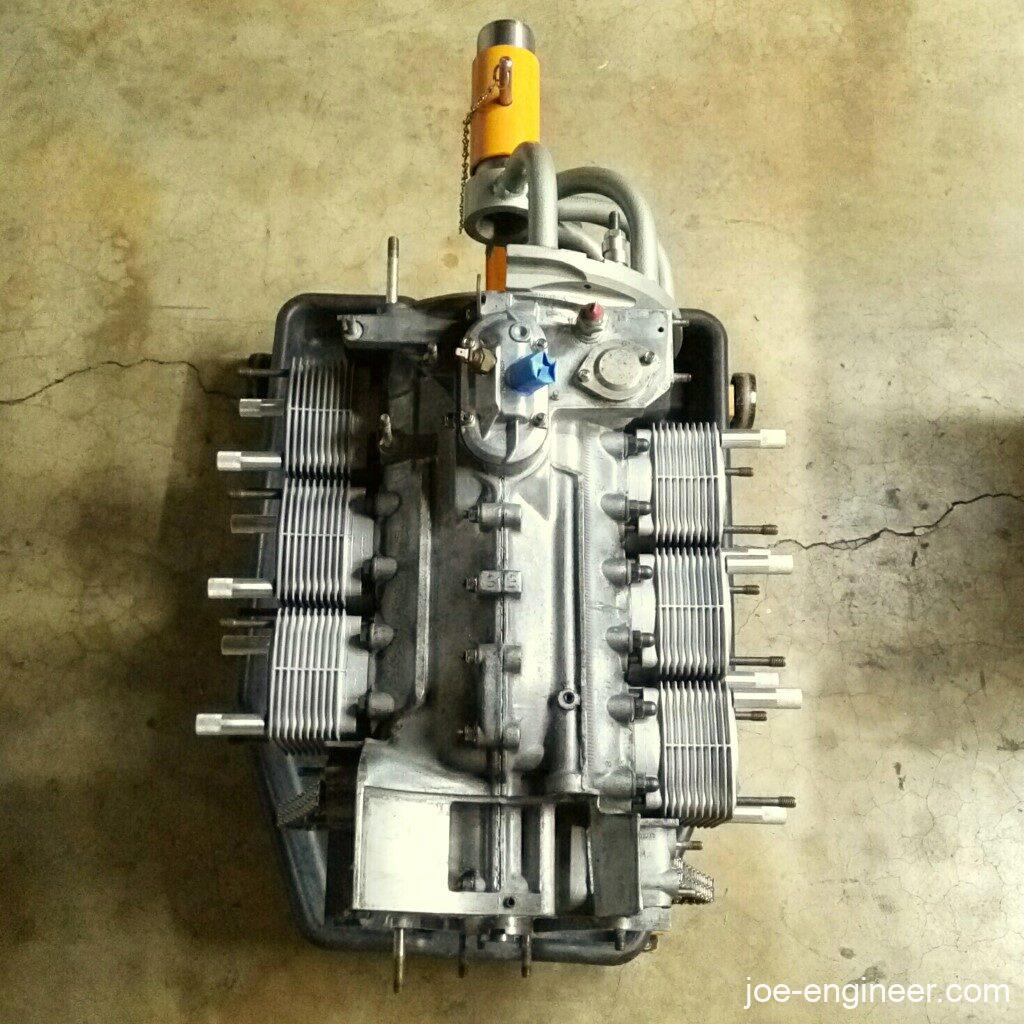
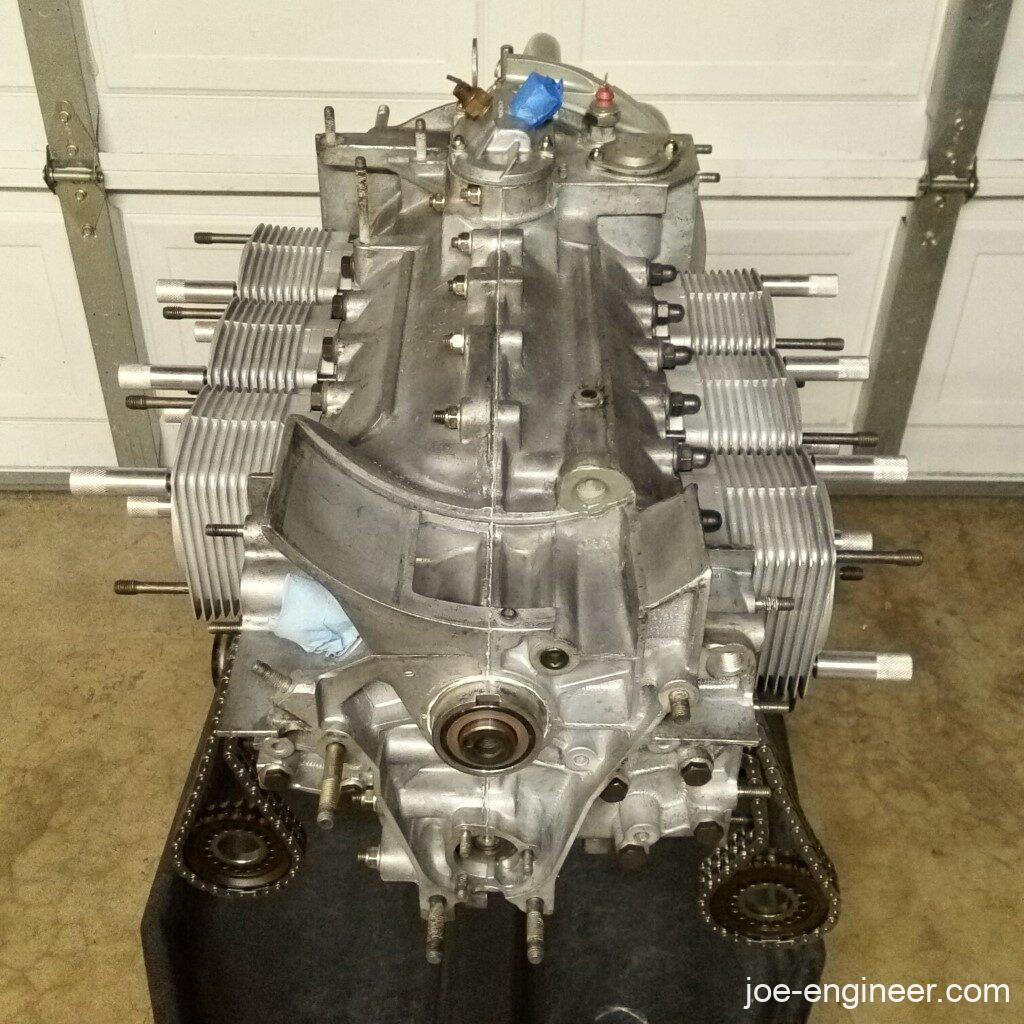
Great progress after fighting through a few challenges.