
DIY: Air-cooled Porsche 911 Fan Air Guide Repair
This is a very specific kind of repair, on a very specific air-cooled Porsche 911 engine part.
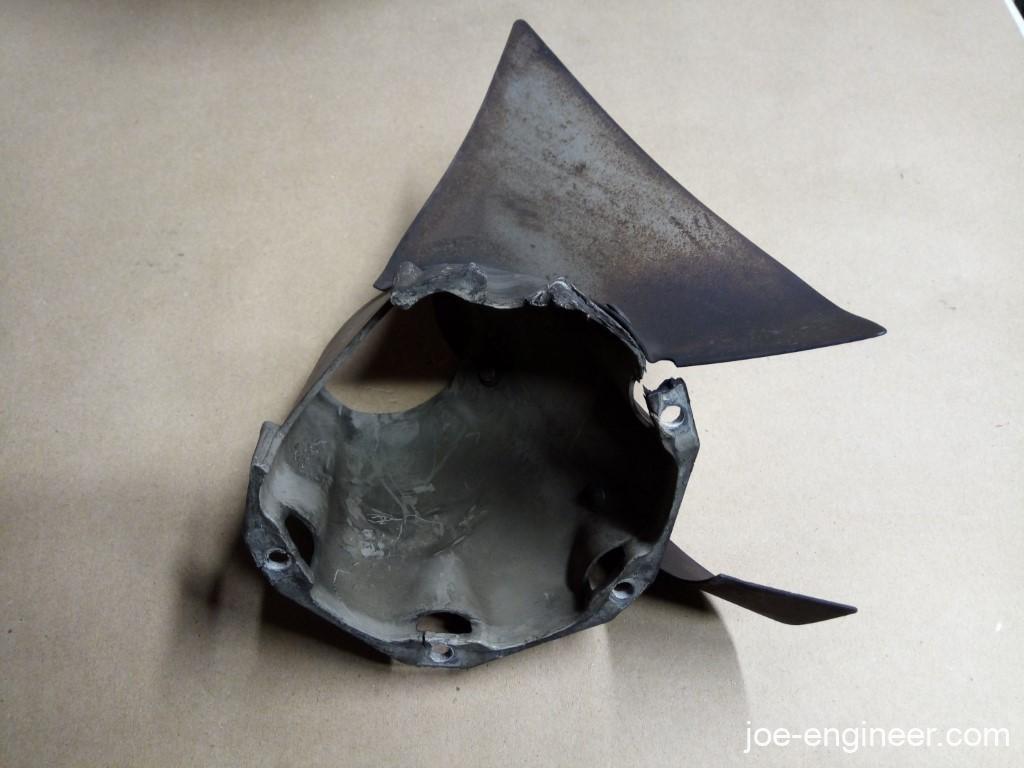
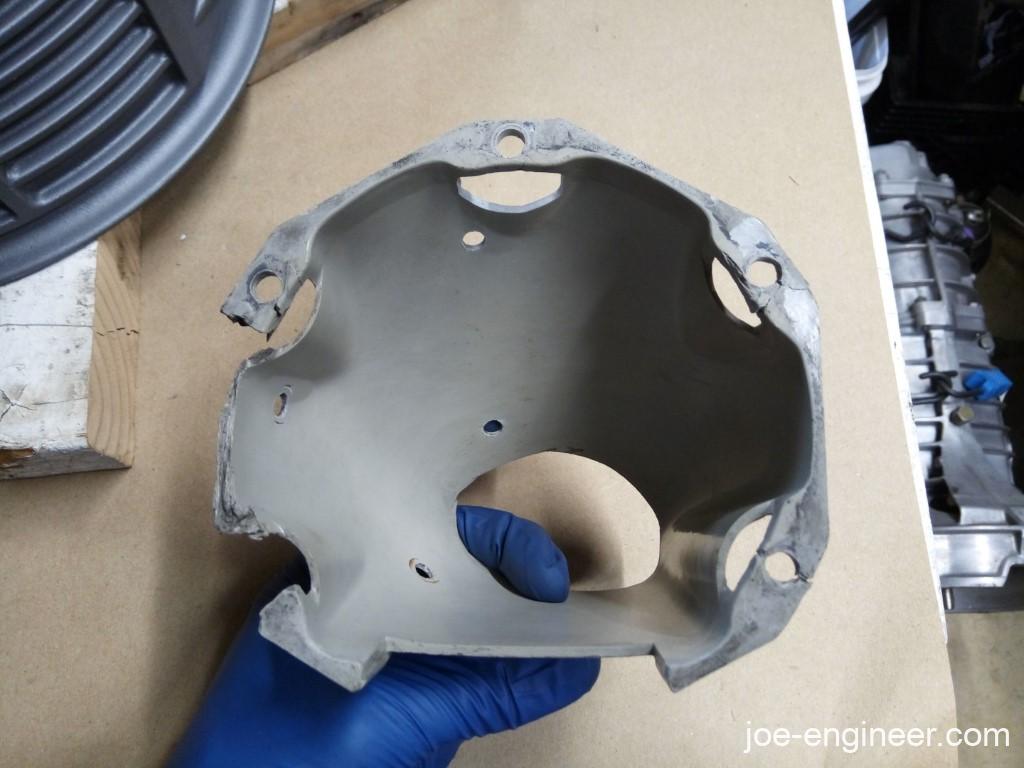
This is the air guide that goes behind the alternator. It lives under the fiberglass engine fan shroud where everyone forgets about it. It takes the air sucked in by the engine cooling fan and keeps it flowing over the cylinder cooling fins instead of swirling in a turbulent wake behind the alternator. I was about to re-install mine when I remembered that it was pretty trashed.

Not acceptable for our freshly rebuilt engine.
I searched for a new one and realized they are NLA, and all the used ones I could find were worse than mine. This left me no choice but to try and recondition it. I used some basic composites concepts for this repair, including bond prepping surfaces, epoxy bonding, reinforcement doublers, and fiberglass fillers.
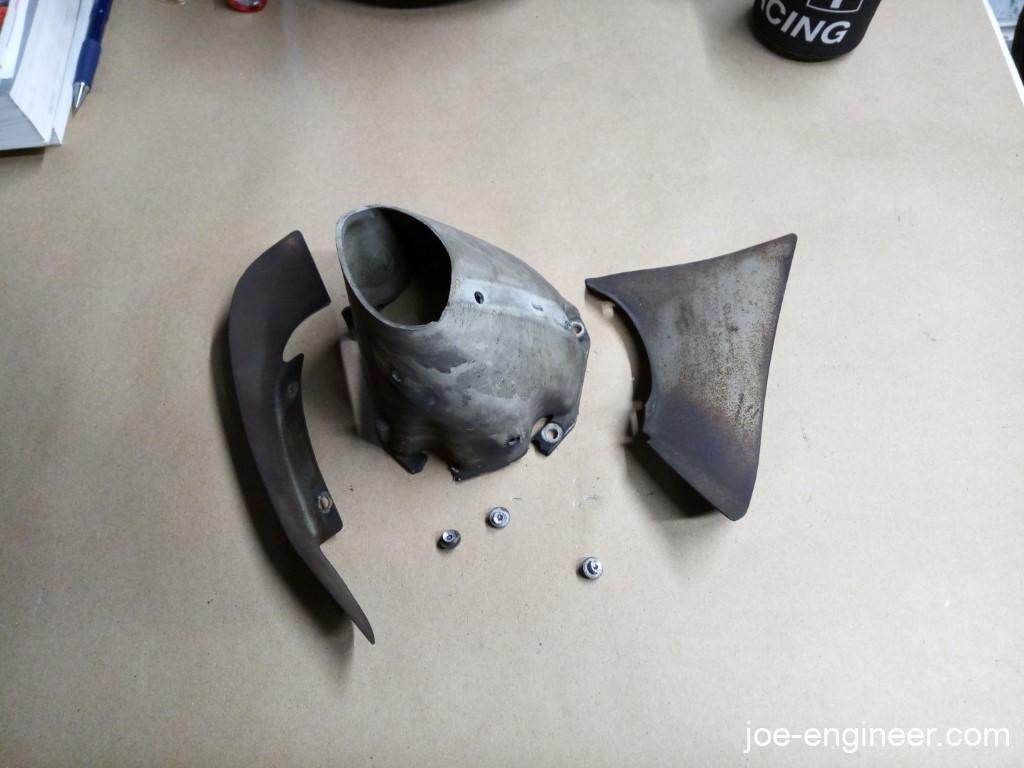
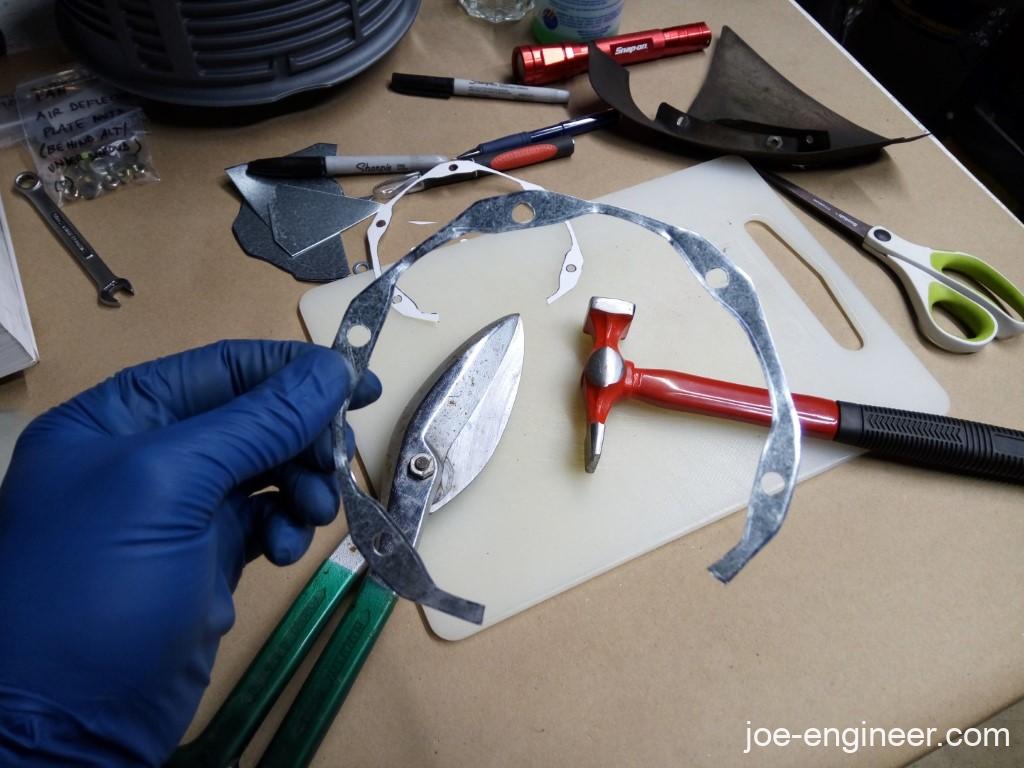
The first step was to drill out the rivets to disassemble it.
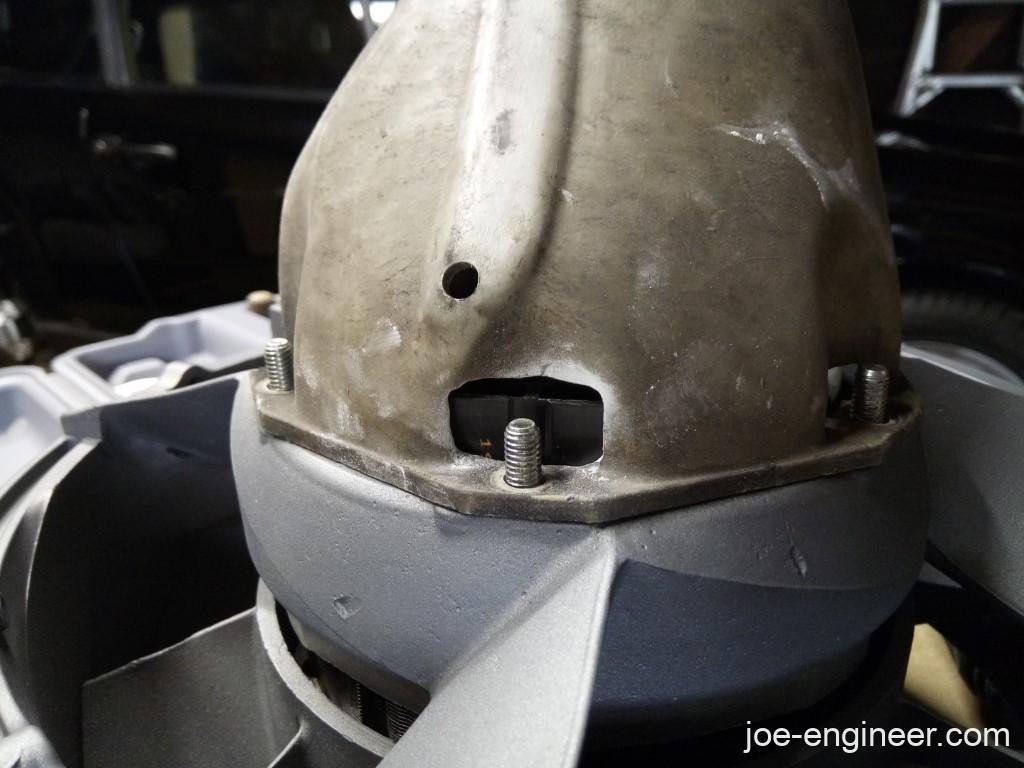
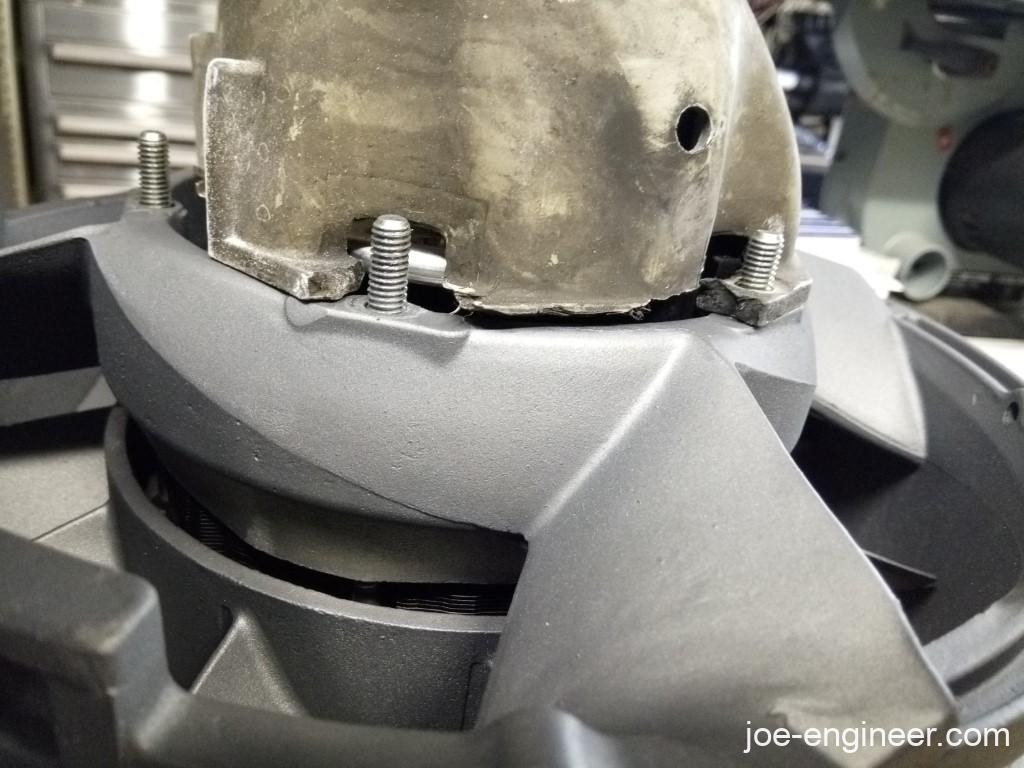
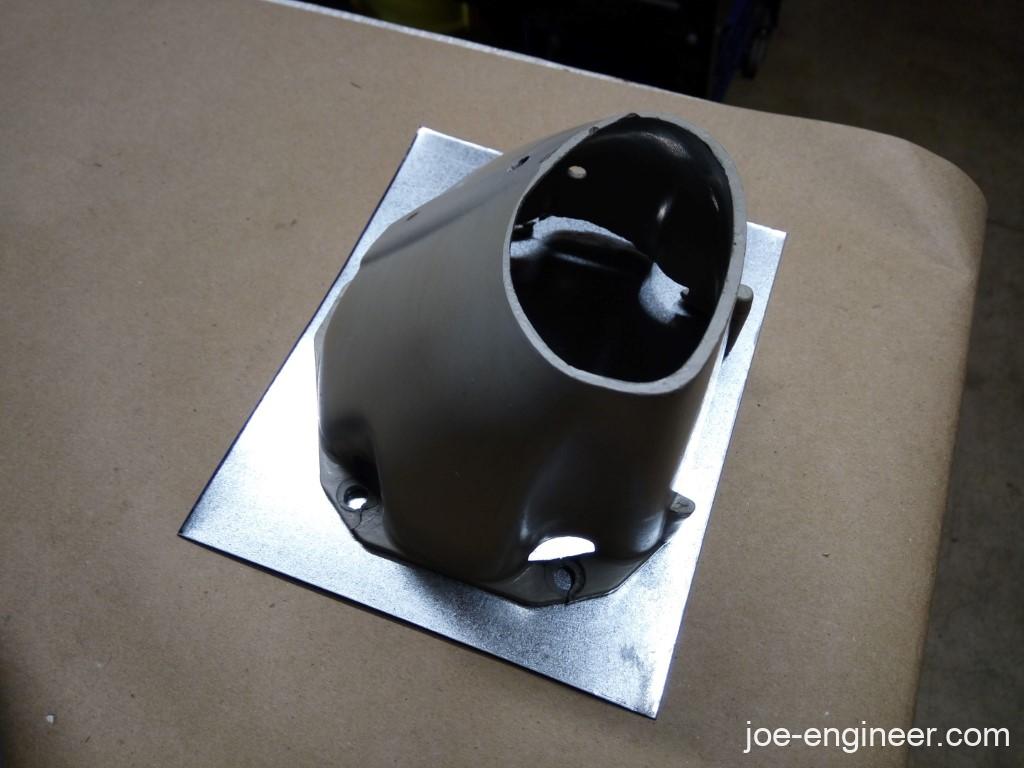
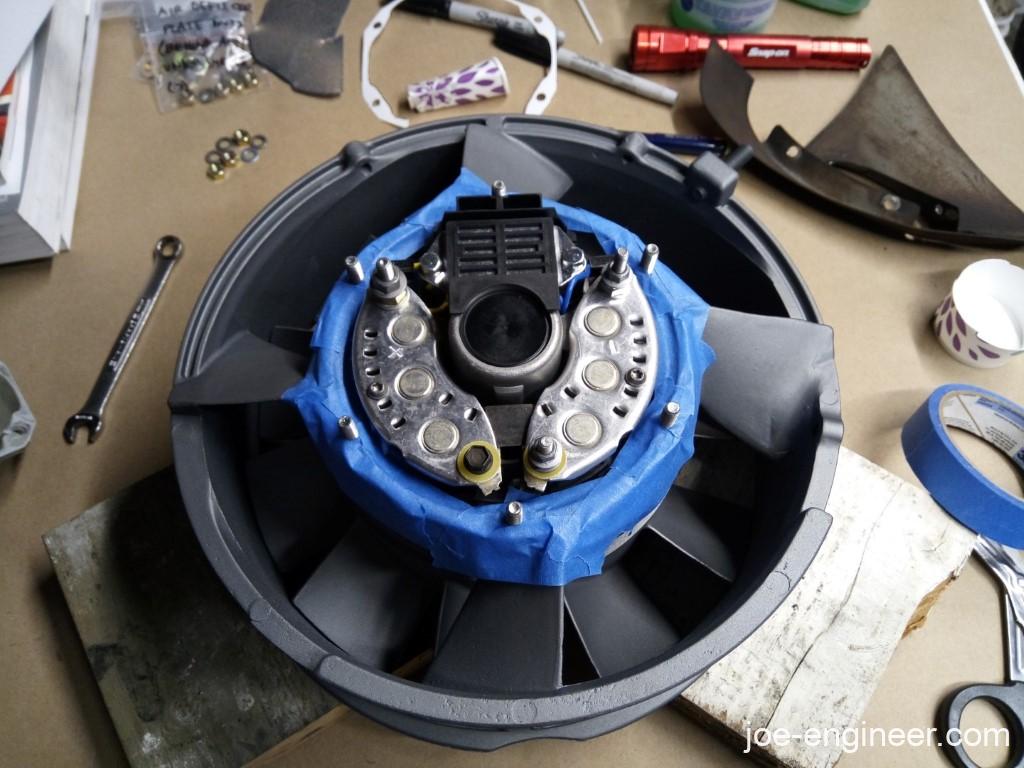
I test fit the can on the back of the fan shroud with the alternator in place. This side seems fine.
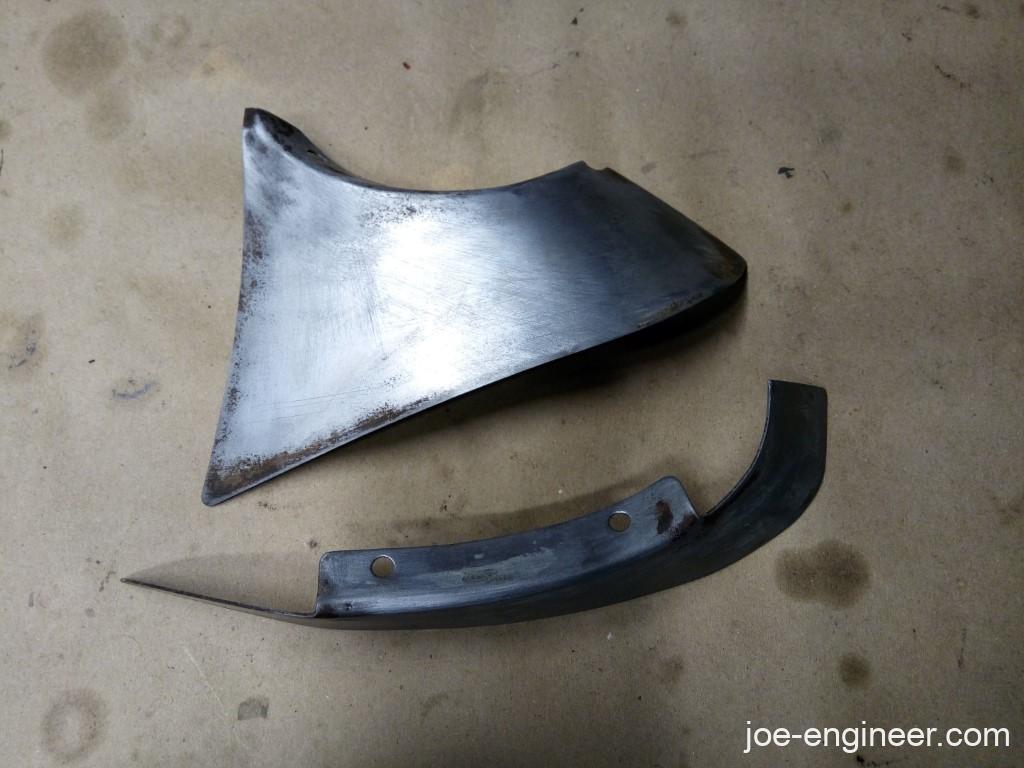
The other side is missing a chunk of the flange.
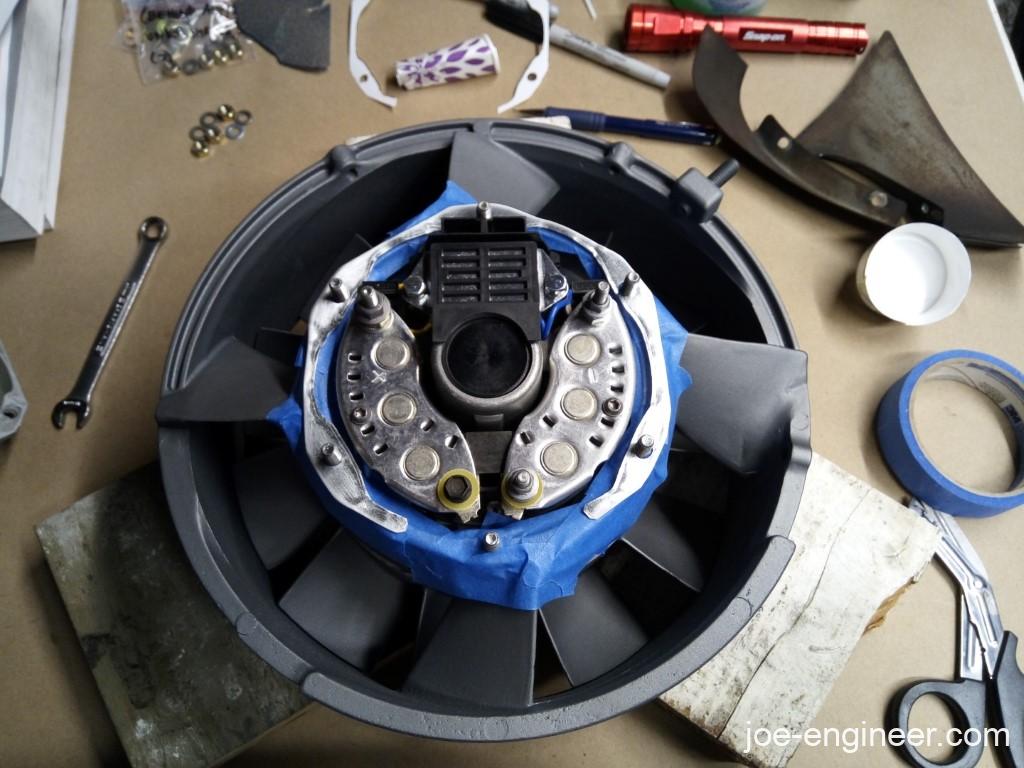
The remainder of the flange itself is cracked in many places around the mounting holes, probably from over-tightening.
I figured I could bond a thin piece of sheetmetal to the mounting face to structurally tie all the flange pieces together again. In composites repair, a reinforcement patch that gets bonded over an existing surface or a damaged area is called a “doubler”.
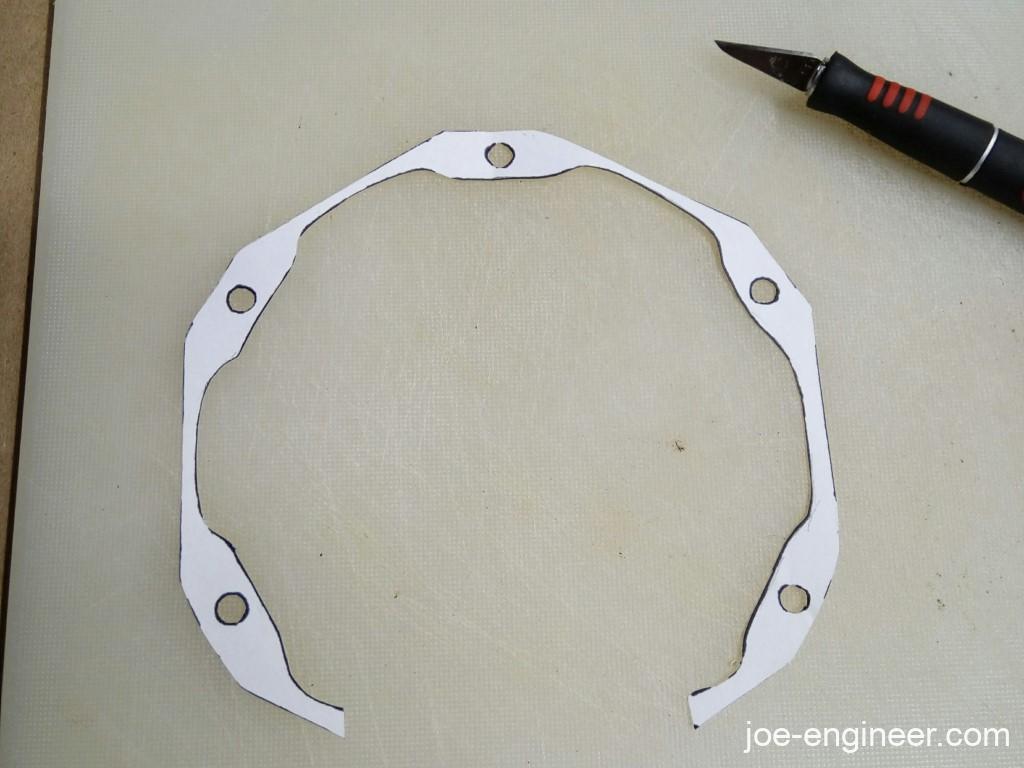
So I made a flange template.
Traced it onto a galvanized steel sheet…
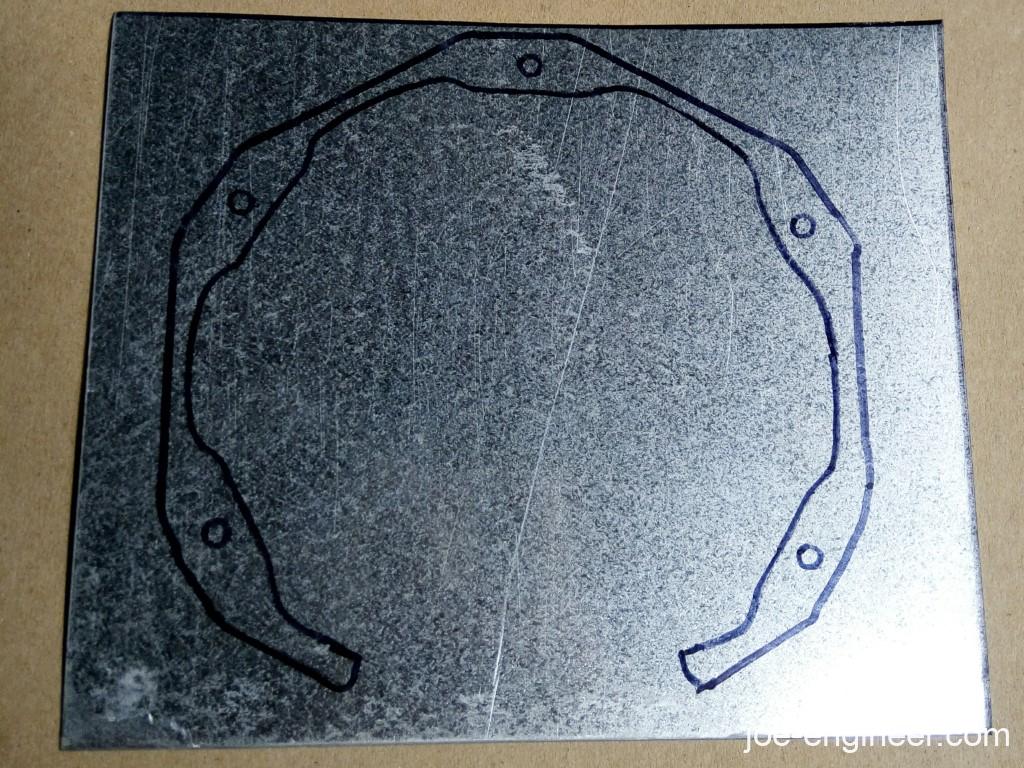
…and cut it out. I could have used aluminum instead or even plastic but this is what I had in my metal scrap pile.
I masked off my freshly Cerakoted fan housing so it would not get contaminated with epoxy.
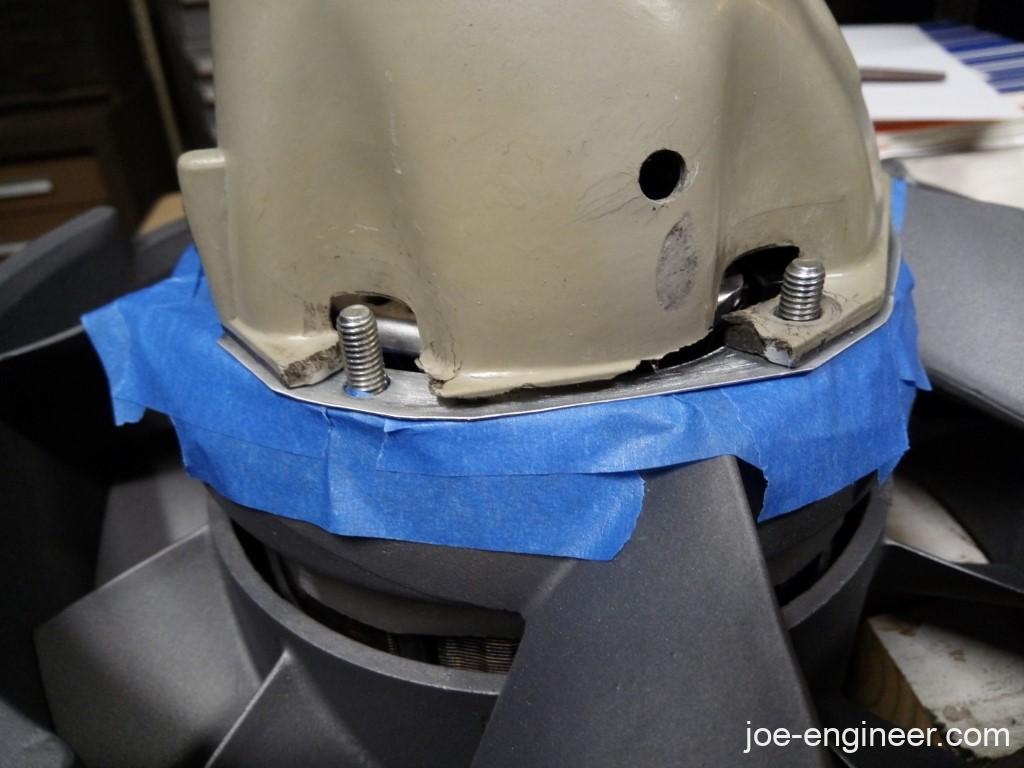
I test fit the steel flange “doubler”.
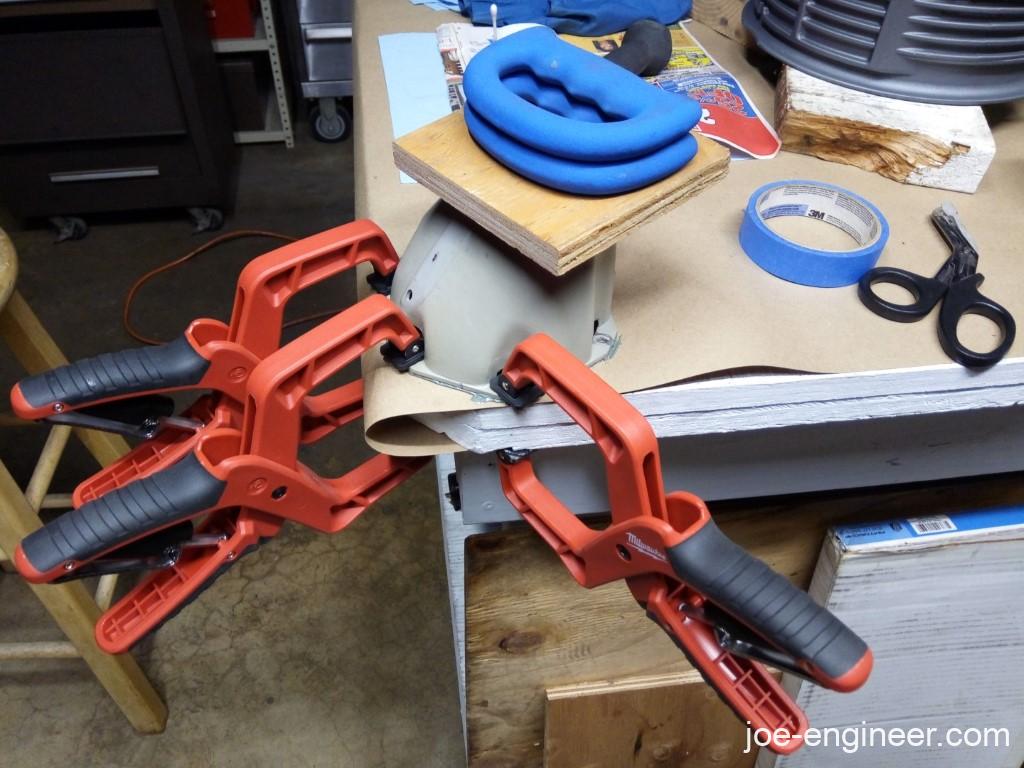
I cleaned and prepped the bonding surfaces of the air guide can and the steel doubler then applied epoxy. This gap will have to be filled later.
After initially pressing the air guide can and the doubler together I removed the assembly and clamped it to a table to get even pressure over the entire flange for maximum epoxy wet-out on the bonding surfaces. Then I let this cure overnight.
Since the bucket is fiberglass I chose to fill it with Duraglass filler, which is body filler that is waterproof and has fiberglass fibers in it for additional strength. I hand sanded it to shape, trimmed the excess metal edges off the flange, match drilled the holes, and test fit the repaired air guide can on the fan housing again.

I sanded the rusty steel vanes and sprayed them black.
I painted over the new filled in flange section to seal the body filler from the elements. I did not have replacement rivets for holes that big but I did have some M6 bolts, washers, and nylocks laying around which happened to fit perfectly. I applied blue loctite and carefully tightened them down by hand.
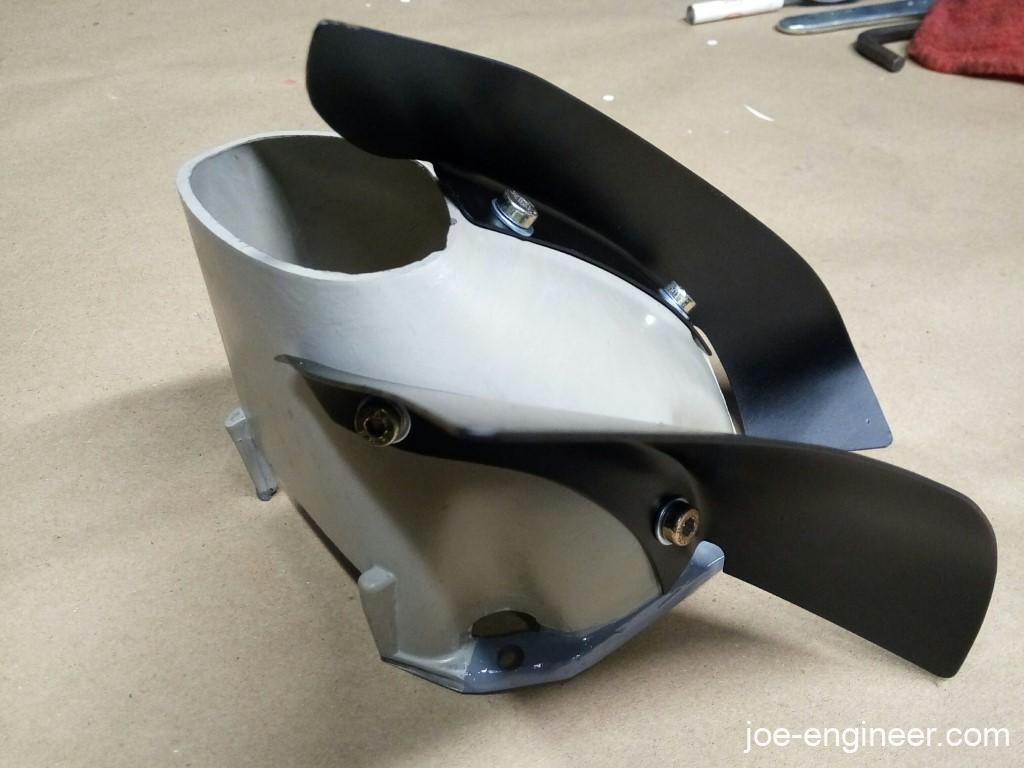

The repaired part fits correctly, is stronger than before, and looks much better.

Sometimes you gotta get creative with your repairs and use what you have.