
Porsche 911 Engine Teardown Part 3: Splitting the Case
In Part 1 of this engine teardown we stripped the complete engine down to the bare longblock. In Part 2 we broke the longblock down to the engine case. In this installment we reach the home stretch and disassemble the case to its most basic elements.
Splitting the Case
At this stage we were ready to split the case halves open. First step was to rotate the engine 90 degrees with the oil cooler side and engine mount adapter facing down. This way the left half of the engine is facing up and can be lifted off the right half. This is very important because if you do the opposite, the intermediate shaft could fall out while you lift the right case half off. That would be no bueno.
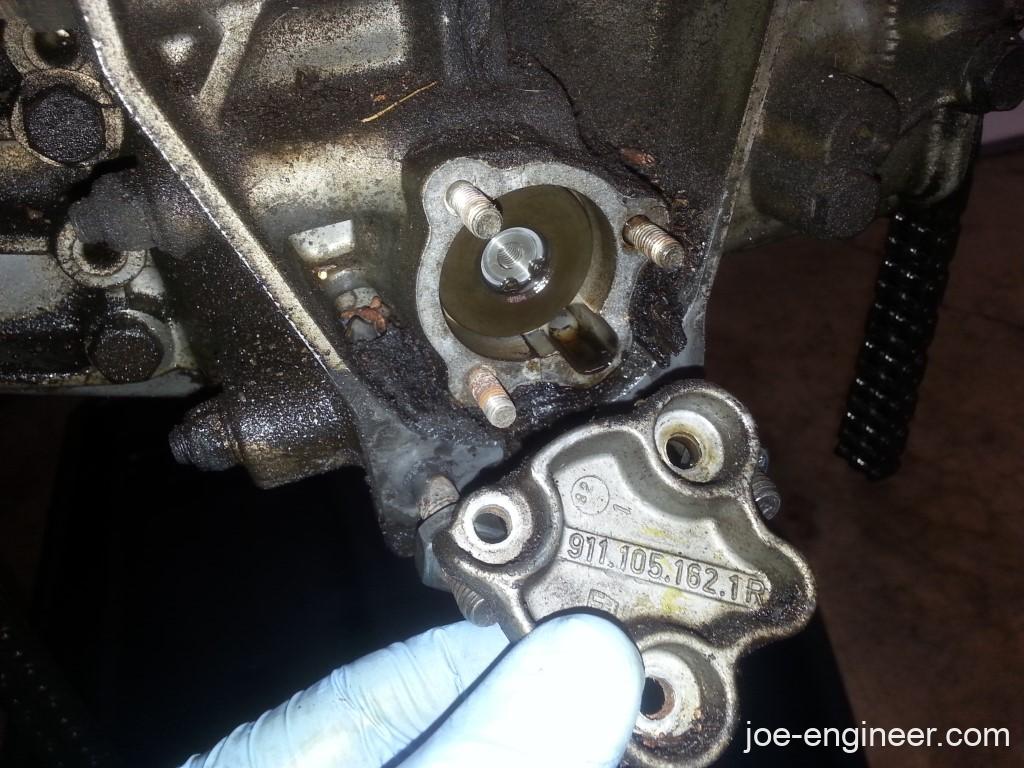
There were a few externally accessible components to remove first. Under the crank pulley at the rear of the case was a little intermediate shaft cover. 3 bolts and it came right off.
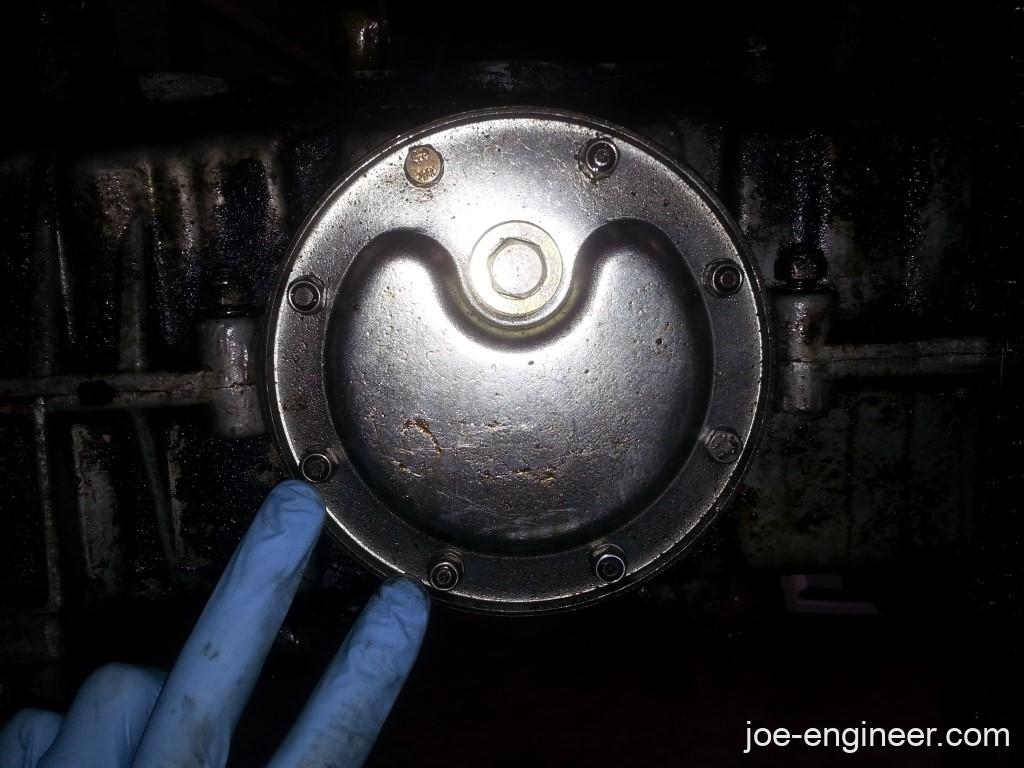
On the bottom of the case was the drain cover plate straddling both case halves. 8 nuts released the cover plate, an oil strainer, and some gaskets.
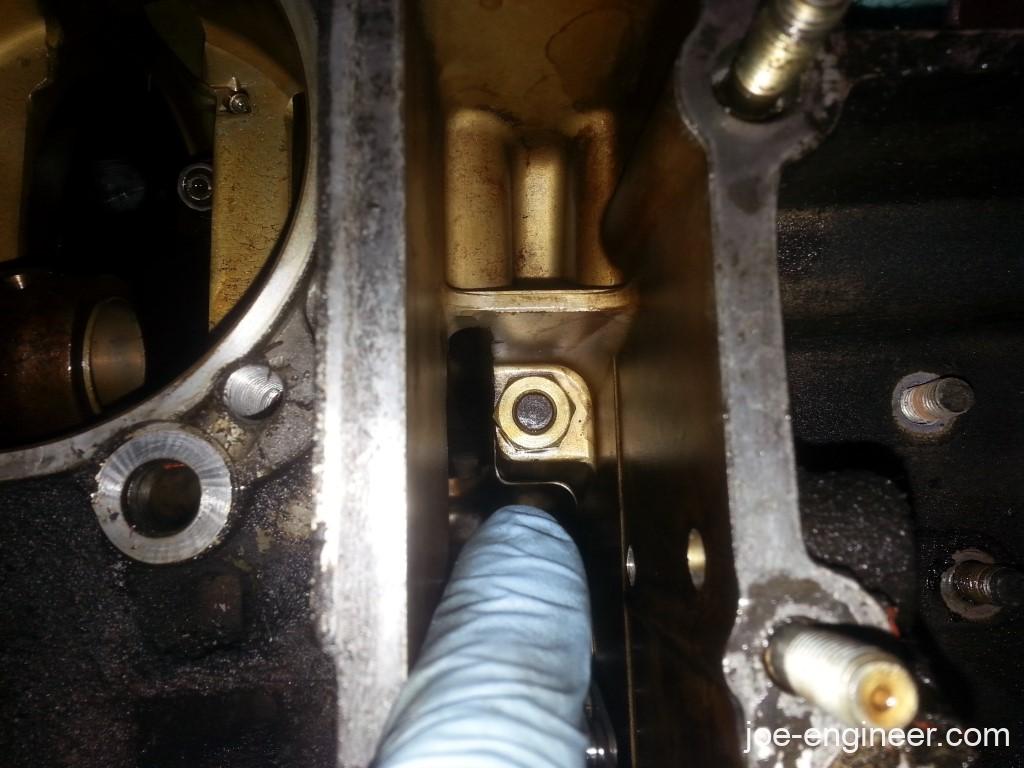
At the rear of the case, to both sides of the crank pulley, were 4 hex bolt heads holding the chain ramps in place. There are 2 bolts per chain ramp and you can see the ramps themselves if you peek inside the timing chain openings. I removed the 4 chain ramp bolts on the left.
With the 4 chain ramp bolts out, the 2 ramps were fished out from inside the left timing chain opening. Then the same process was repeated on the right side chain ramps and bolts.

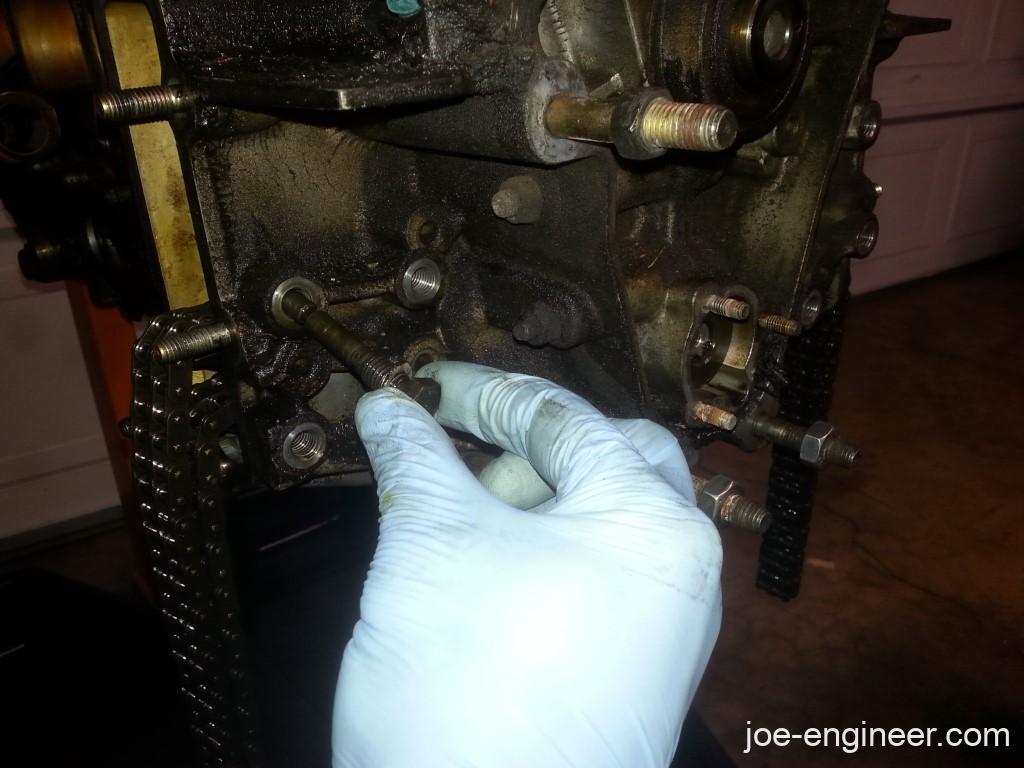
Then I removed all the case perimeter nuts around the outside flange of the case, including 3 behind the flywheel and a hidden one deep inside the left timing chain opening.
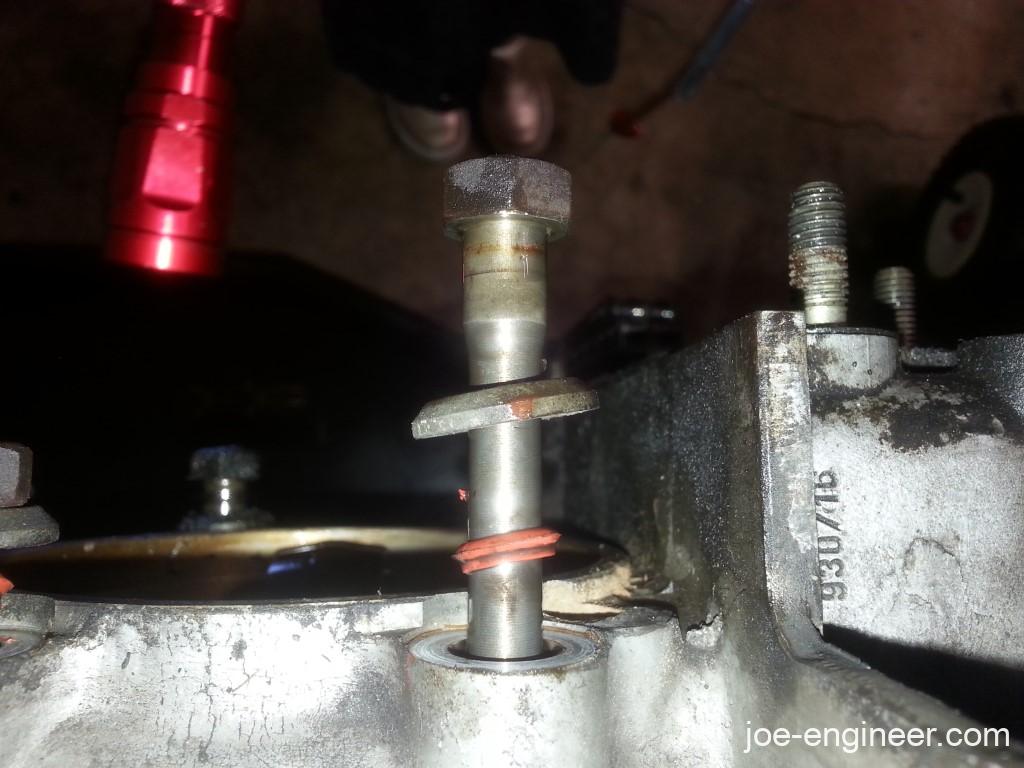
Lastly I removed the 11 closed end nuts and washers from the case-through bolts and pulled the bolts and remaining washers out.

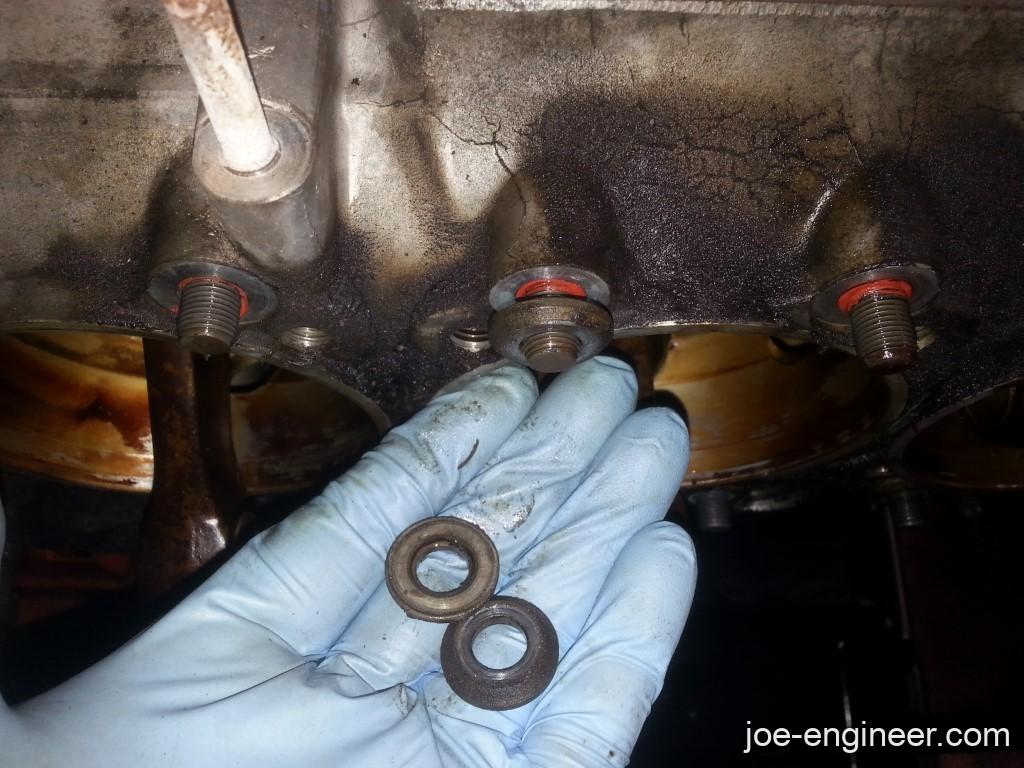
There were o-rings under the washers on both sides of the case that were supposed to seal the case-through bolt holes because pressurized oil passages go through them. It is difficult to tell if these ever leaked because the rest of the case was so filthy due to larger leaks. The o-rings did seem pretty trashed though. We will have to be careful not to damage the new o-rings during re-assembly.
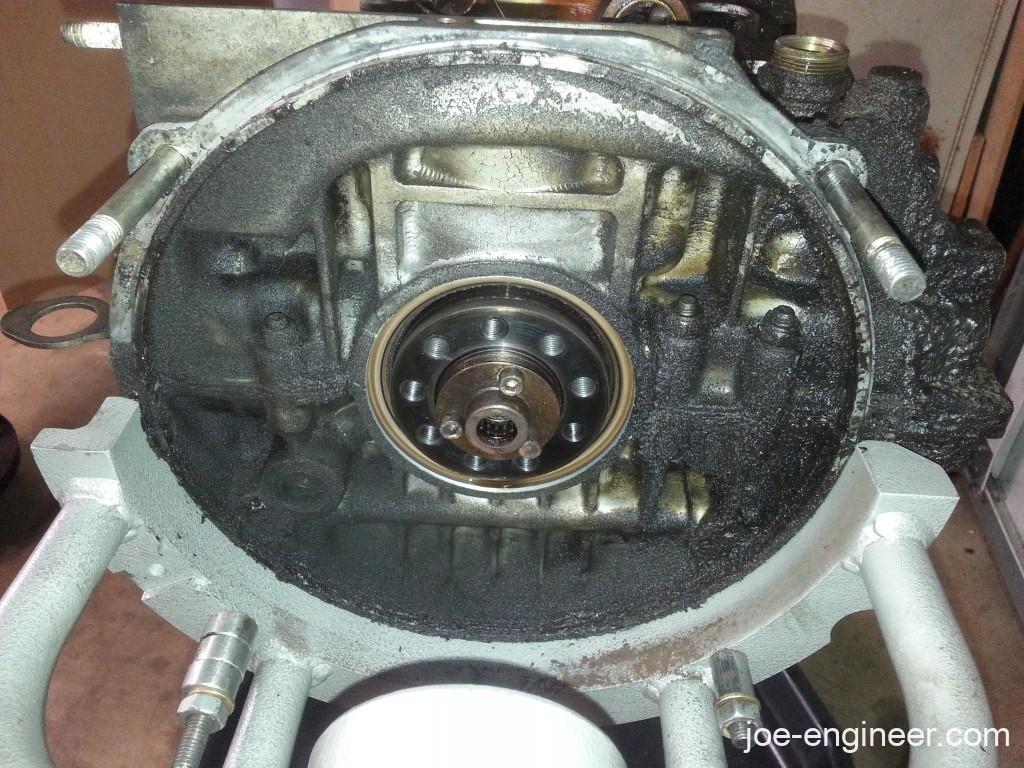
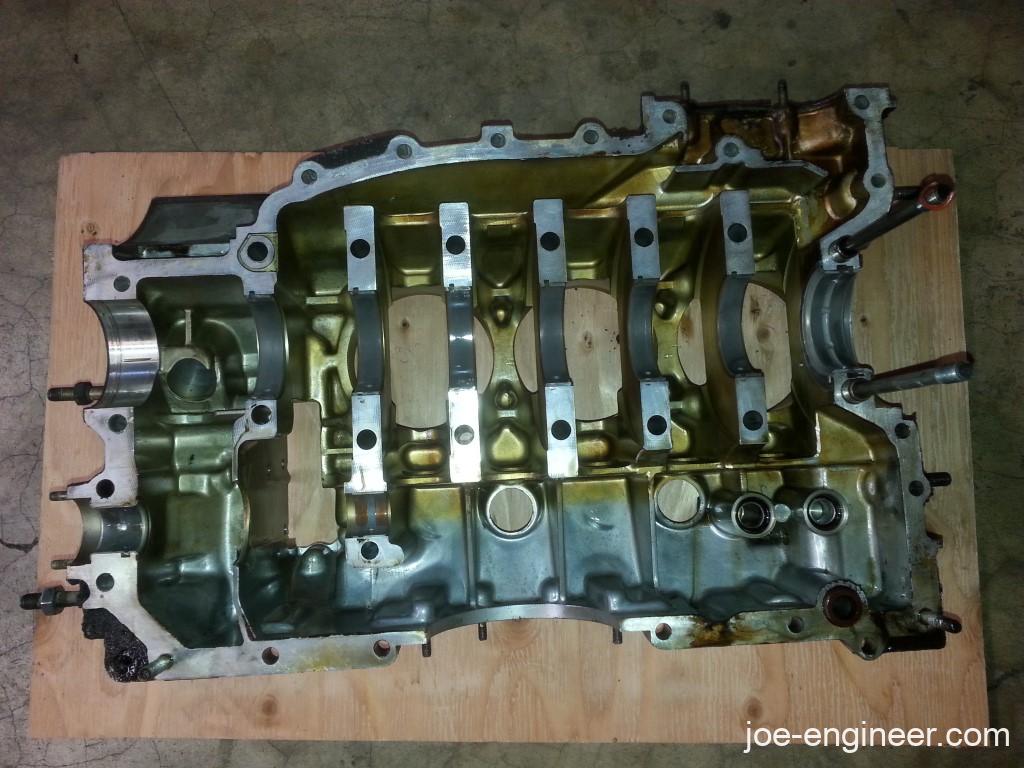
With a block of wood and a rubber mallet I gently tapped around the case to get the left half to split off the right case half. After going around a couple of times I started to see a gap between the two halves and was able to gently rock back and forth and lift the left case half off completely. I set it aside and marveled at the view of all the internal engine components.
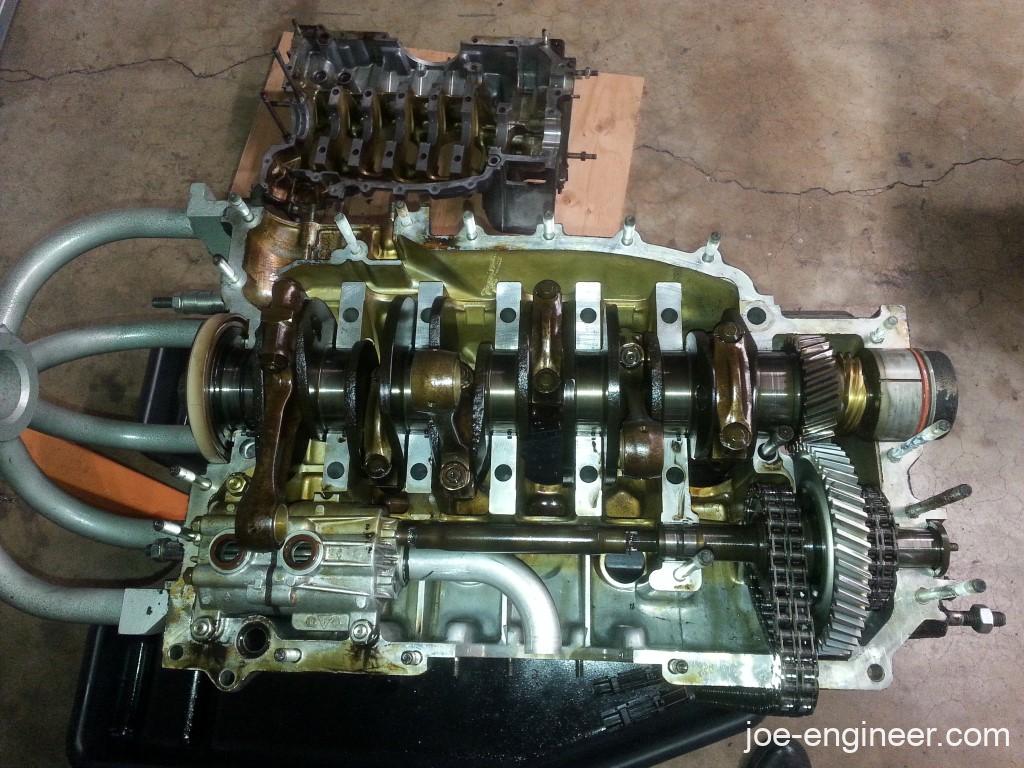
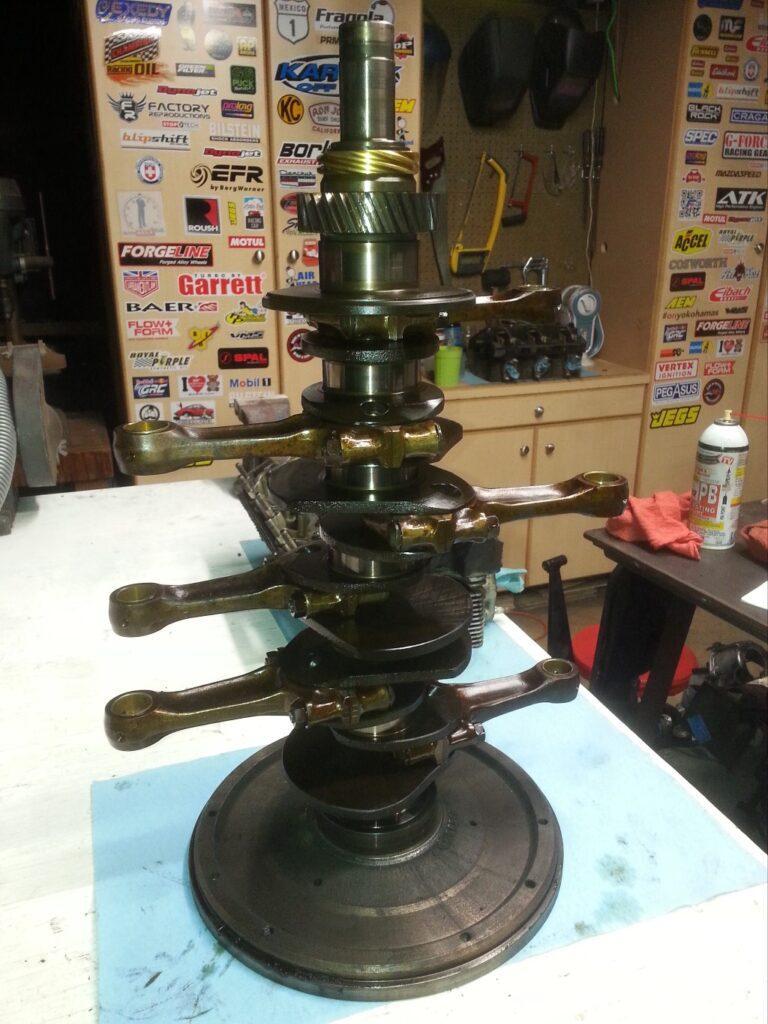
Before me lay the crank and rods sitting in their bearings, with the steel crank timing gear meshed with the aluminum intermediate shaft gear, and the shaft driving the timing chains and oil pump. Such a tidy compact package. The left case half was bare save for all the crank main and intermediate shaft bearings.
I lifted 2 rods and firmly pulled the crank and rod assembly out and walked it over to a work bench. It was very heavy.
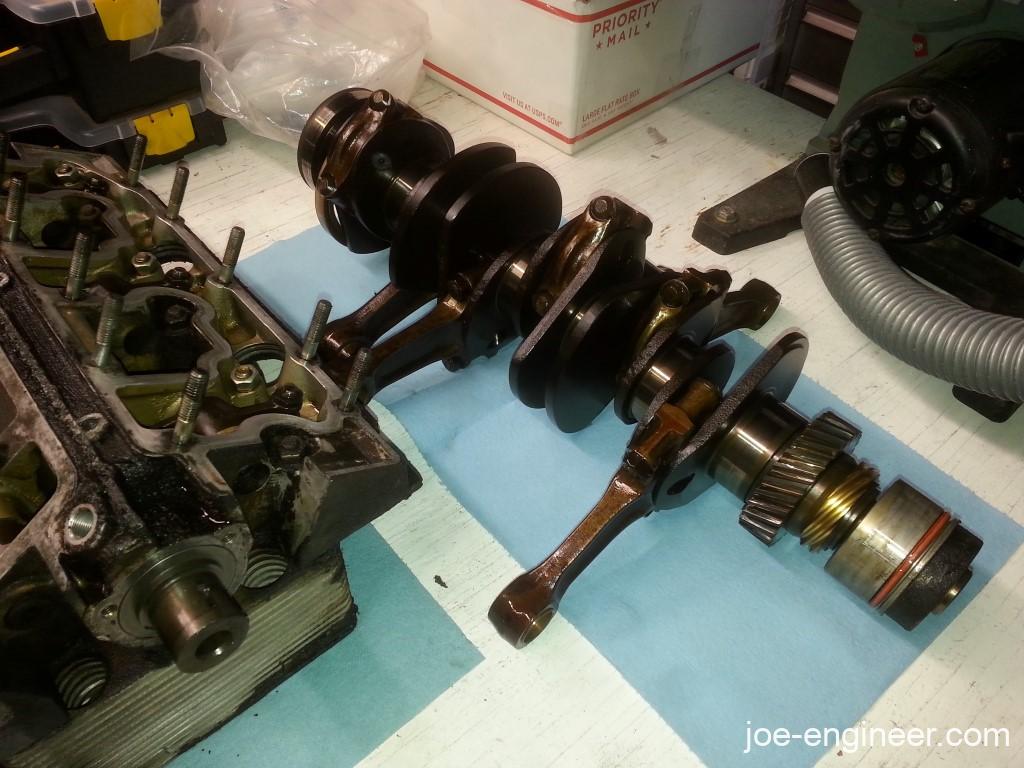
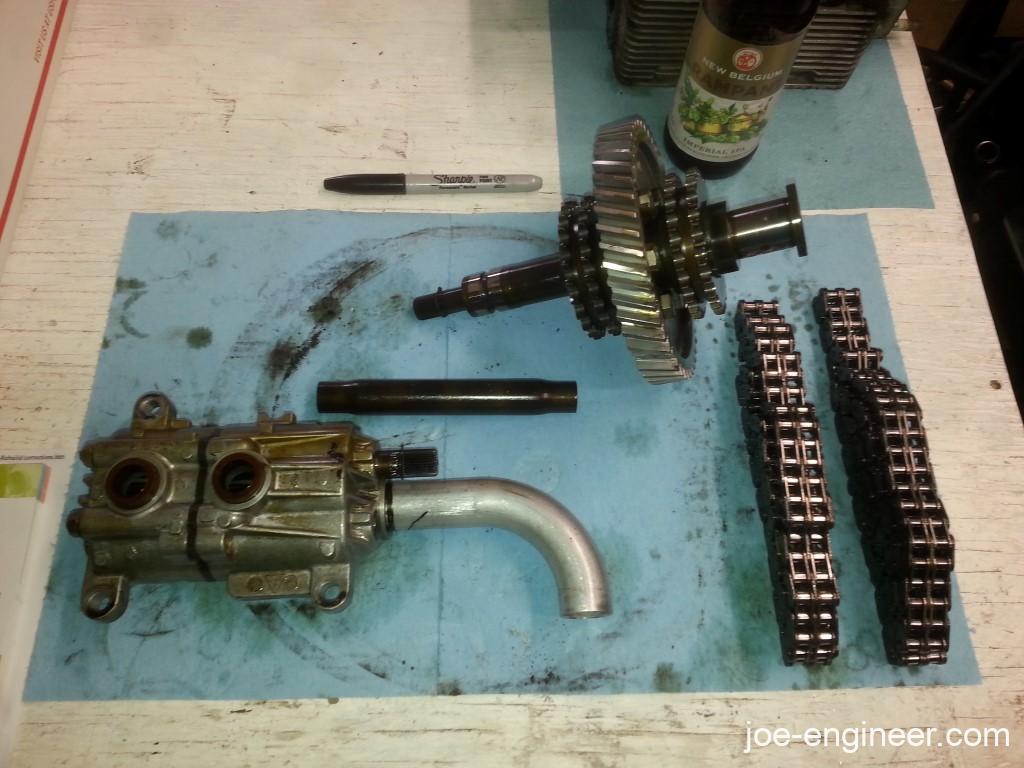
Then the intermediate shaft came out along with the driveshaft connecting it to the oil pump and the 2 timing chains. After removing 3 lock tabs and nuts the oil pump came out as well.
All the main bearings and intermediate shaft bearings stayed in both halves of the case, with the exception of the crank nose bearing, which was still on the crank. This was a good time to evaluate the health of the bottom end after 200,000 hard miles under less-than-stellar care.
Case Internals Evaluation
Scanning the right case half, the first thing that caught my eye was the intermediate shaft bearings. The inner one was starting to “show copper” indicating higher wear than usual. It was probably a matter of time before this one failed.

Remarkably, the main bearings all looked quite good with no abnormal wear or scoring either on the bearings or the crank mains. The #6 crank main had a light scratch that was visible but barely detectable with my fingernail and invisible on the crank itself. A tiny spec of debris must have made its way through the oil passages and into this bearing.
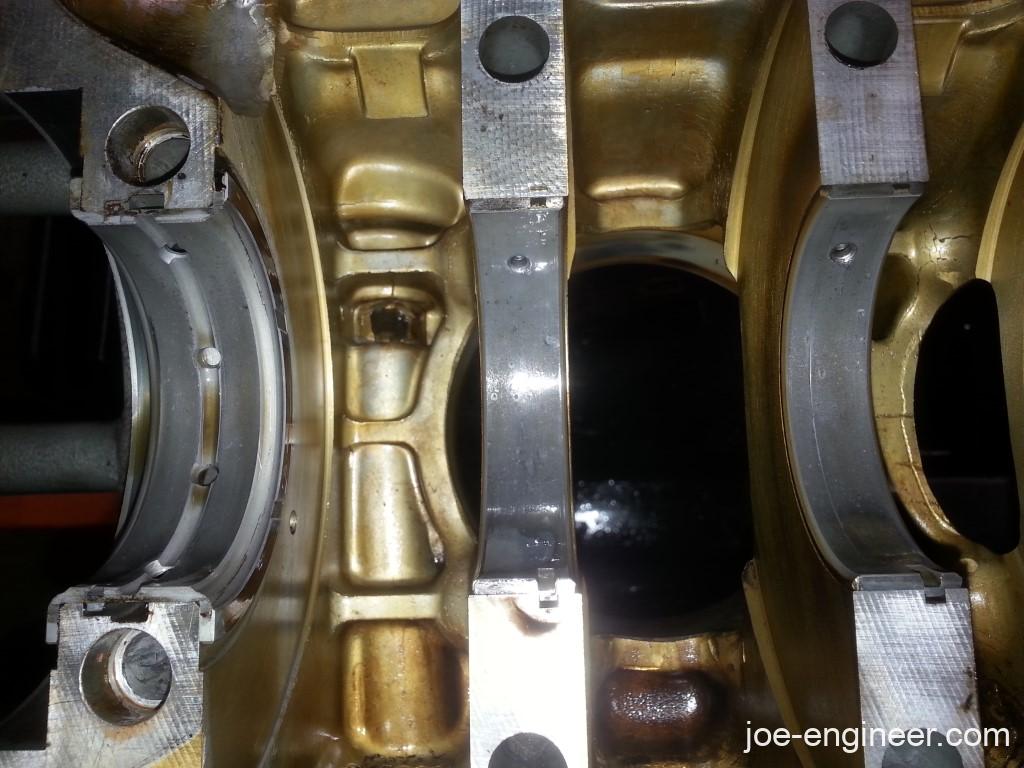
The most shocking thing was how clean the inside of the case was! I never would have guessed it based on its horrific external appearance. I guess at the very least this lump was getting its regular oil changes. Then again, with as many leaks as it had it is possible that it was receiving a continuous oil change, and not by choice! If you look at the photo above you can see the backside of the case slot leak under the oil cooler. It looks like the aluminum wall in that area is very thin and flaked off. There is a steel tube that is embedded in that section of the case which was preventing it from being a gaping hole, but at the same time wasn’t sealing the area effectively. Epoxy on the exterior of the case should fix the problem.
I bolted the end of the flywheel to the crank to make a temporary crank stand. I was then able to stand it up on a table and easily remove the rods.
I went back to the intermediate shaft to bag and tag it when I noticed something on the timing gear.
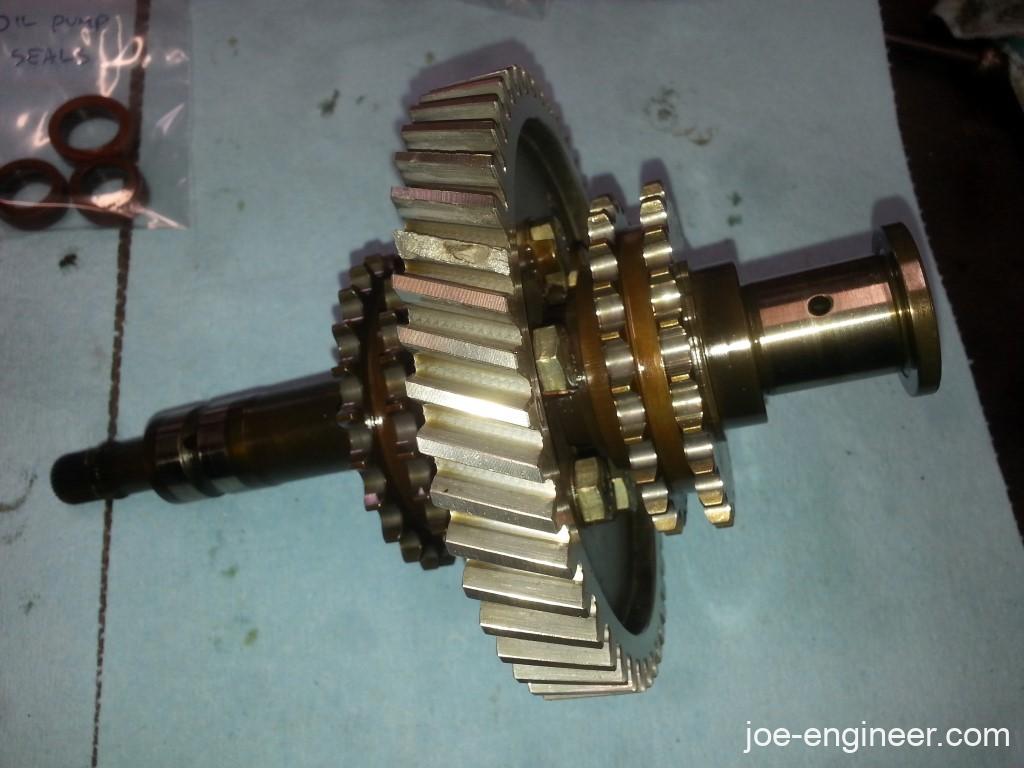
The aluminum gear was missing a tooth and it was nowhere to be found inside the case sump!
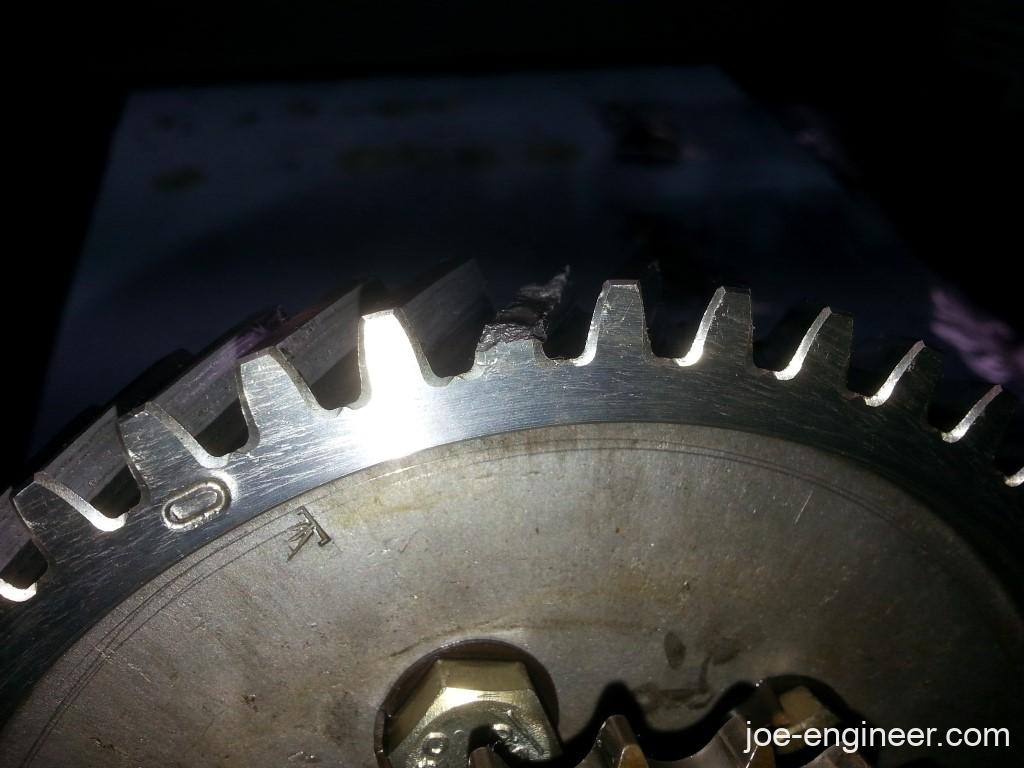
Thankfully there were no signs of carnage that a floating chunk of aluminum would have done to the internal rotating assembly. My guess is that somewhere along the line it coughed up a gear tooth, luckily it went straight to the sump, and was flushed out during an oil change. That must have been an exciting day for the previous owner who found it. I am purely speculating here but maybe there is a connection between the broken tooth, the abnormally worn intermediate shaft bearing, and the light scratch on crank main bearing #6.
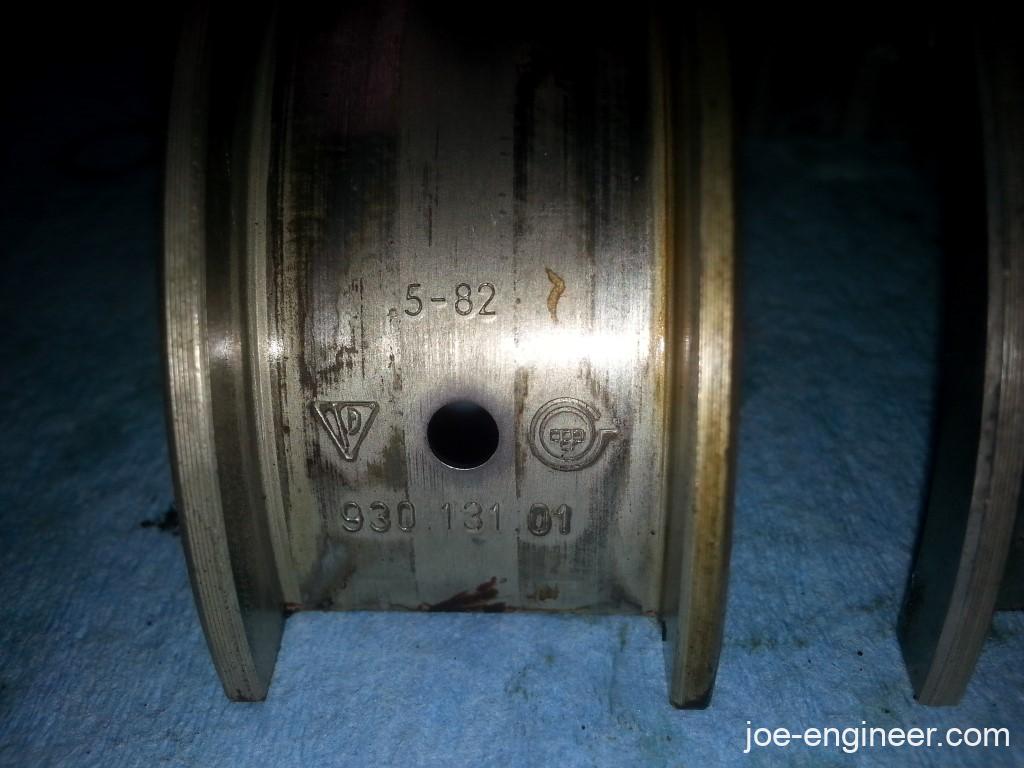
While I was removing the main bearings from the case I noticed they were the original ones dated “5-82”. There was a very good chance I was the first person in here since the car left the factory in the early 80s. I was still a baby when this thing was rolling through the assembly line!
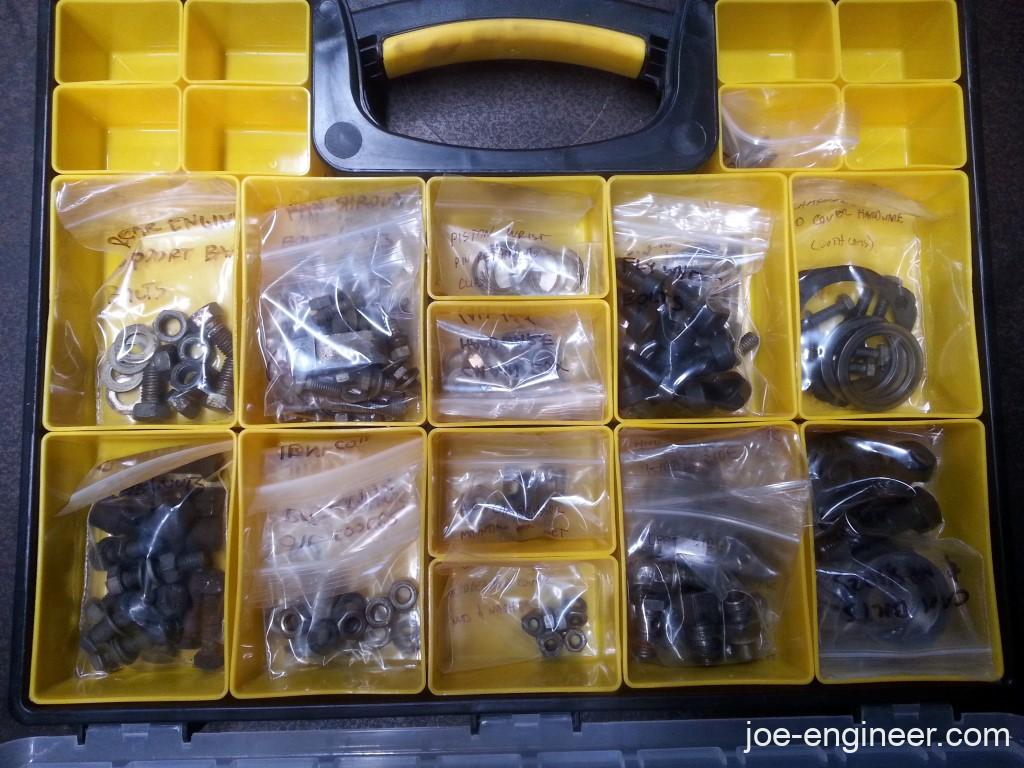
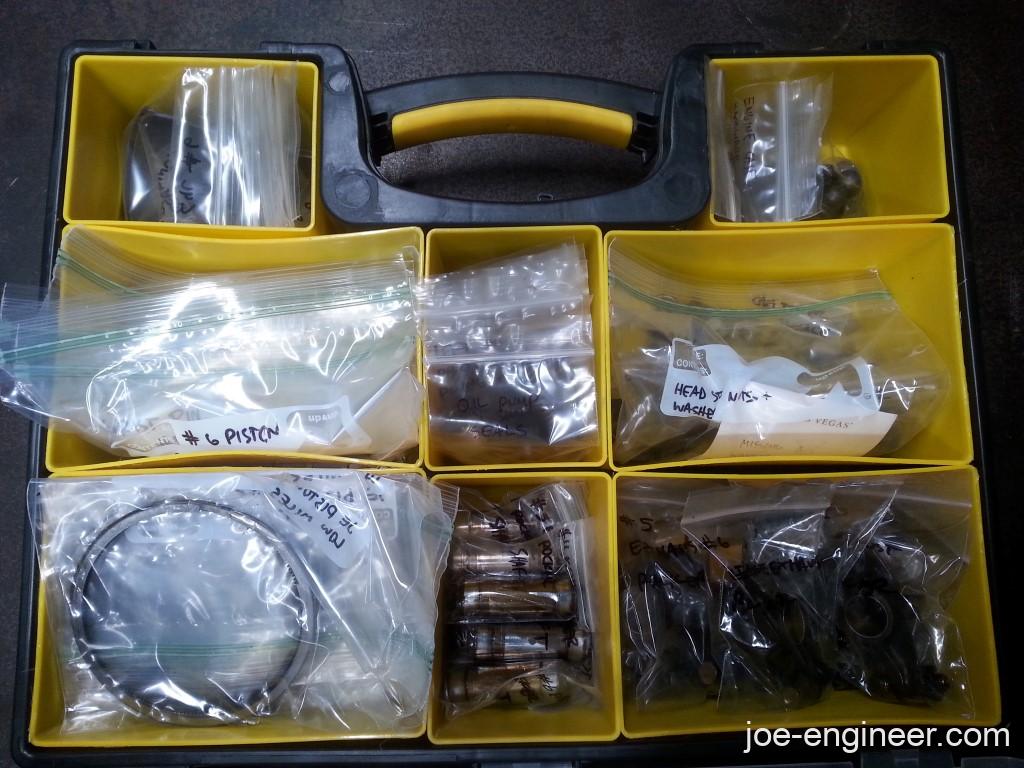
I removed the rods from the crank and disassembled the top end, removing the cams, rocker arms, shafts, and all the associated hardware into my storage cases for safe keeping.
I shared photos of my crank, rods, bearings, cams, and rockers with some elder builders for initial evaluation on the condition of my parts. The general consensus was that this was a pretty healthy running engine and that many of the parts would likely be reusable.
It was time to prepare these parts for a trip to one of my favorite places in the world: the machine shop.