
Porsche 911 Engine Teardown Part 1: Disassembly to Longblock
Warning: Long, pic-heavy post ahead. Enjoy!
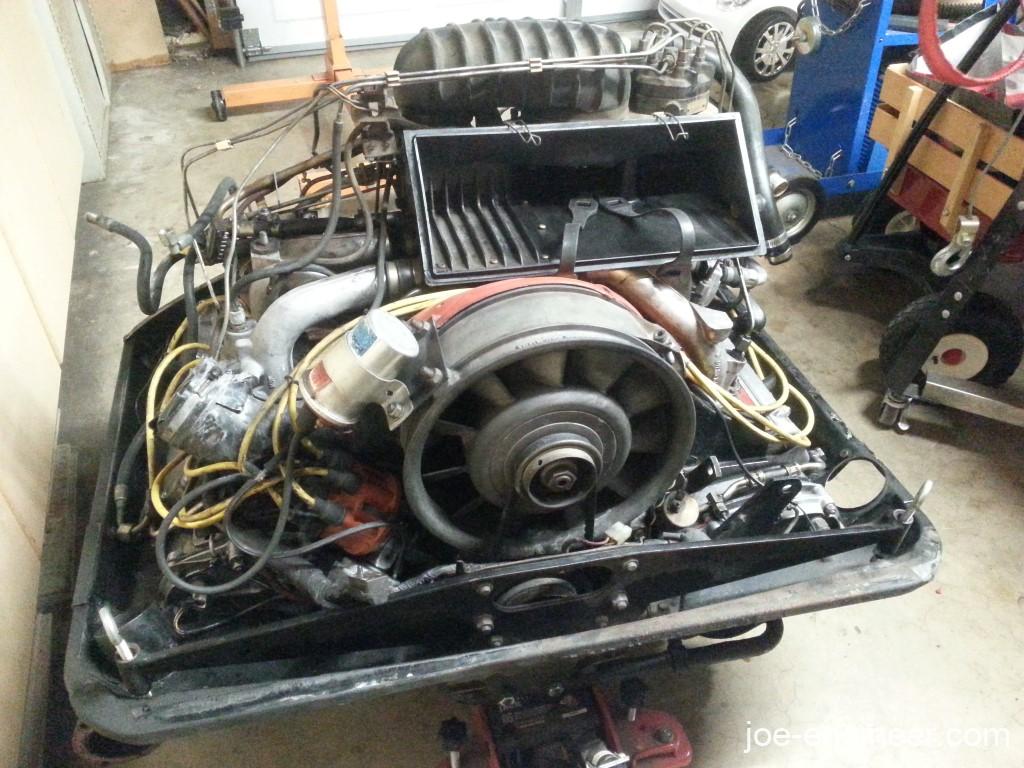
After dropping my drivetrain, separating and cleaning the transmission case, it was time to venture deeper and deeper into the unknown.
I was ok with the realization that I was not quite sure how long this would take, but as long as there was constant progress, I would eventually have a fully rebuilt engine. I didn’t want to stress out over a deadline and take short cuts that I would regret in the long run. I just wanted to enjoy the journey and absorb all the knowledge this experience would give me.
I prepared the engine for a careful and methodical teardown to achieve two main objectives: 1) keep track of all my parts 2) inspect for any root causes of the current issues (oil hemorrhage and CIS backfire).
Removing Distributor, Coil, Plug Wires, and CIS Fuel System
The spark plug wires and ignition coil were removed, then after removing the distributor adjustment nut, the distributor unit came out. Distributor hole was plugged with a paper towel to prevent foreign objects from finding their way in there.
In order to reduce the amount of weight that needed to be lifted onto the engine stand and just generally deal with less clutter I decided to remove the fuel system first. I labeled all the harness wires and disconnected them from each sensor. Each intake runner was held to each cylinder head by 2 bolts. I removed all 12 of these bolts and the whole system lifted right off the engine.
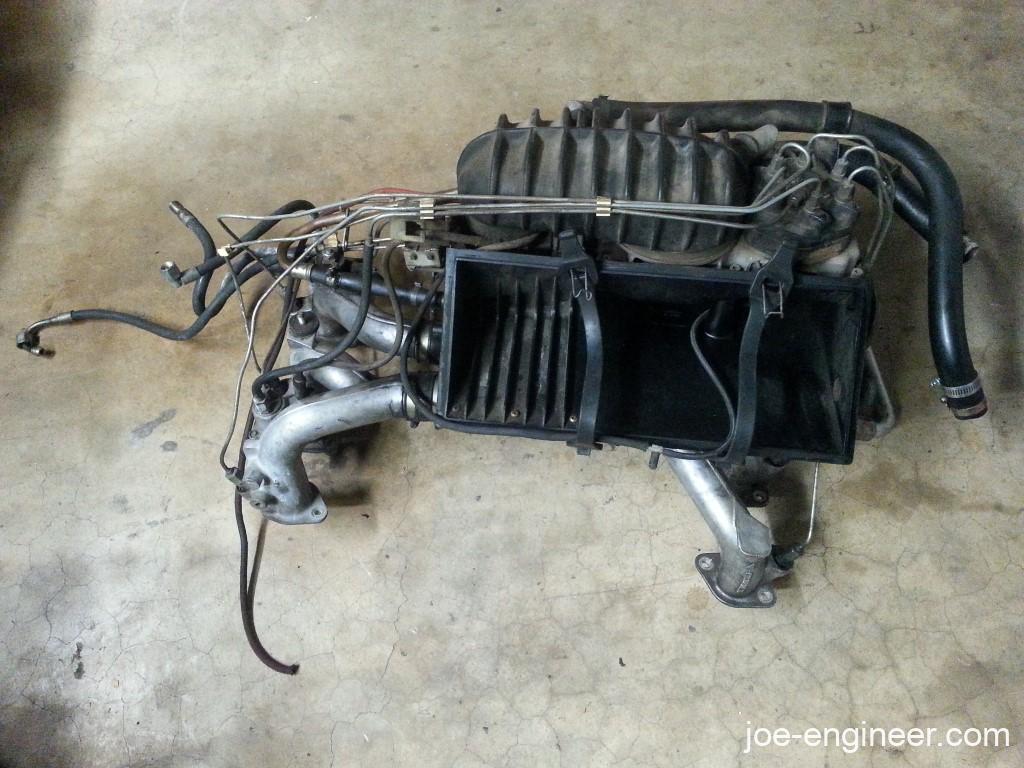
The system was quite heavy, maybe 35 pounds or so. As I was walking it over to a shelf I noticed 2 of the intake runners had slipped out of the rubber boots that connect them to the plastic airbox. These rubber boots and their clamps were not doing their job of sealing intake air and were likely generating huge vacuum leaks. It didn’t take long to find my airbox backfire root cause. The vacuum leaks were causing a lean condition, then the fuel mixture was manually richened enough to compensate for the leaks. Then when I re-connected the O2 sensor I caused it to go lean again and boom went the airbox. So simple and so avoidable. The entire CIS system was an oily mess so I wrapped it in a plastic trash bag and set it aside. I then plugged all the open intake ports on the engine with paper towels.
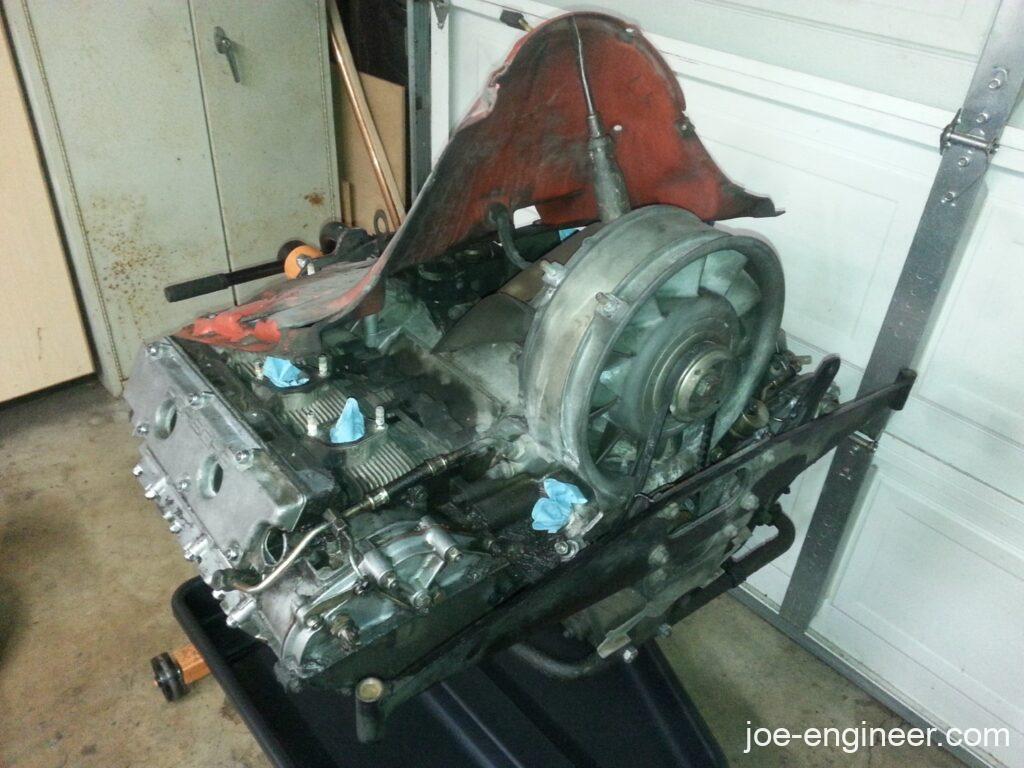
Getting the Engine Onto My Engine Stand
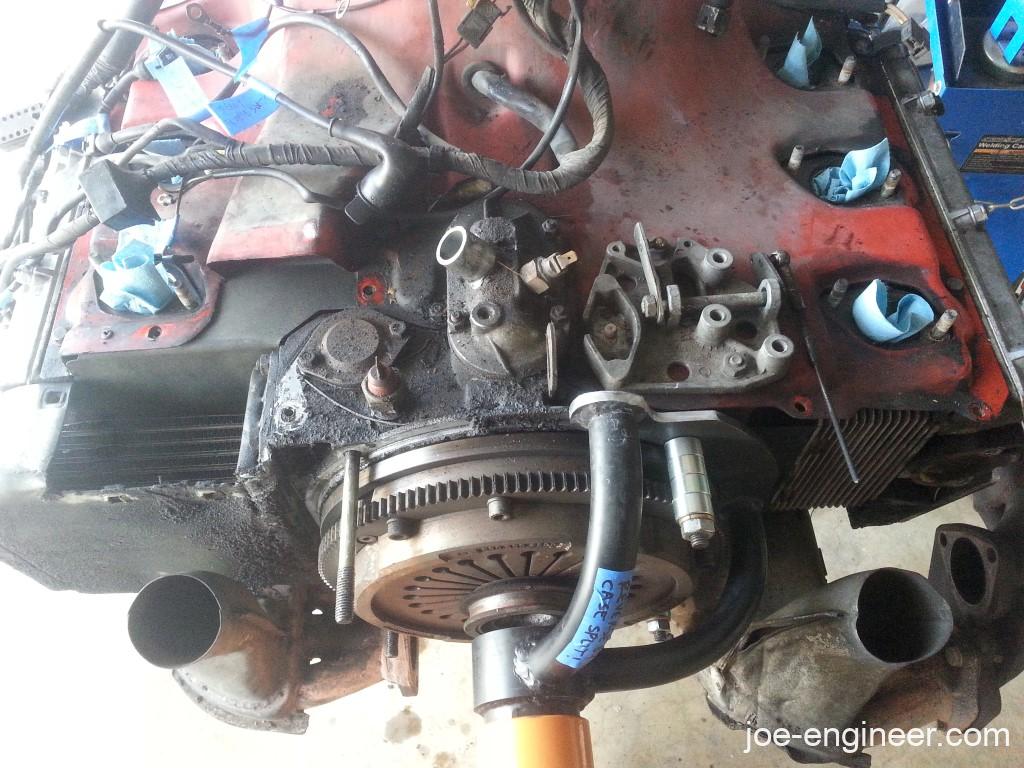
I wheeled my engine over to my engine stand via the motorcycle jack I used for the engine drop. I had an engine stand adapter laying around from my air-cooled VW days that apparently was also compatible with the air-cooled flat six. After successfully using it on my transmission during the cleaning process I elected to reuse it again for the engine.
I quickly found that the adapter flange interfered with an exhaust flange. Some clearance work on the bench grinder and I was able to get it further onto the engine case studs when it then hit the oil cooler. You are supposed to bolt to this half of the case so that when you turn the engine 90 degrees with the oil cooler side facing down and split it open, you have the oil pump and intermediate shaft assembly sitting in the lower half instead of falling out of the upper half. In my situation I simply swapped it to the opposite side and wrote myself a note to swap it back to the oil cooler side after I had removed the oil cooler and before I split the case.
My engine stand was not the U-shaped kind that would let you wheel the jack right up to the stand base, but rather the I-shaped kind that you would commonly use with a cherry picker to lower the engine into position from above and attach it. I had no cherry picker so I had to get creative in lifting the engine onto the stand. I used a big stack of wood blocks I had laying around to jack the engine, support the ends with blocks, lower the jack to stick more blocks between it and the engine to get it as high as I could on the jack.
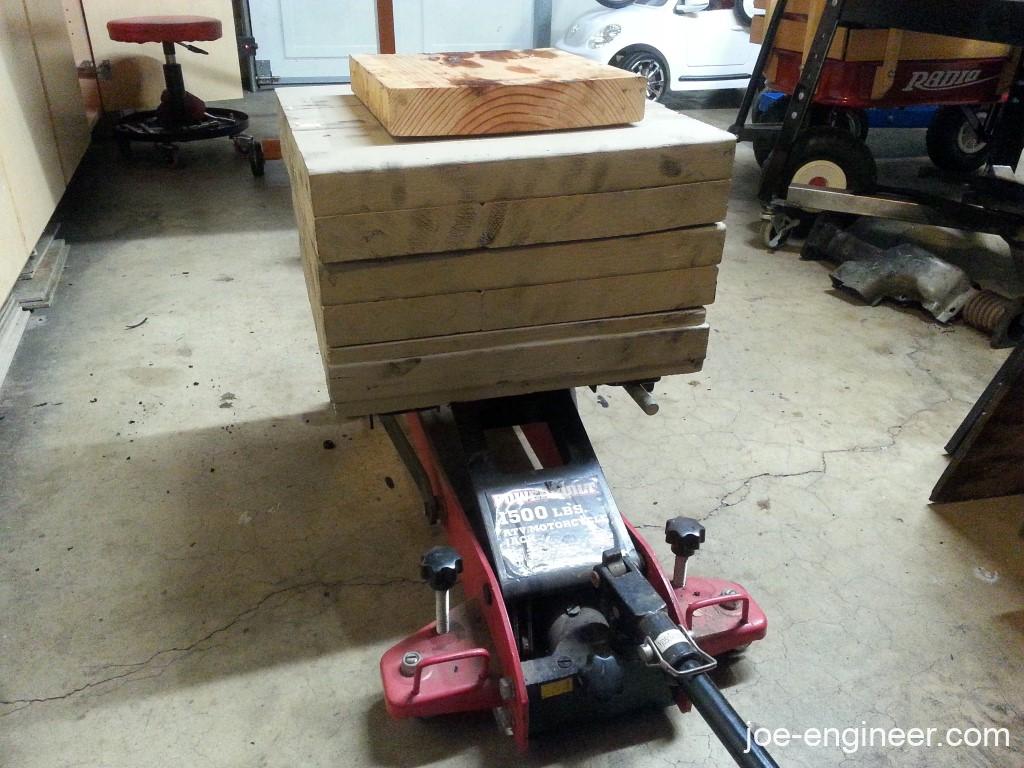
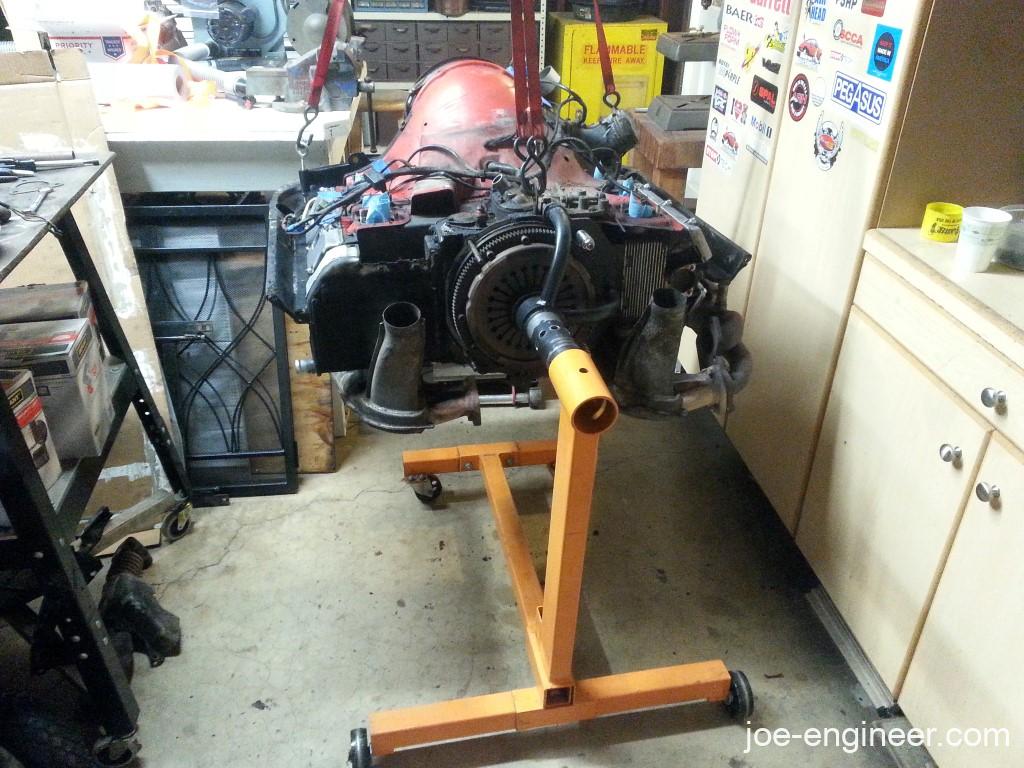
Then I installed a pair of eyebolts through the threaded ends of the rear engine crossbar (at the back corners of the engine, on either side of the fan) and used those 2 points and the lifting point at the front of the engine to pick up the engine onto the stand. Using a 5000 lb strap strategically wrapped around the strongest point in my ceiling rafters, I attached a pair of ratchet straps to the engine lifting points and slowly and evenly raised the engine high enough to mate the adapter to the stand. It was a slow process but it worked beautifully.
Warning: I dont recommend you lift your engine this way. I recommend you get the U-shaped stand that allows you to roll the jack and engine right up to the receiver tube on the stand and lift it using only the jack and blocks. Why risk dropping your engine or damaging your garage?
If you haven’t already, read my Engine Teardown DIY to know how I photographed, labelled, bagged, and stored all the parts I am about to remove.
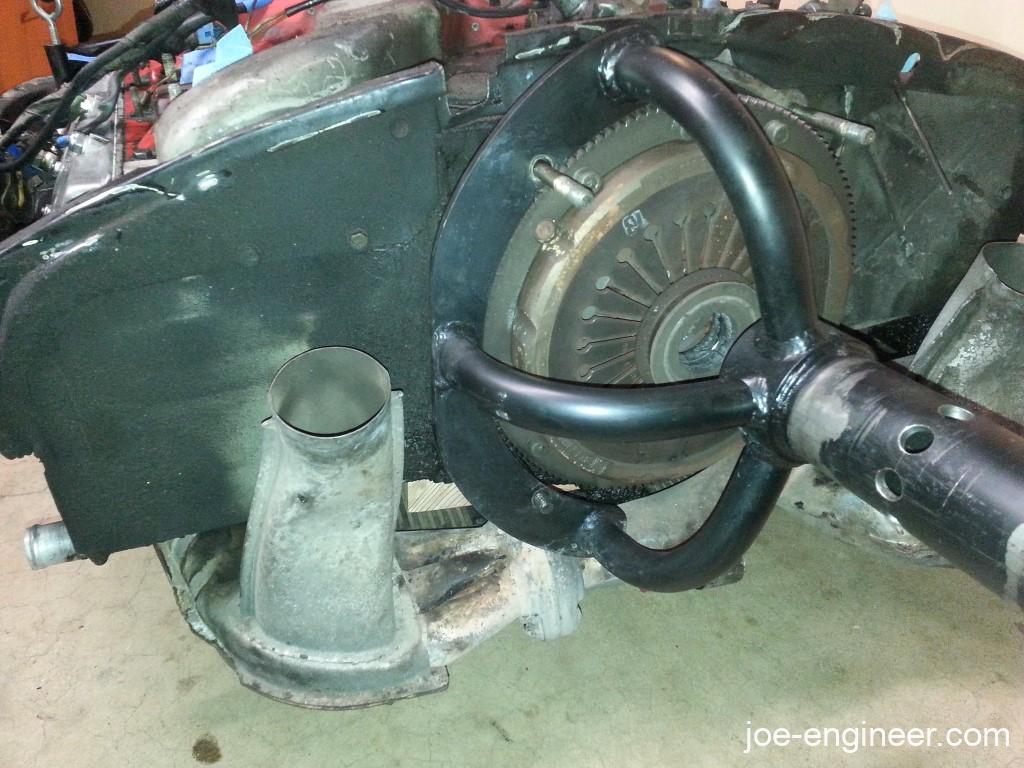
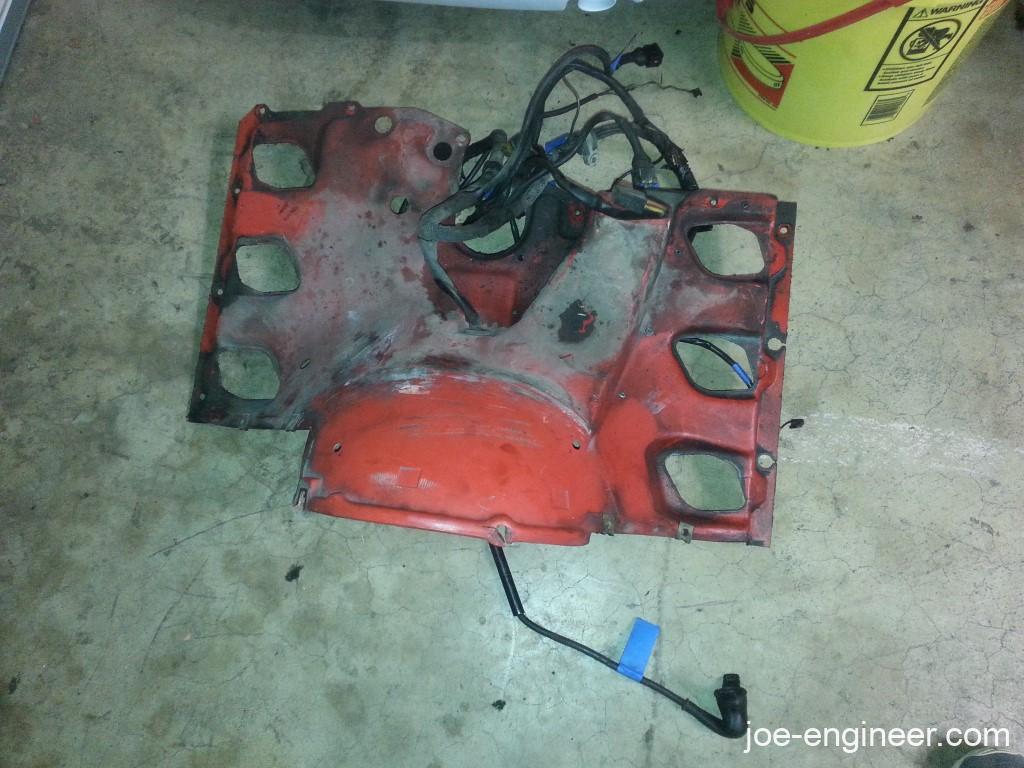
Removing Cooling Tin and Exhaust System
I unbolted all the cooling tin pieces. I had to dig through a lot of grime to find some buried screw heads when the parts wouldn’t pull off. I found that the area around the oil breather tower, oil thermostat, and temp sensor was caked in grime. It was safe to say that I had found a huge oil leak source. Leaky gaskets plus a possibly disconnected breather hose probably sprayed oil vapor all over everything whenever the engine ran.
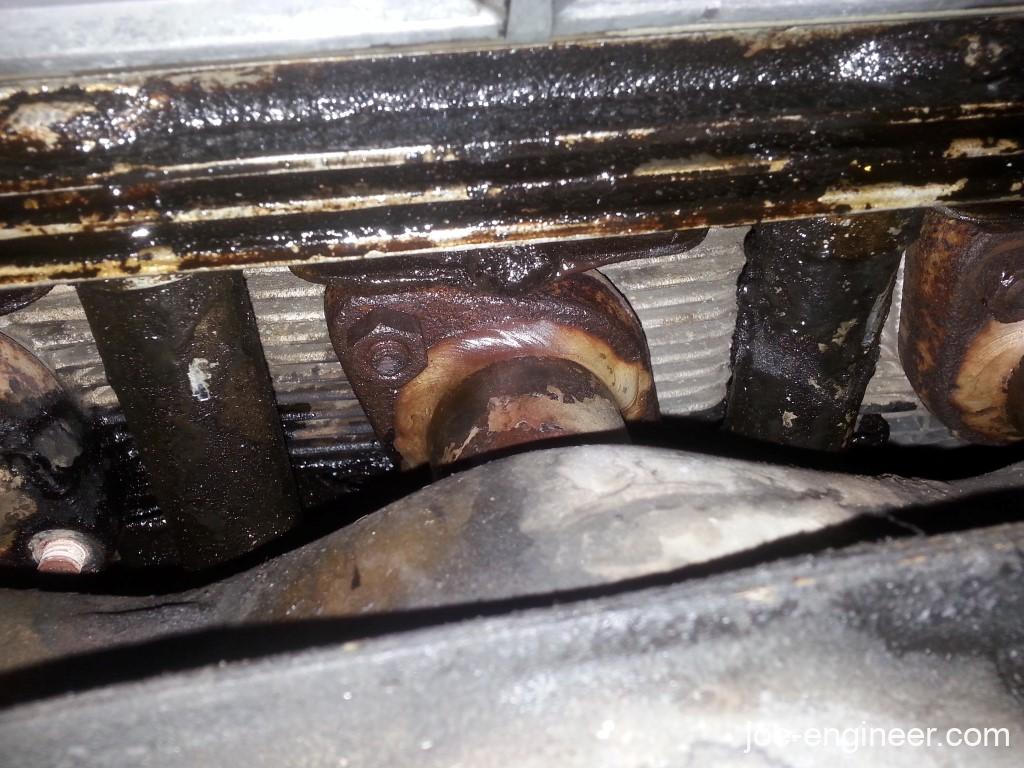
I then rotated the engine 90 degrees to get a good look at the exhaust system. Lots of rusty hex and barrel nuts holding the heat exchangers on. Here is where things can go south quickly if you break an exhaust stud in the head.
I was able to access the barrel nuts with a long hex wrench through the access holes in the heat exchangers. These and all the hex nuts came off with little drama after soaking in penetrating oil. Except one hex nut. There was little tool access to apply sufficient torque to it and it wouldn’t budge.
I cleaned the surrounding area of grease and broke out the propane torch to heat that stubborn nut. I put the nut through a few successive heating and air cooling cycles.

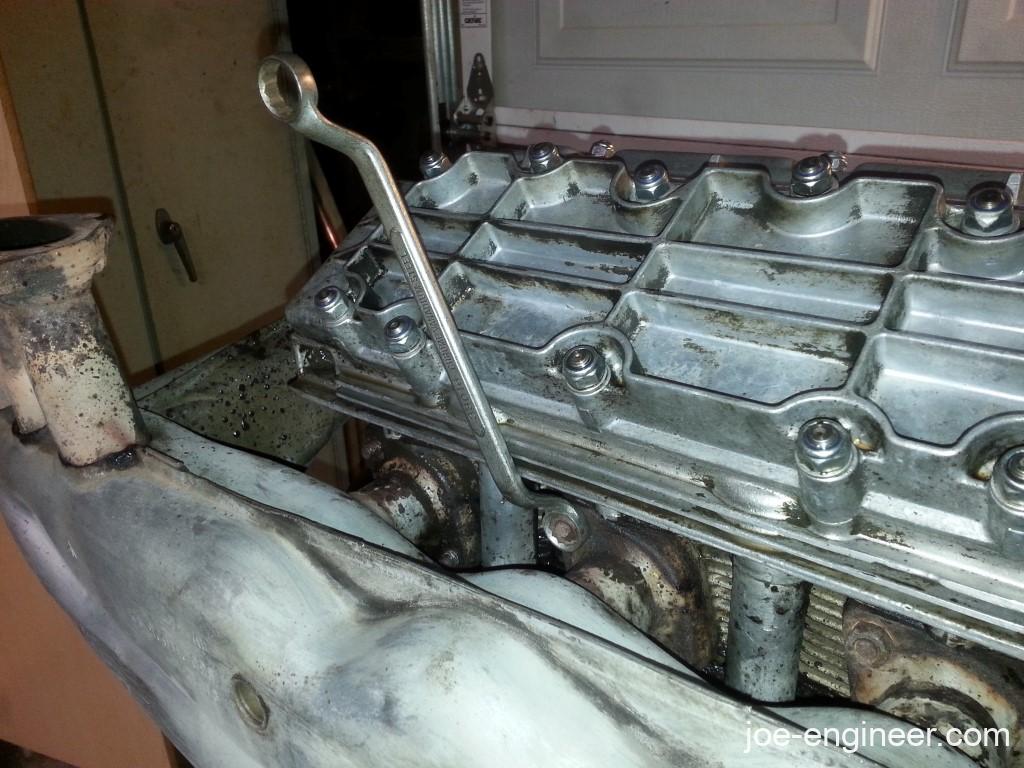
Then I happened to find an offset box wrench in a drawer of random wrenches I have. It was a perfect fit for that area and gave me the leverage I needed to get the nut off with no issue. I consider myself lucky to have had the appropriate tool on hand.
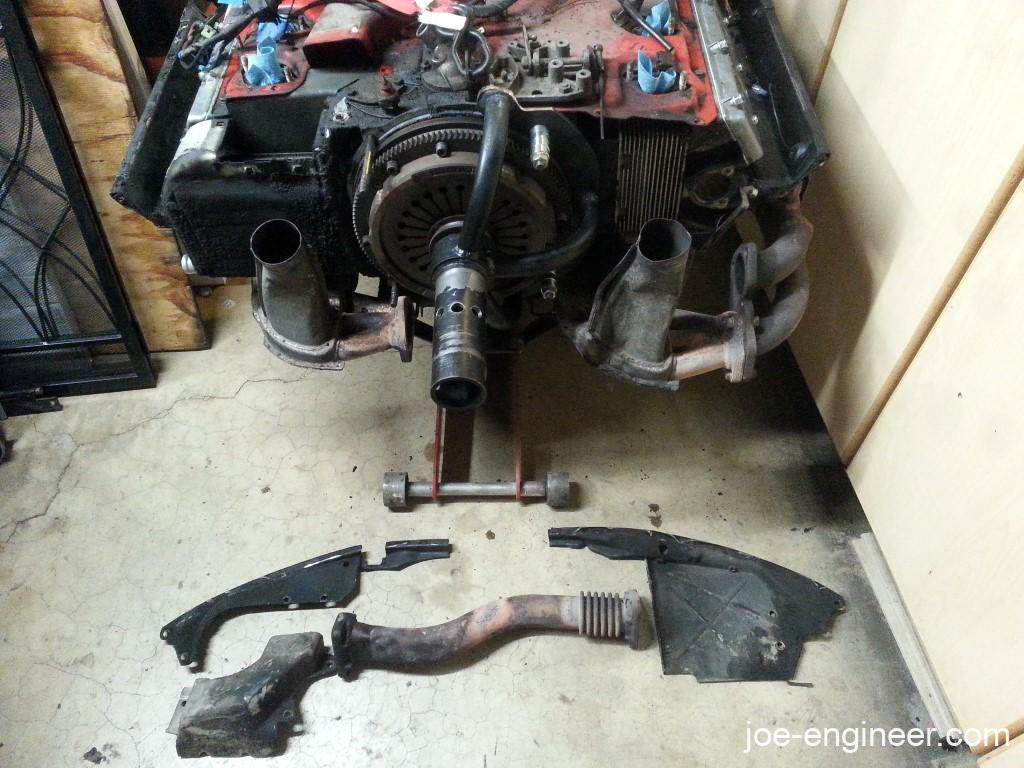
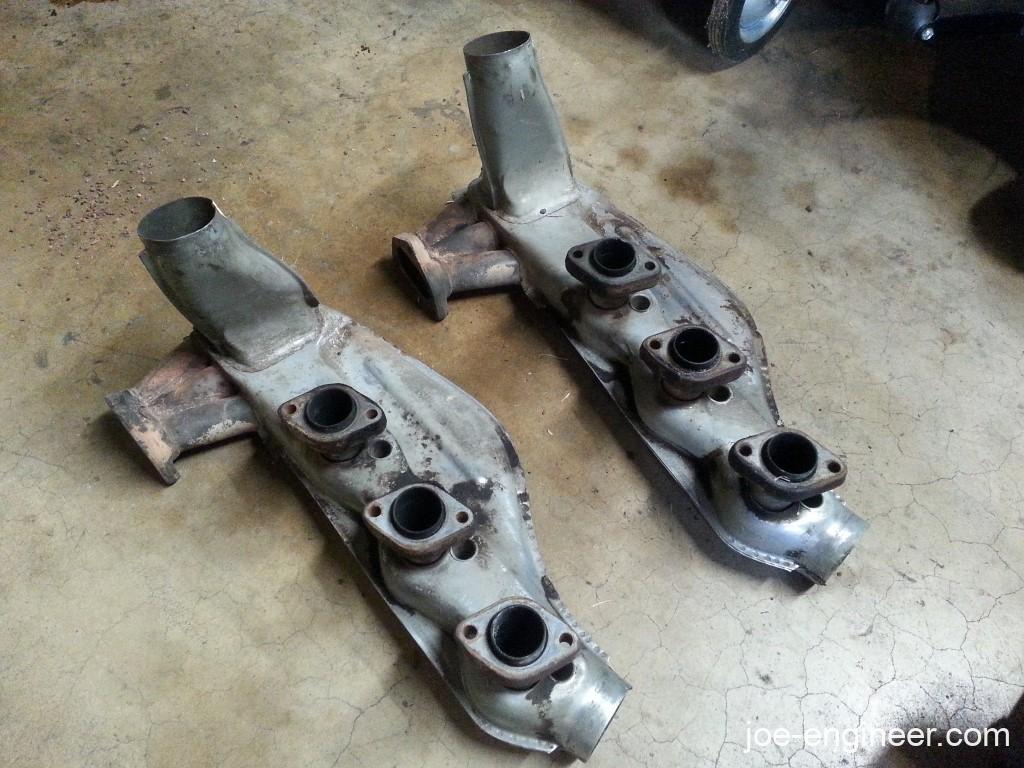
After that, both heat exchangers were off the engine and on a shelf. Exhaust ports were plugged with paper towels as well.
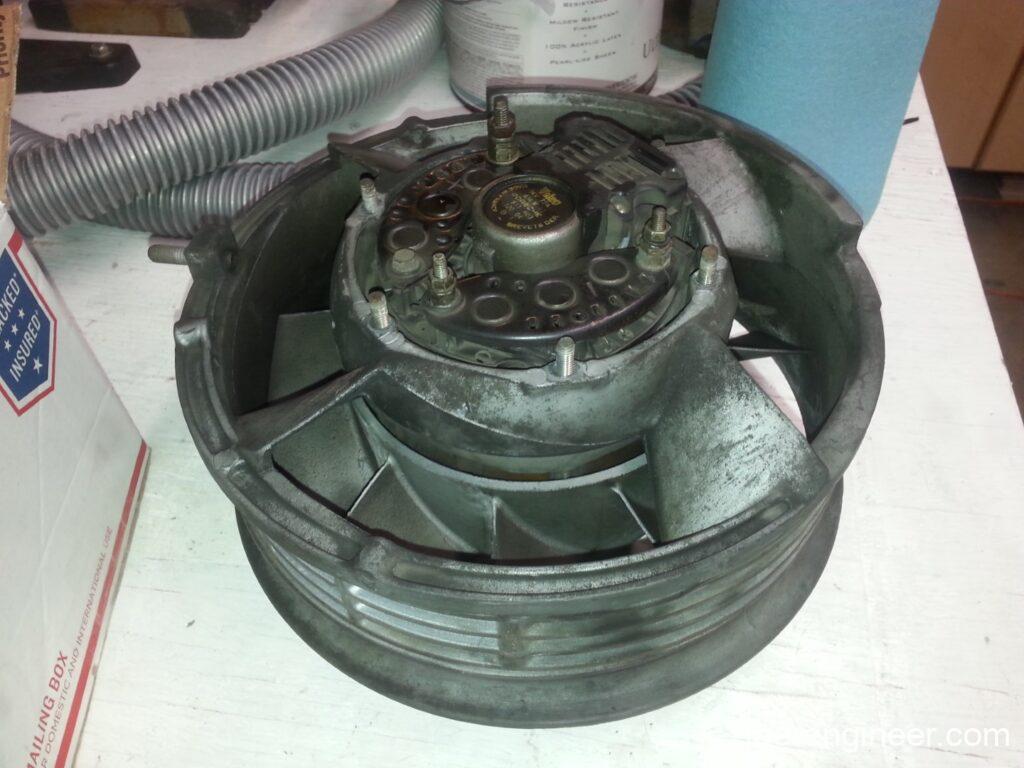
Removing Oil Cooler, Engine Harness, Engine Shroud, Fan, & Alternator
After removing some more tin screws, the heater duct and cover plate on either side of the fan came off. Near the front of the engine on top of the red engine shroud, a couple of nuts released the throttle bellcrank unit followed by the shroud itself. I had to carefully prop up the shroud off the fan housing so I could remove the alternator fairing and disconnect the harness wiring behind the alternator.
After labeling and removing the wire connections, the whole engine shroud lifted off along with the main engine harness.
Next step was to remove the single fan strap bolt to loosen the fan strap and allow the fan, housing, and alternator assembly to come off in a single unit. This was set aside in a safe place, as replacement fans and housings are crazy expensive to replace.
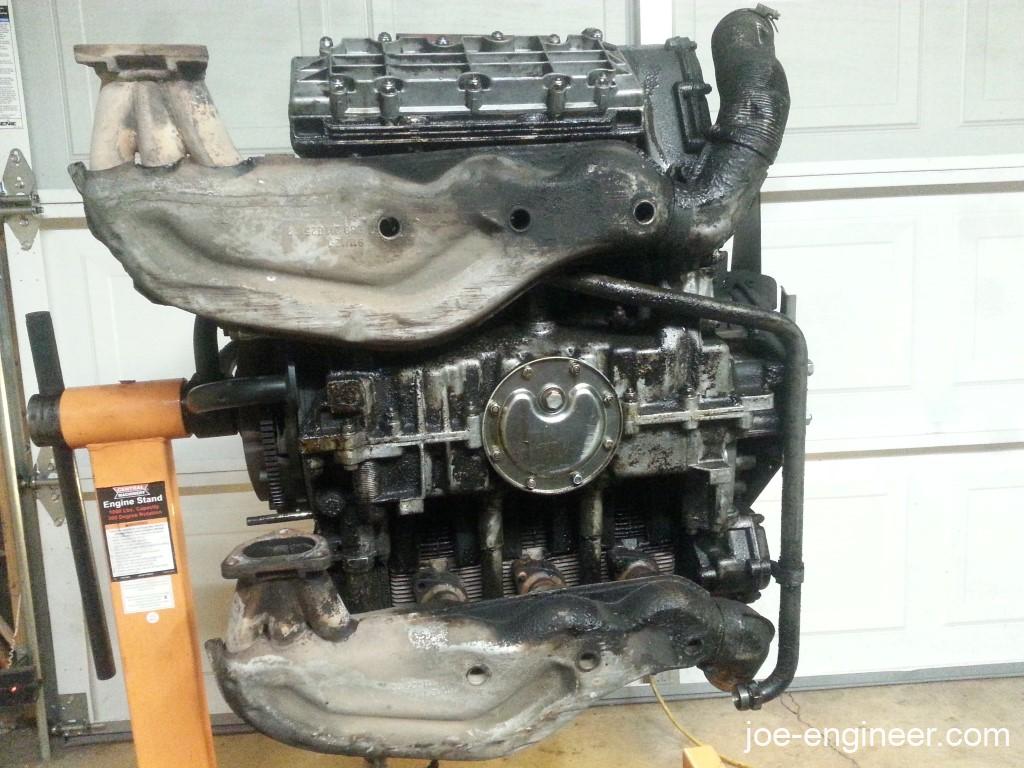
I unbolted the oil cooler and found another contributor to my continuous oil change. Under the bottom half of the cooler there is a slot in the case that commonly leaks due to a thin casting area that is prone to cracking. There is a factory service bulletin stating to seal this slot with epoxy during reassembly.
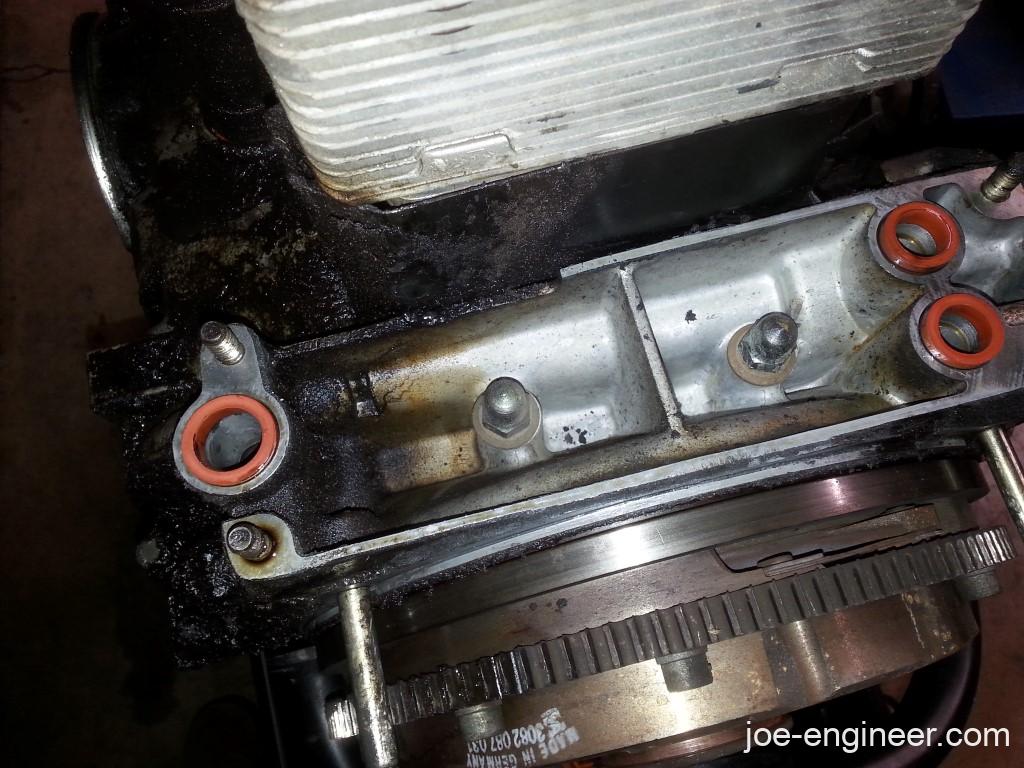
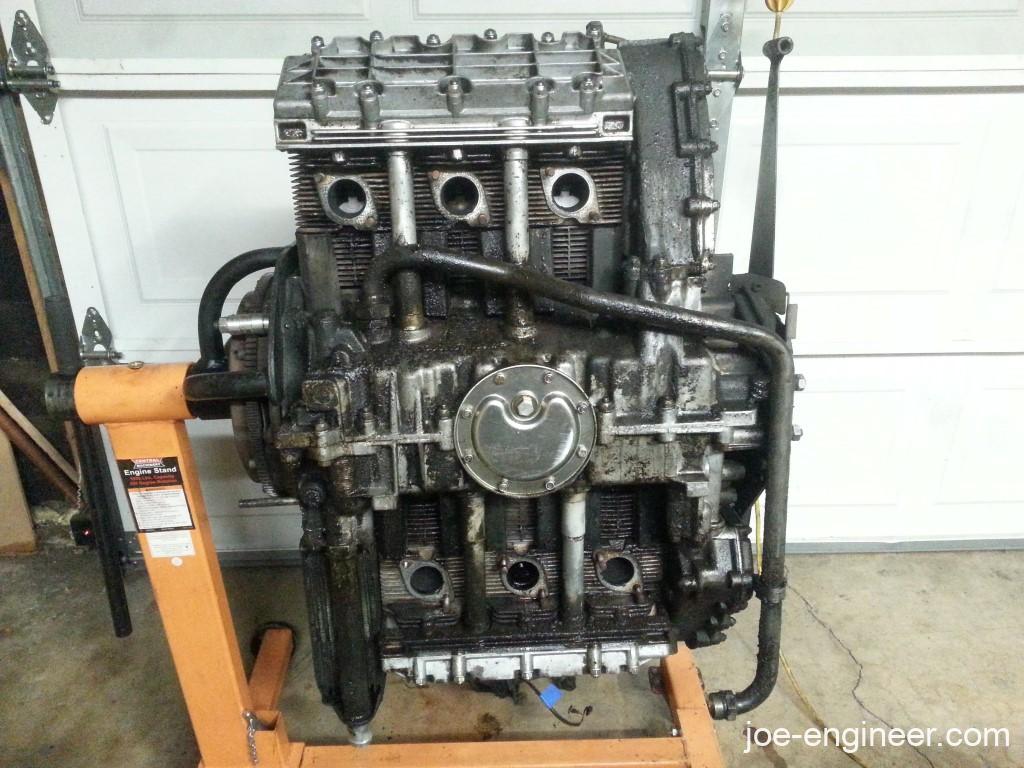
This bare engine assembly is known as the longblock.
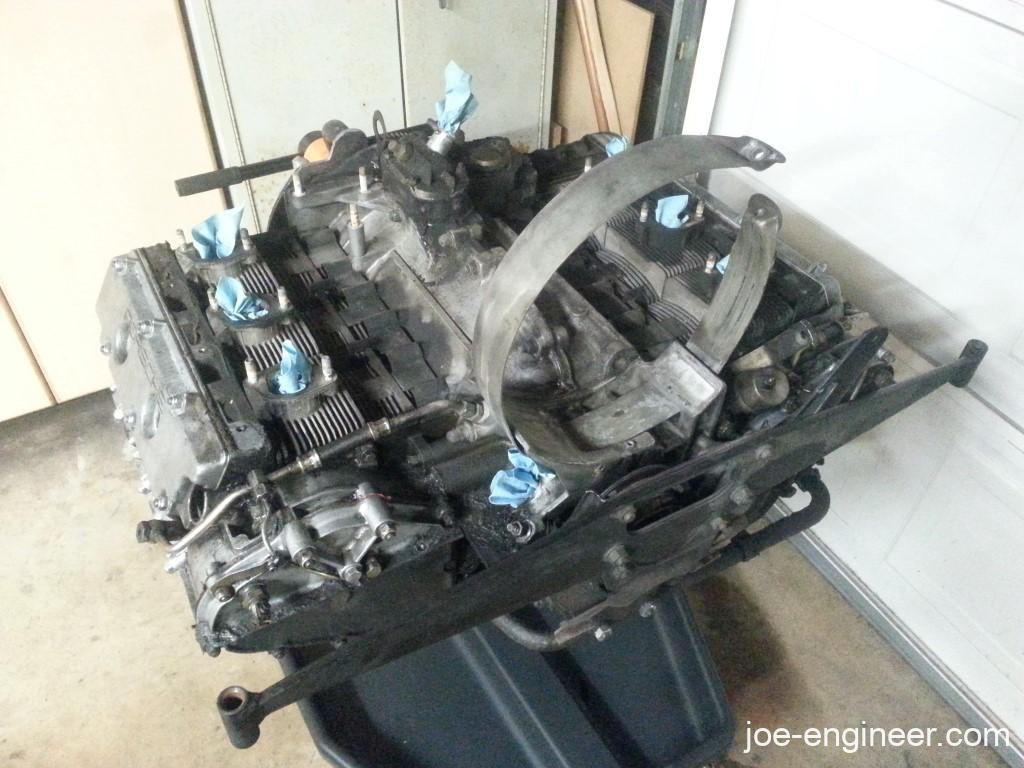
This was a good stopping point to clean and organize all the parts I just removed and read up on how to continue disassembly. Next time we will open things up and see what 200,000 miles of hard work does to combustion chambers.