
Porsche 911 Engine Drop & Initial Evaluation
“Welp, I guess its time to drop the engine!”
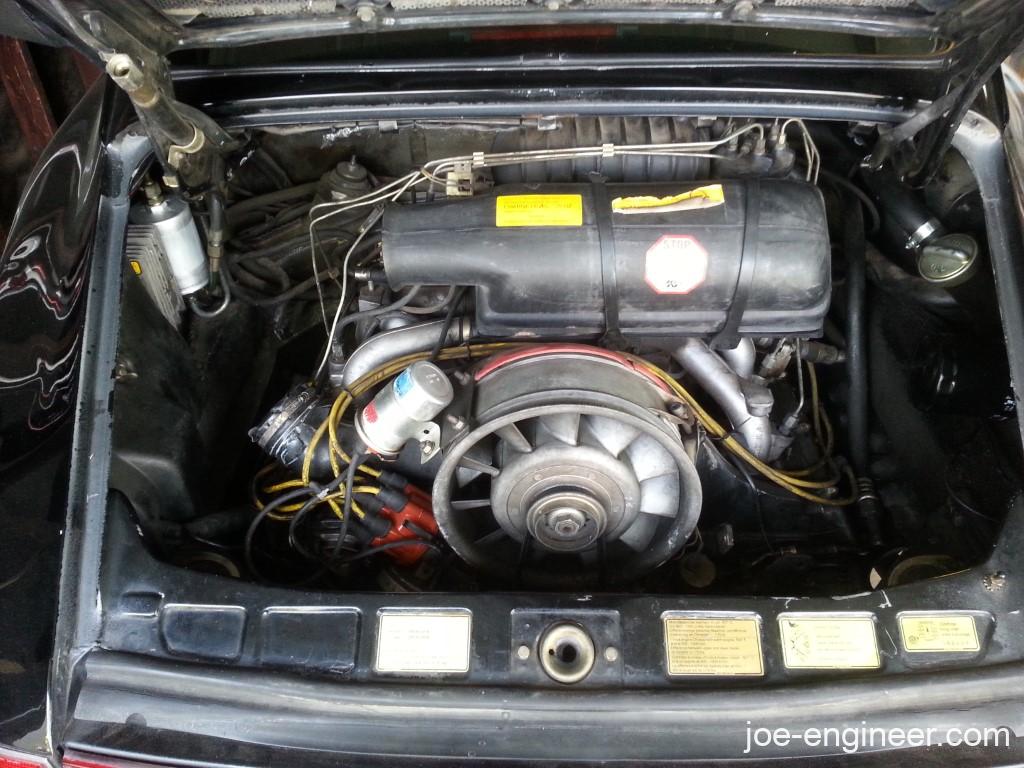
My primary tasks going into this were to replace the busted head stud and airbox. As long as the engine was out it would be a good time to take a very close look at everything and see what I was working with.
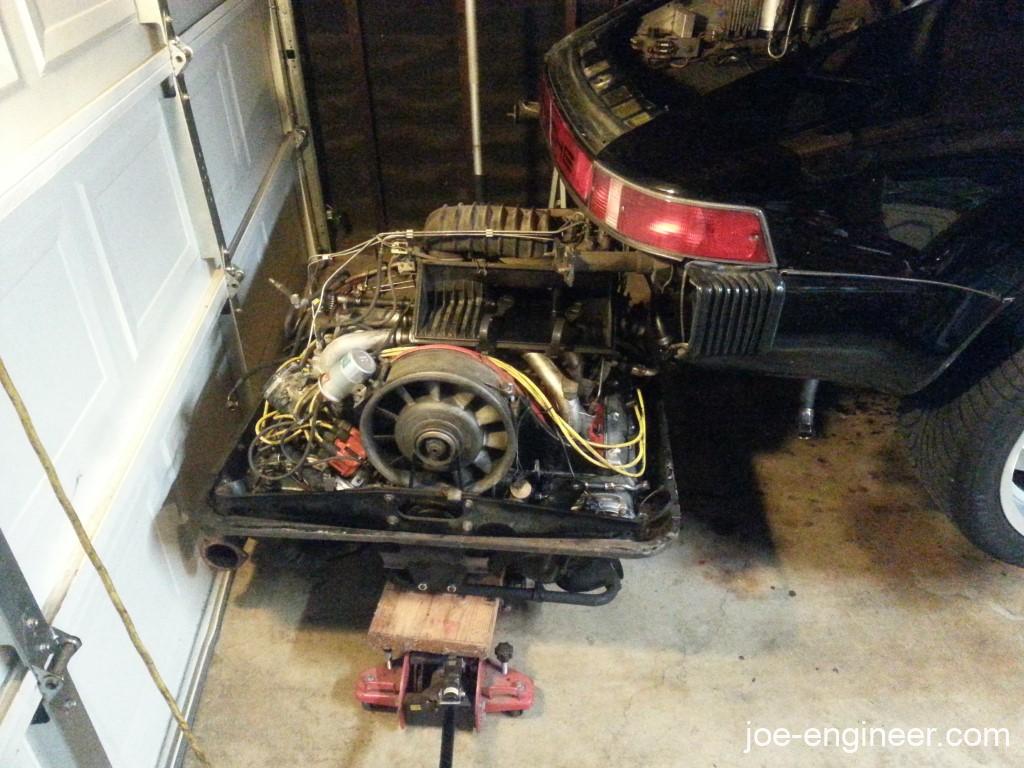
I proceeded to drain the oil and disconnect the many linkages, oil/fuel/vacuum lines, and wires per Wayne’s books. Four mounting bolts later and the entire engine and transmission assembly safely lowered onto my motorcycle jack. I put a tiny ¾ ton aluminum jack underneath the transmission cross member to help stabilize that end. After gradually raising the car’s butt a bit higher using 12 ton jack stands, I was able to just clear the rear apron and rolled the grimy drivetrain out from under the car. I held the engine stable as I pulled the bike jack and the aluminum jack under the tranny simply followed like a little caboose. I observed the greasy, filthy, oily disaster in front of me.
I began my visual examination based on my research:
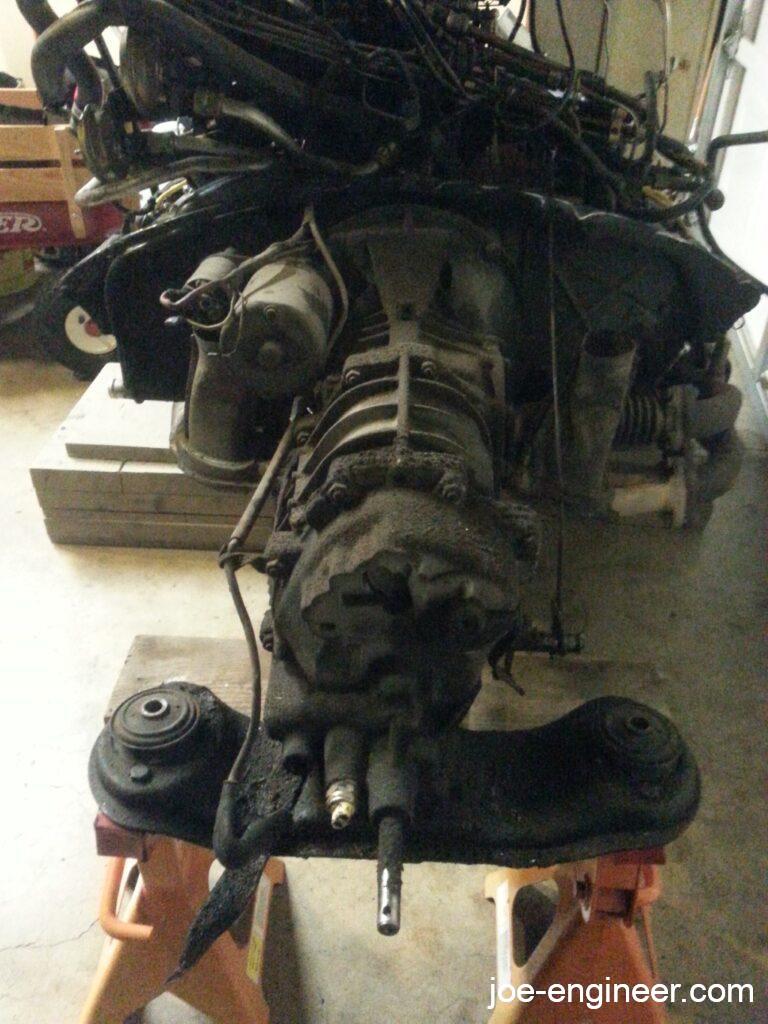
- The transmission was filthy and stickier than the engine. This was likely due to a leaking shift rod seal spewing transmission oil out the nose of the tranny and it gradually coating the entire housing as air blew past it at speed. No worries, clean and replace as many seals as possible.
- The inner CV boots were toast and through centripetal acceleration lobbed all their sticky grease onto all the surrounding surfaces, including the sides of the transmission. Cleaning may suck more than I thought.
- The engine is also filthy but thankfully not as bad. It seems to just be coated in engine oil and dirt. This was likely caused by the so-called “Triangle of Death” at the top of the engine. This is where the oil breather tower, oil temp sensor, and oil thermostat lived close to each other, right behind the CIS airbox. All 3 of these were common sources of oil leaks, and their location at the highest part of the engine combined with the constant flow of cooling air allowed oil to travel to pretty much all other engine surfaces. This is commonly known as an “automatic self-undercoating system”.
- The CIS system is super dirty and probably has a million vacuum leaks. It seems best to just go through the whole thing and replace all rubber hoses, boots, gaskets, etc.
- I can’t believe how damn dirty this whole thing is. This is the dirtiest drivetrain I have ever seen in my life. I literally cannot touch a single surface without black oil transferring to my hands. Just looking at it makes me want to wash my hands!
I went back to the Pelican Parts forums and dug through more threads. The more I read, the more conclusions I made and the more I became
worried.
- The engine was consuming quite a bit of oil when it ran. I think I added 2 quarts of oil in 500 miles of driving, and very little of that ended up on the ground. After 200,000 miles the rings and the valve stem seals were probably tired.
- The lower head studs were made from an alloy called Dilavar, and were supposed to experience less thermal expansion than the steel studs above them. Since the lower studs were parked right above the exhaust, they were the Dilavar type in hopes that the hot bottom half of the cylinders and heads would expand at the same rate as the cooler top half. This sounds good on paper and I am not sure if it actually worked or not, but what did happen is that these Dilavar studs often corroded and broke. Even on dry California cars like mine. A common fix was to replace all the lower Dilavar studs with the same steel version as the upper ones, or get fancy with race-grade ones like the ones from Supertec, ARP, or Raceware. For my stock engine, the steel ones would do just fine.
- Replacing the head studs requires removing the heads. As long as the heads are off, replace the rings and get the heads rebuilt to address the valve stem seals. Boom! Oil consumption problem solved! Laborious and expensive but I knew sooner or later something like this would be needed.
- But wait, the car has 200,000 miles on it and as long as you are in there doing a top end rebuild and have the engine down to the case, it isn’t that much extra time or cost to just split the case, examine the bottom end, and replace the bearings. Now we are looking at a full rebuild.
So within a span of a few days my searches escalated from “How to replace a broken head stud” to “DIY engine rebuild”.
I was faced with a moral decision. Do I go the cheap route and do the bare minimum to get the car running again? Do I do it right, go through everything, and rebuild the entire engine to make sure it can do another 200,000 trouble free miles? I have never been one to half-ass too many things, at least not intentionally.
I plan on keeping this car for a long time. Maybe even as long as I live. I know I have said this for most previous project cars however this one is different because it was really expensive, they are not getting any cheaper, and it is very special to me. For one reason or another I have faced difficulties with previous project cars and had to get rid of them but every single time my thought was “its ok, I can always buy another”. I don’t know if I will get another shot at another 911 so I need to make this ownership experience count. It is important that I make repairs properly, using quality components, the first time. This way I can hopefully treat myself and my family to many hundreds of thousands of effortless miles.
So I poured myself a stiff drink, calmly sat down, and visualized what I was about to get myself into. A full engine teardown.