
Porsche 911 Engine Case Bits
After successfully sealing the engine case, there were a ton of little external parts to bolt on to transform that shortblock into a longblock.
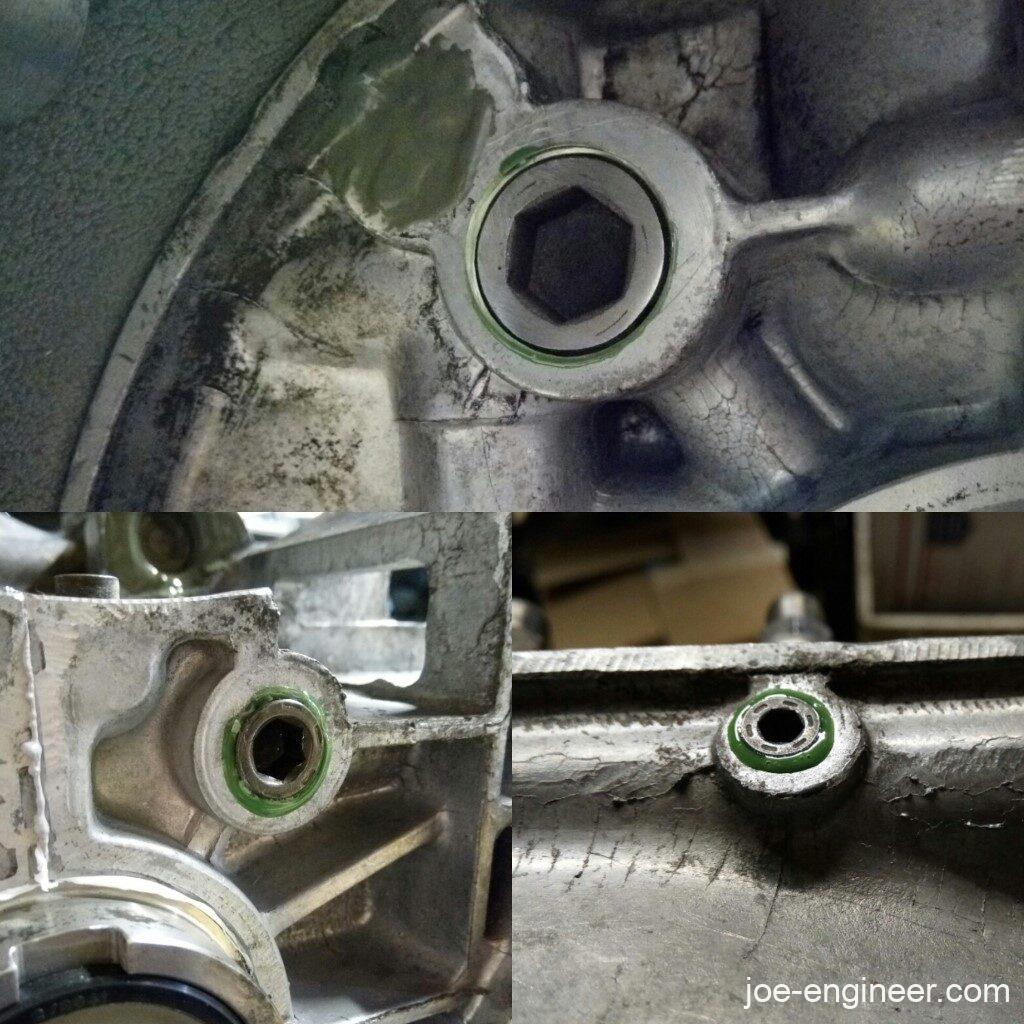
If you recall, we had the oil galley plugs drilled out and tapped so we could get in there and clean everything out perfectly during every rebuild. I sealed those galleys shut with threaded tapered plugs and green Loctite.
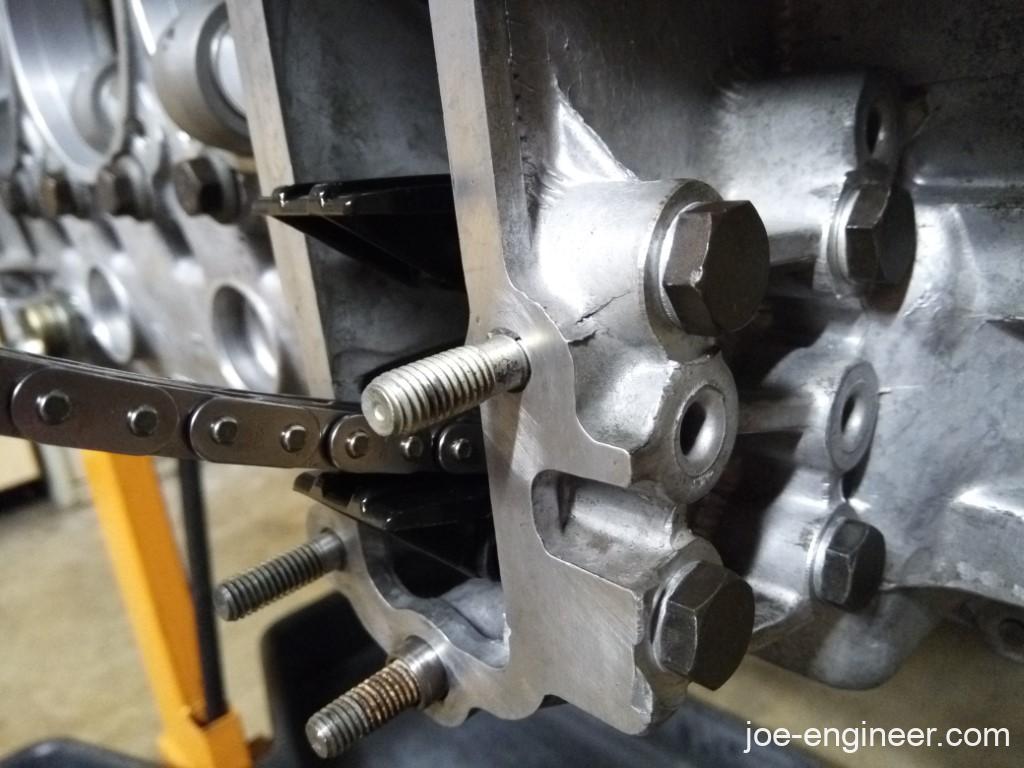
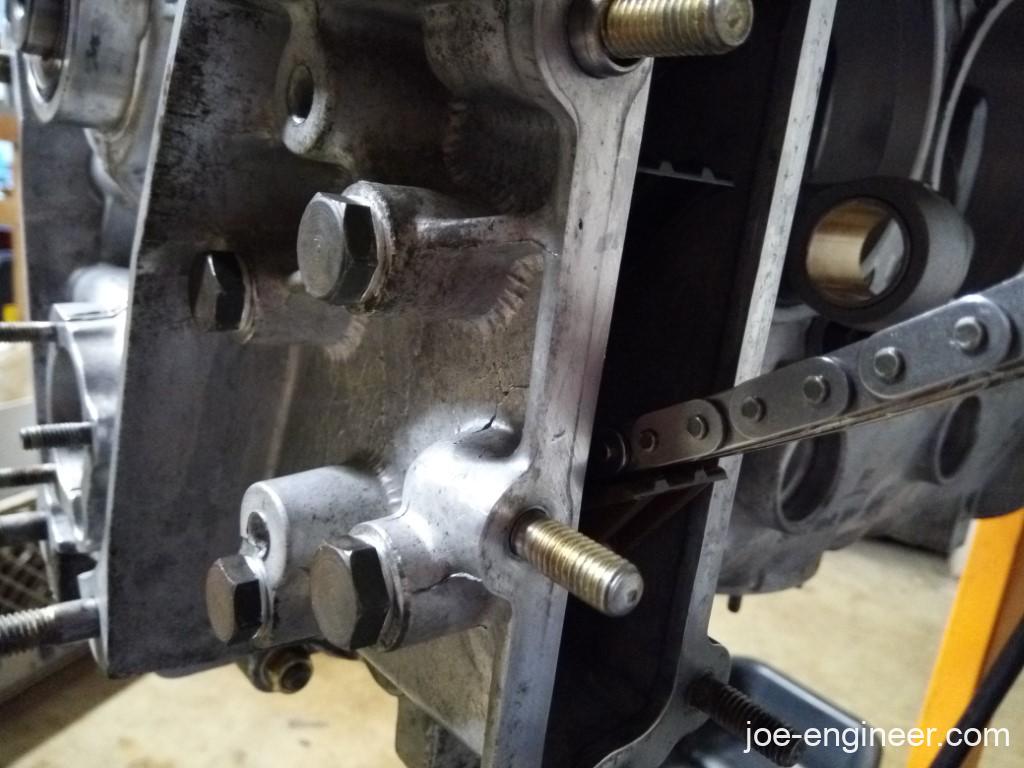
Next I installed the timing chain ramps which snap onto the end of externally mounted bolts at the rear of the case on either side of the crank pulley.
Next on the list was the oil pressure relief springs, pistons, and plugs at the bottom of the case.
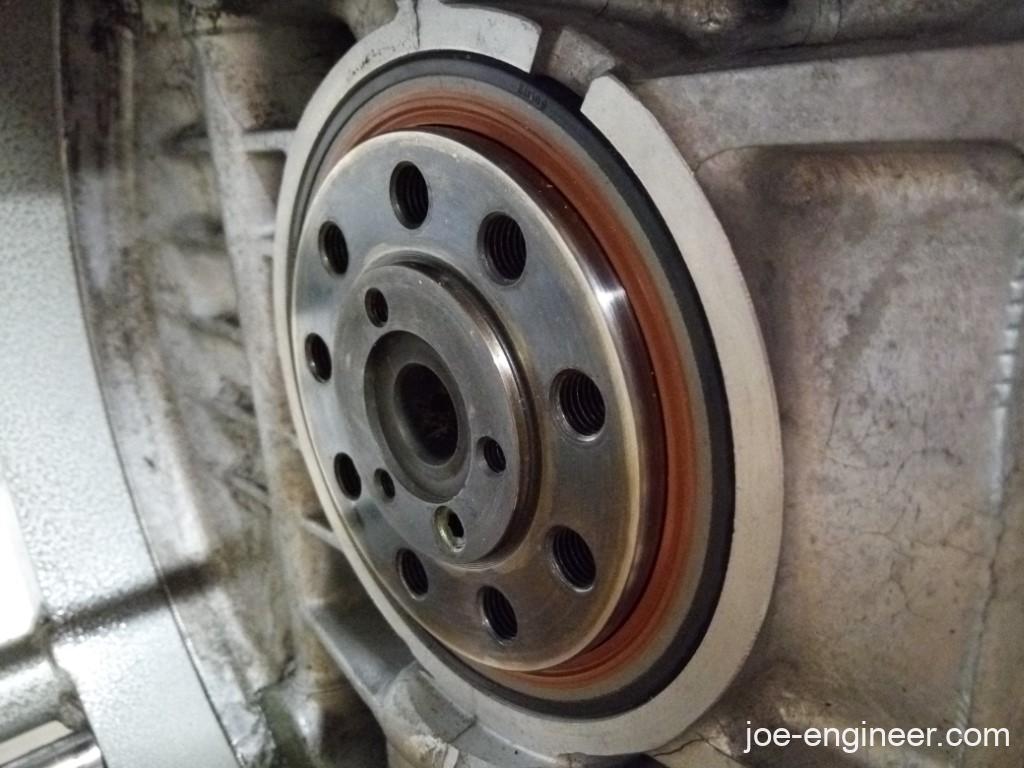
It was then time to install the main crank seal, but I did not have the expensive factory tool that bolts to the end of the crank and slowly presses it into the case. After doing a bit more installation method research I found that I could put it in a Ziploc bag and let it sit in the freezer for a few hours and this would shrink the outer diameter enough to let me press it halfway in with just finger pressure. Then I simply took a wooden dowel and a mallet to go around the diameter and gently tap it the rest of the way in until it was flush with the surrounding case surface.
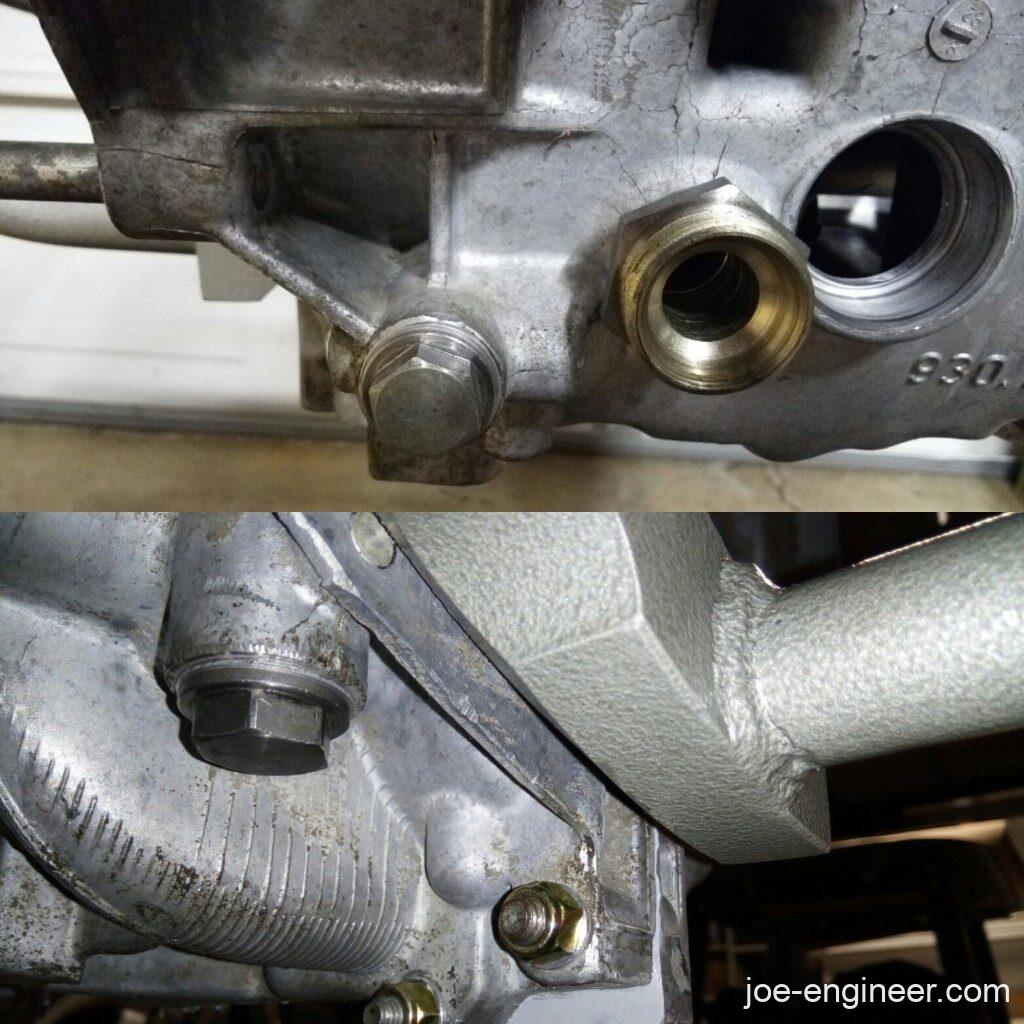
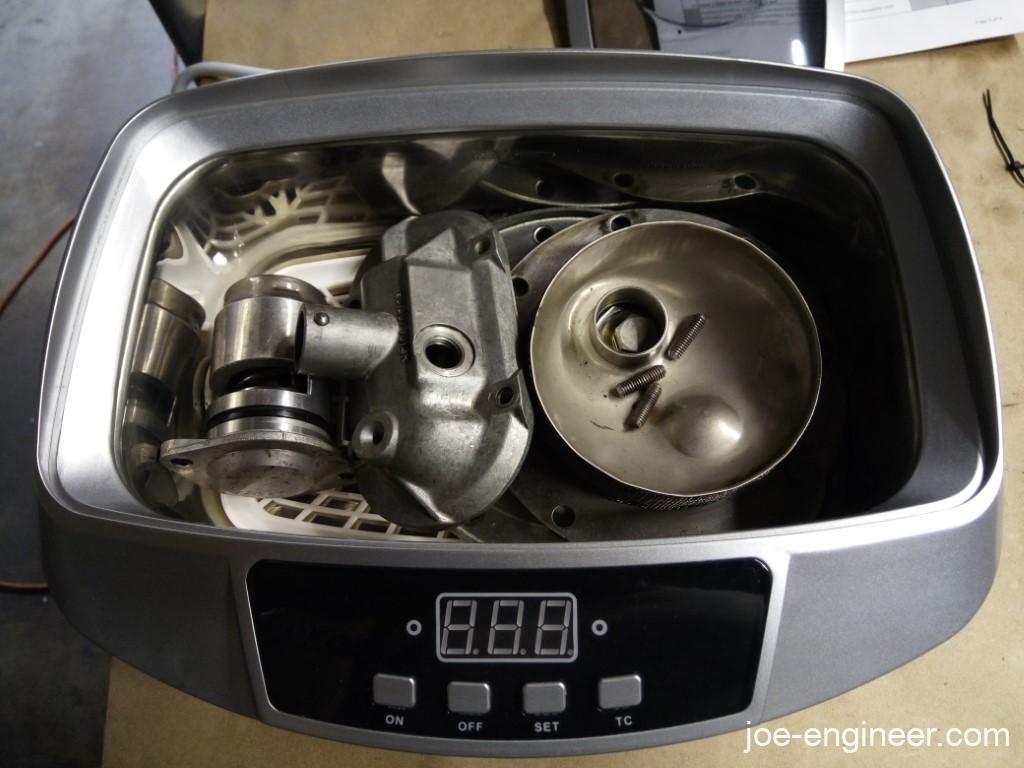
There was a small batch of parts I needed next but weren’t as clean as I would have liked. Those went into my trusty ultrasonic cleaner to get perfectly clean. These were the case-mounted oil thermostat, oil breather tower, and the sump drain plate. I cant stress how amazing this little machine is. Some water and blue Dawn dishwashing soap works 99% of the time, with an old toothbrush scrub on the 1% of times the parts don’t end up perfectly clean.
The thermostat cleaned up beautifully.
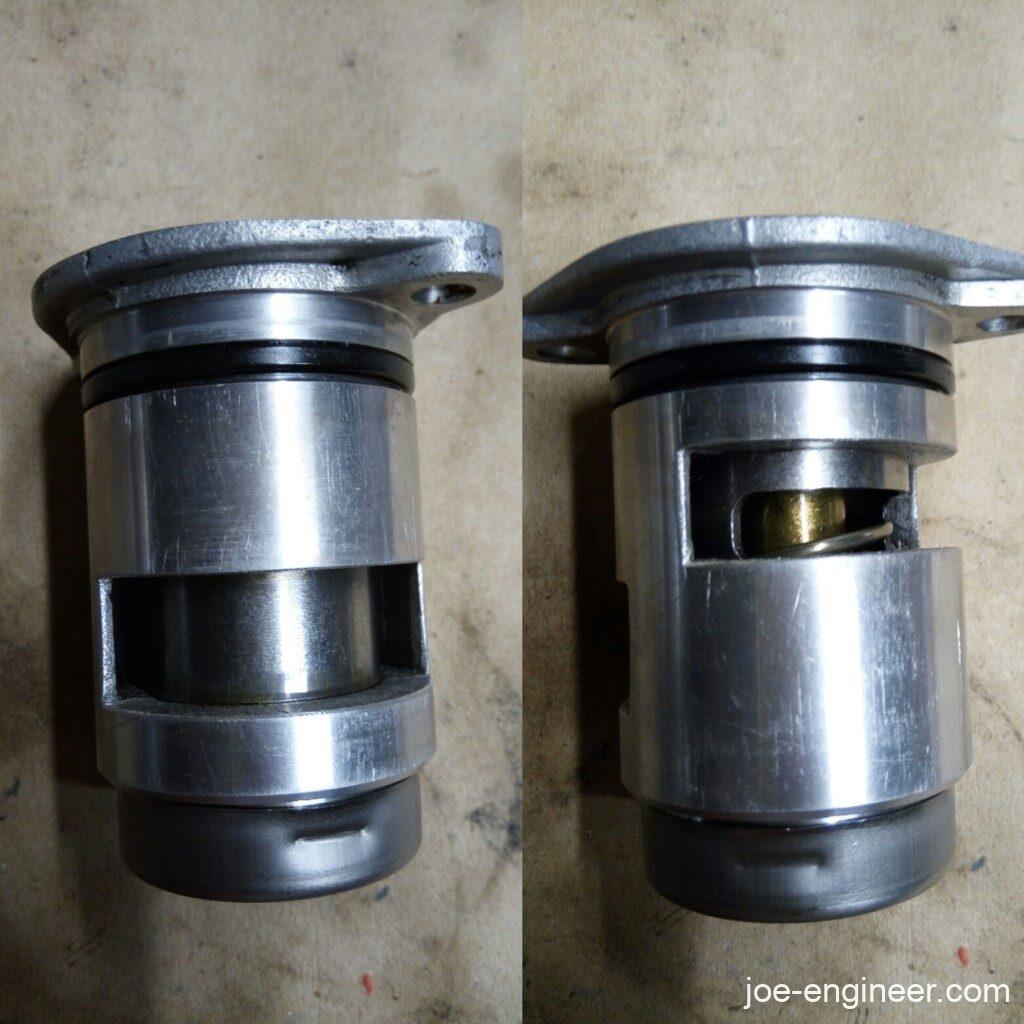
According to all my reading, these thermostats rarely fail but it was good practice to test one out as long as you had the opportunity to do so. I heated this one up in a pot of boiling water and watched it open, then air-cooled it to watch it close as shown below:
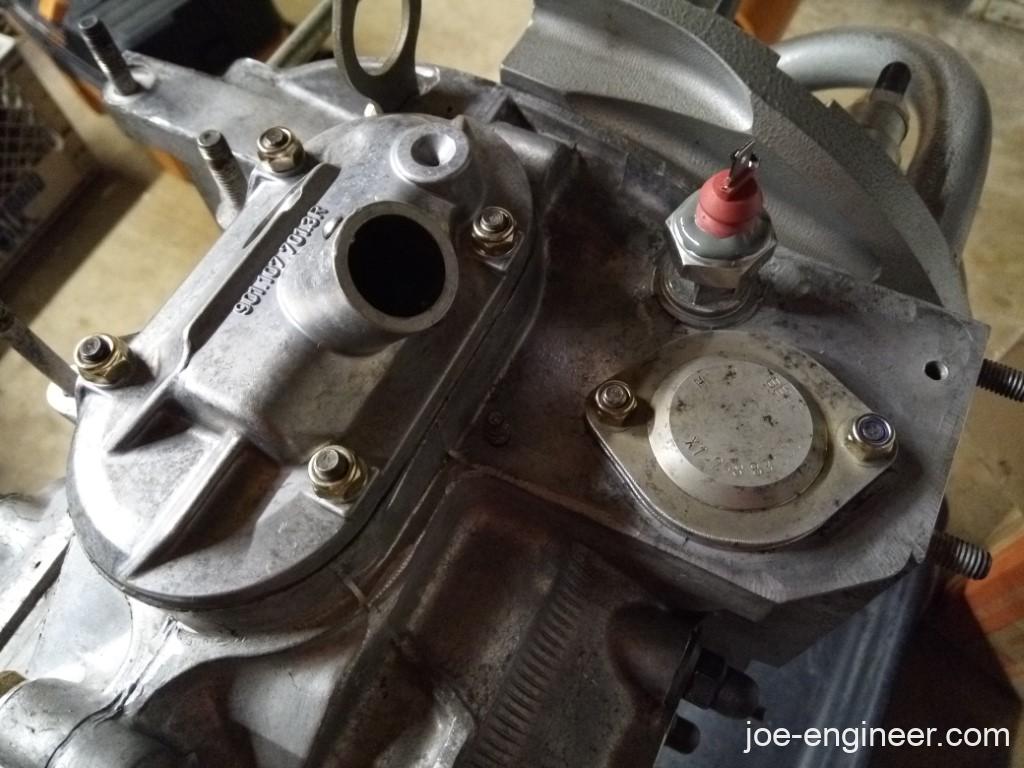
After confirming the thermostat worked, I put a new o-ring and gasket on it and re-installed it in the case. Then I put the breather tower back on and a new oil pressure switch with a bead of epoxy between the plastic and metal crimp to prevent any leaks there. I also tested that CIS temp switch on the breather tower to make sure it works. Hopefully this area known as the “Triangle of Death” stays clean as a whistle for many years.
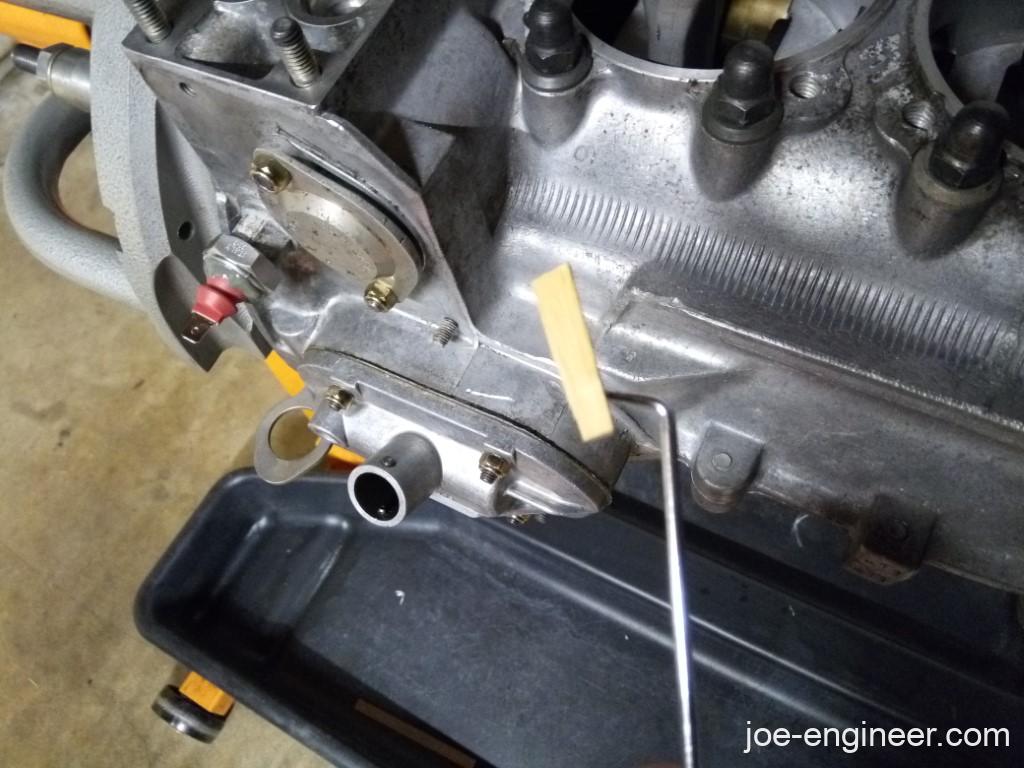
I had a small side adventure when the younger of my two little helpers (4 years old at the time) was in the garage with me while I was bolting on all these parts. In a split second, she picked up a tiny piece of wood that was on the ground and through the corner of my eye I saw her drop it in the case. Down down it went deep into the case beyond my reach. My heart dropped. I took a deep breath and remained calm as my little one saw that I was initially visibly shocked. I quickly reassured her not to worry and that everything was ok. I calmly took her back inside the house and went back out to go back into panic mode. Fortunately after peering in with a flashlight I was able to spot it, rotate the engine such that I could stab it with a pick and retrieve it. Disaster averted. For the remainder of the build I covered every opening with masking tape to keep foreign object debris (FOD) out. 🙂
The last external bits to install were the head studs. If you recall the upper head studs are steel and the lower ones are Dilavar ones which are prone to breaking. Mine had 1 broken stud which landed me in this rebuild adventure in the first place. The usual fix is to throw away the Dilavar studs and install steel ones on the bottom as well. I reused my 12 original steel studs and bought 12 new steel ones. Although highly unlikely but just in case there are any alloy differences in the old and new ones that would cause the thermal expansion to vary, I decided to install all the old studs on one side of the engine and all the new ones on the opposite side, that way each cylinder bank expands and contracts evenly. Probably overkill but it helps me sleep better at night.
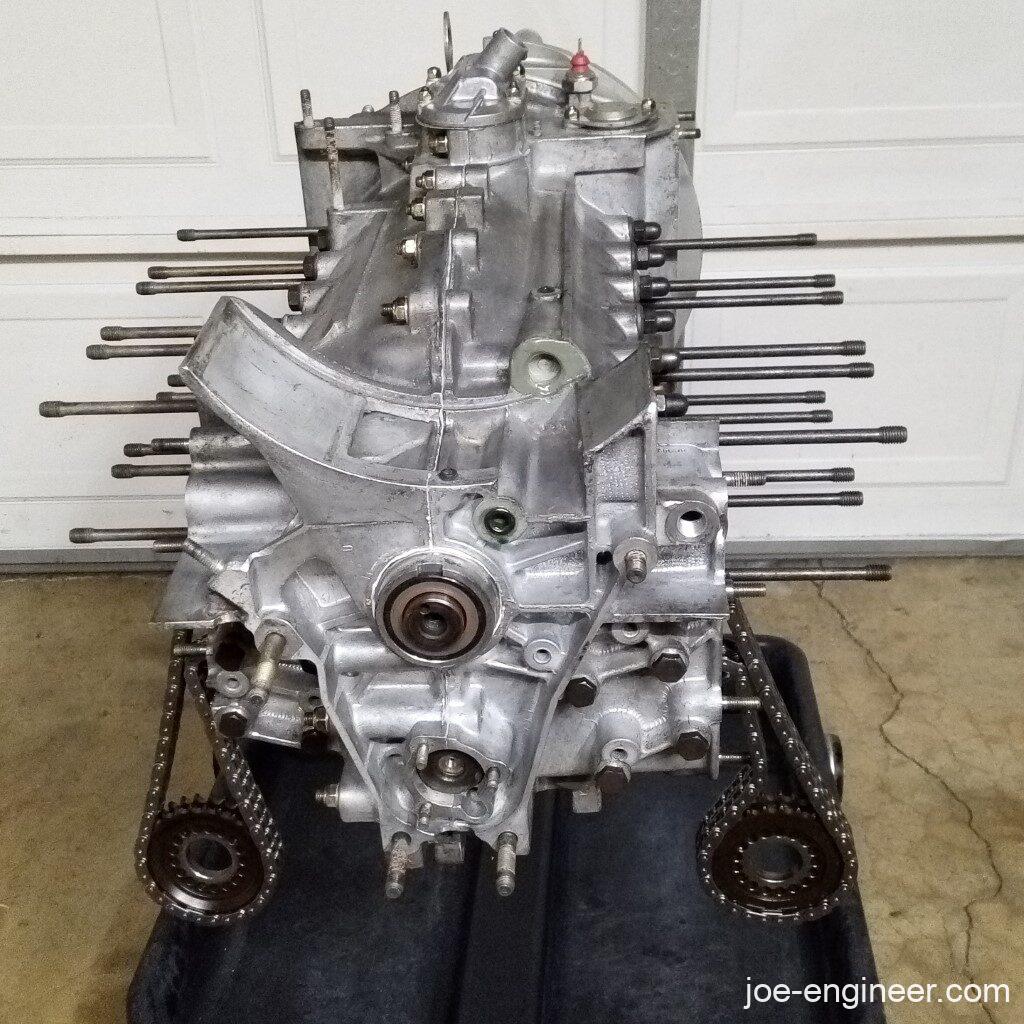
After installing all the studs at the correct height, I grabbed a bunch of rubber bands and did the obligatory crank spin.
One last note from the case assembly. Remember how I didnt take a picture of that oil pump seal that goes between the right case half and the oil pump? Well I found a way to verify externally that it is in fact present by looking in the lower hole where the engine oil cooler gets mounted.
On to pistons and cylinders next.