
Porsche 911 28-Tube Brass Oil Cooler Upgrade
Here’s how I upgraded from a trombone to tube-style oil cooler.
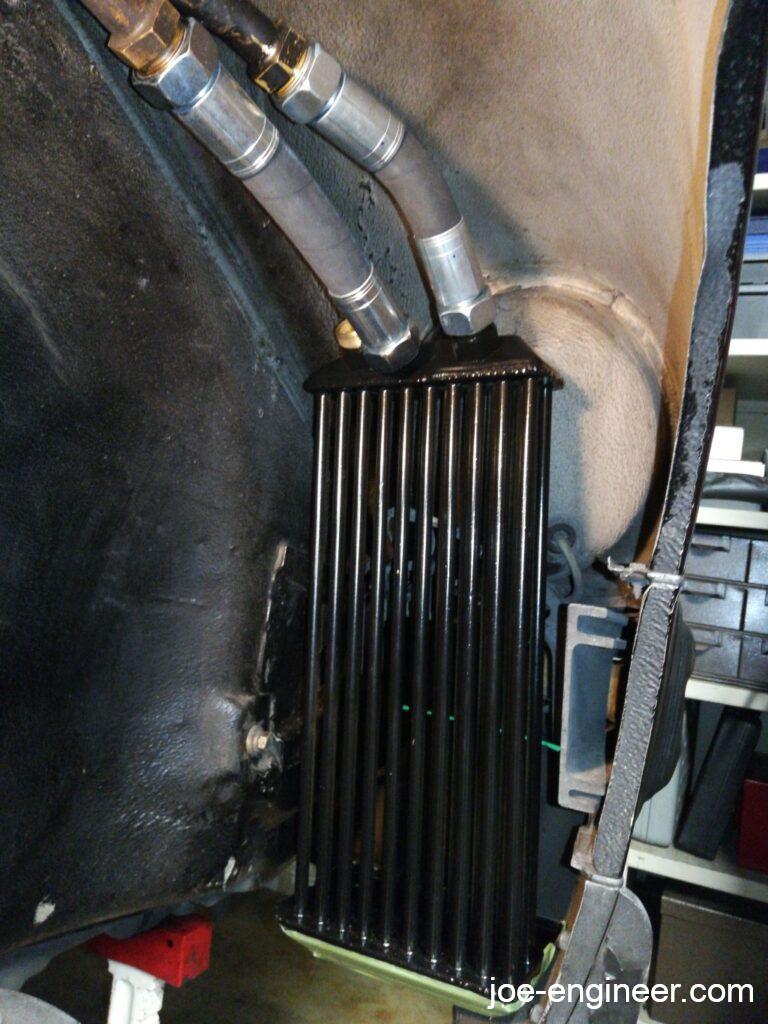
Since I had my external oil cooler system apart why not take the extra step to upgrade my old trombone oil cooler to a 28-tube version? If you need to catch up on why I chose the 28-tube cooler over the Carrera cooler with the fan, read this. Even though this is an OE part used on 911s for a short time, it didn’t quite bolt right in. Here’s how I installed mine.
Disclaimer: This procedure is for reference only. My final cooler mounting dimensions may not necessarily work for your car so please do not copy them verbatim. Instead follow the general thought process to determine the best cooler mounting position for your car and verify your own mounting method and final tire clearances. If you are mounting a Carrera cooler kit, the bracket mounting method itself is similar but the cooler assembly is completely different. If your Carrera cooler kit comes with its own mounting instructions please follow those instead.
Oil Cooler Mounting Objectives
When this oil cooler is mounted in its final location it should achieve the following:
- Achieve good tire clearance at all steering angles and suspension travel
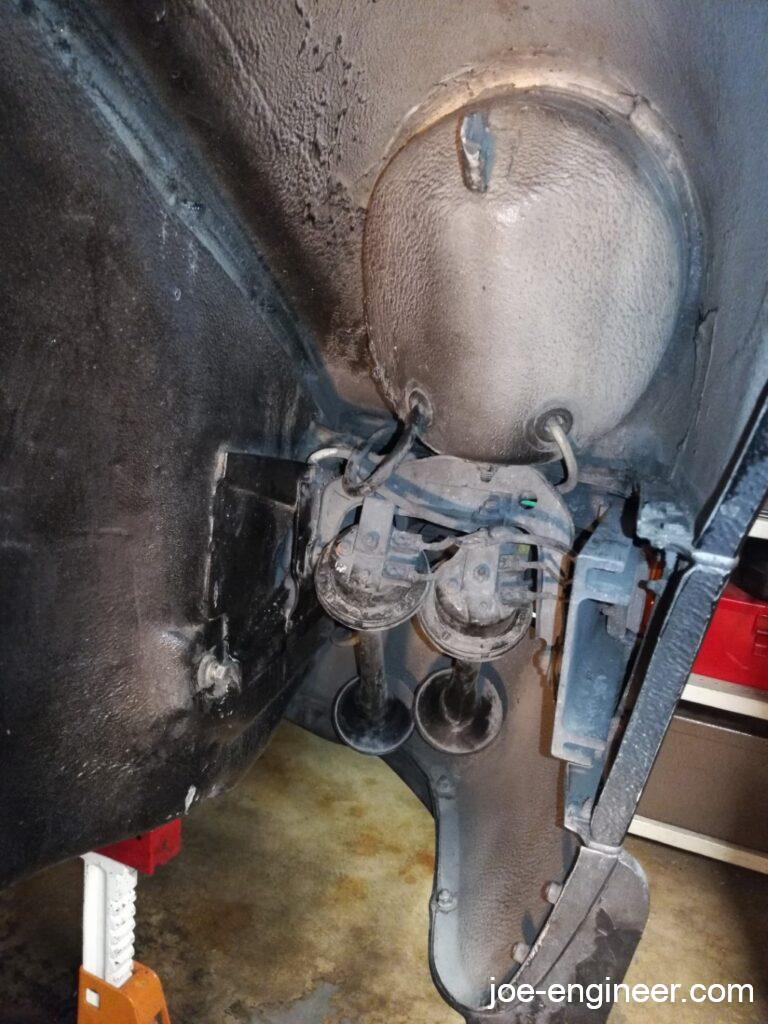
- Clear the horns located directly in front of the cooler
- Utilize the upper mounting hook (behind the headlight bucket) used on the trombone cooler
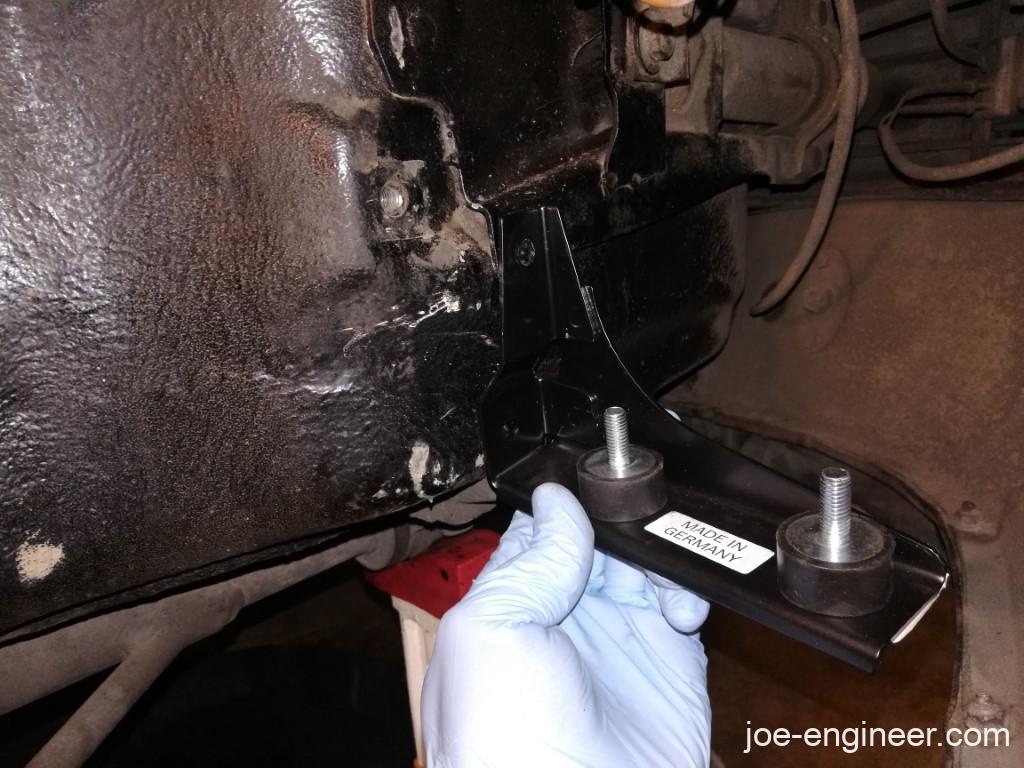
- Utilize the factory lower Carrera oil cooler bracket (which will have to be added to my car)
- Bolt to the short OE front oil lines
Mounting Challenges
Some of the difficulties of mounting this cooler on my 911SC were that the car didn’t have any pre-existing mounting provisions for the factory lower bracket required to support the cooler.
The surface of the inner fender well seemed like it approximately lined up with the profile of the factory oil cooler bracket. However I could not find exact dimensions for the location from any reliable source. I was going to have to figure them out myself and hopefully drill (or weld) only once.
Another difficulty is that a pair of new front hoses are stiff and very difficult to both get mounted on a cooler that is not solidly mounted to the car.
One option is to connect the short one, locate the cooler as best as possible, drill & mount, then later muscle the longer hose in place, making sure it is long enough to reach both threaded ends. If you can get them both on, then by all means do so.
Lower Bracket Mounting Process
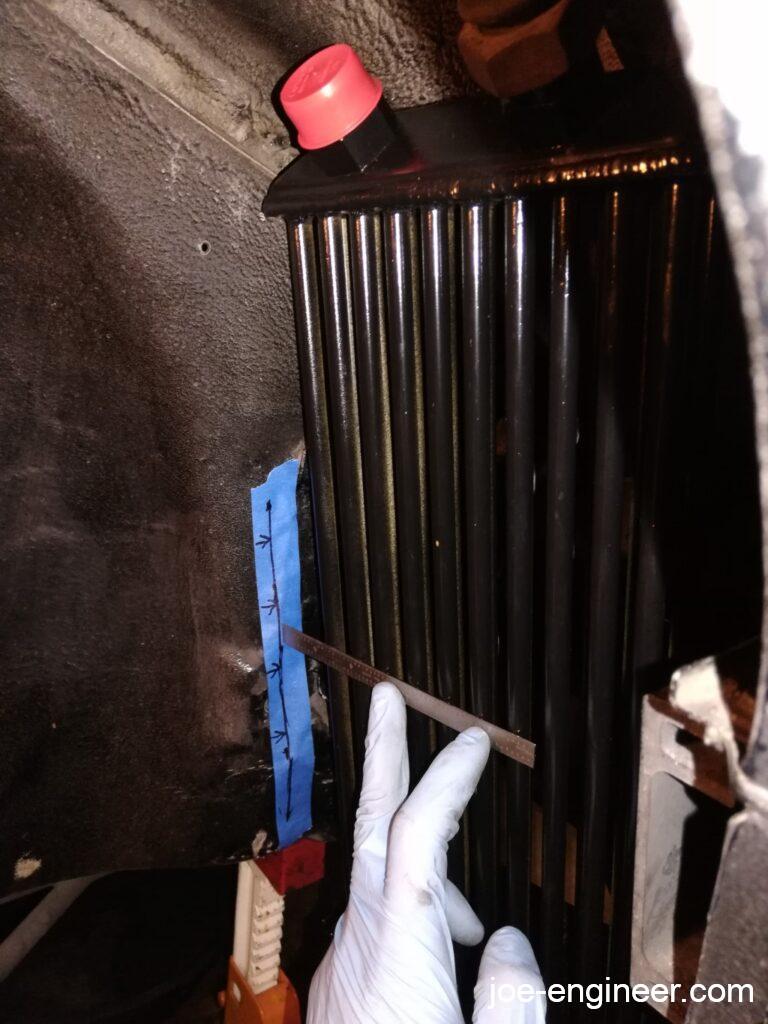
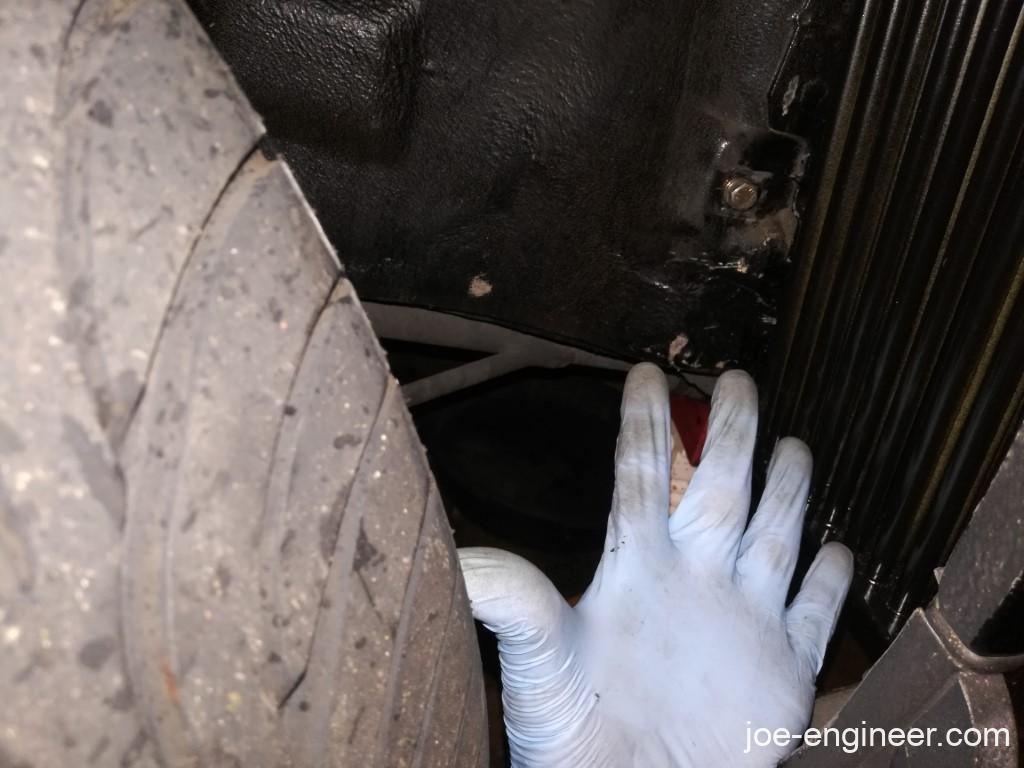
I temporarily hooked up both oil hoses to the top of the cooler and bolted the lower bracket and rubber buffers to the bottom of the cooler. Then I hung the cooler from the upper mount with another rubber buffer. I put masking tape on the inner fender well surface so I could mark off the oil cooler location using the angle and face of the tubes closest to the tire.
Through trial and error I rotated the cooler about the top hook, put the wheel and tire back on, cycled the steering wheel through its entire travel, and checked the cooler to tire clearance. An extra pair of hands is super helpful to mount the wheel and turn the steering wheel while you hold the cooler in place and check clearance. Or you could leave the wheel and tire turned in whatever position provides the worst case clearance and work off that position knowing that is your minimum tire clearance.
I found a good lower bracket location that does everything right: It lets me use the upper hook mount, clears the horns, and has good cooler-tire clearance at all steering angles. As others found in the forums, the lower bracket top hole is a thru hole into the frunk and the lower hole requires a nutsert because it ends up in a blind body cavity. I suppose both could be nutserts if you wanted to go that route as well.
I was then able to mark off a final cooler location that worked well and gave me the clearances listed above.
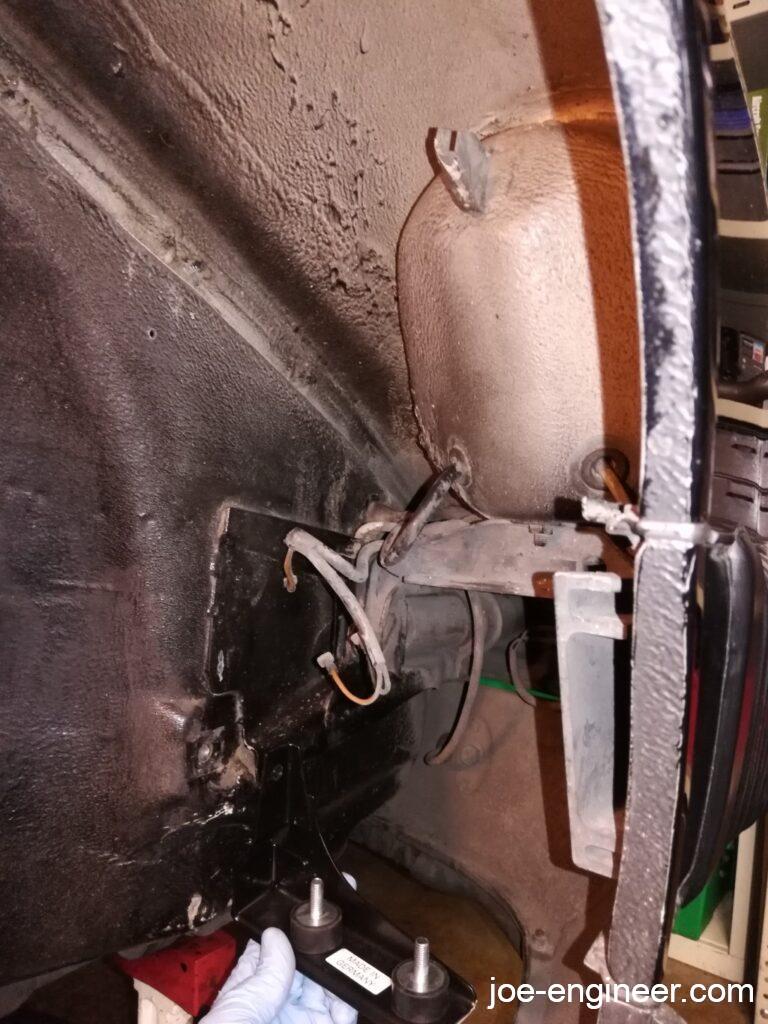
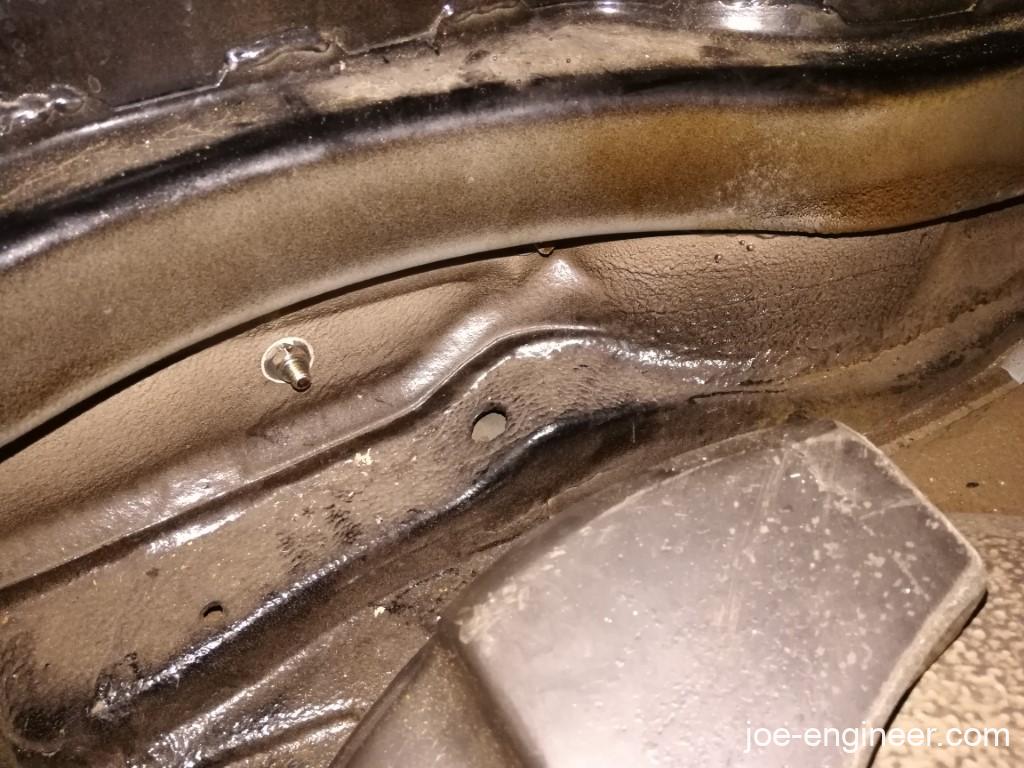
The position that worked out tucks the top corner of the bracket under the lip in the inner fender well you see here. Since the bracket cantilevers with a heavy cooler on it, this will only serve to make the bolted connection stronger as it is less likely to pull away at the top.
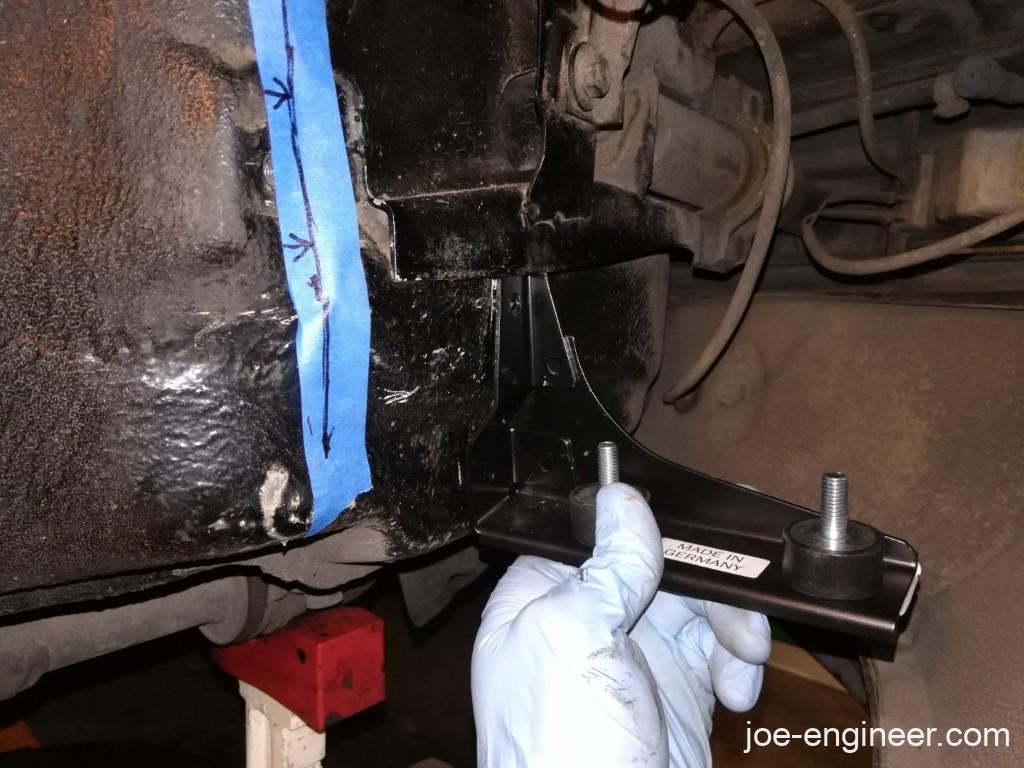
Using the cooler location tape line, I lined up the cooler in its final position with one hand and then scribed the lower bracket location with the other. Then I removed the cooler and set it aside to scribe the bracket holes, center punch and drill both holes out.
Rivnut Installation
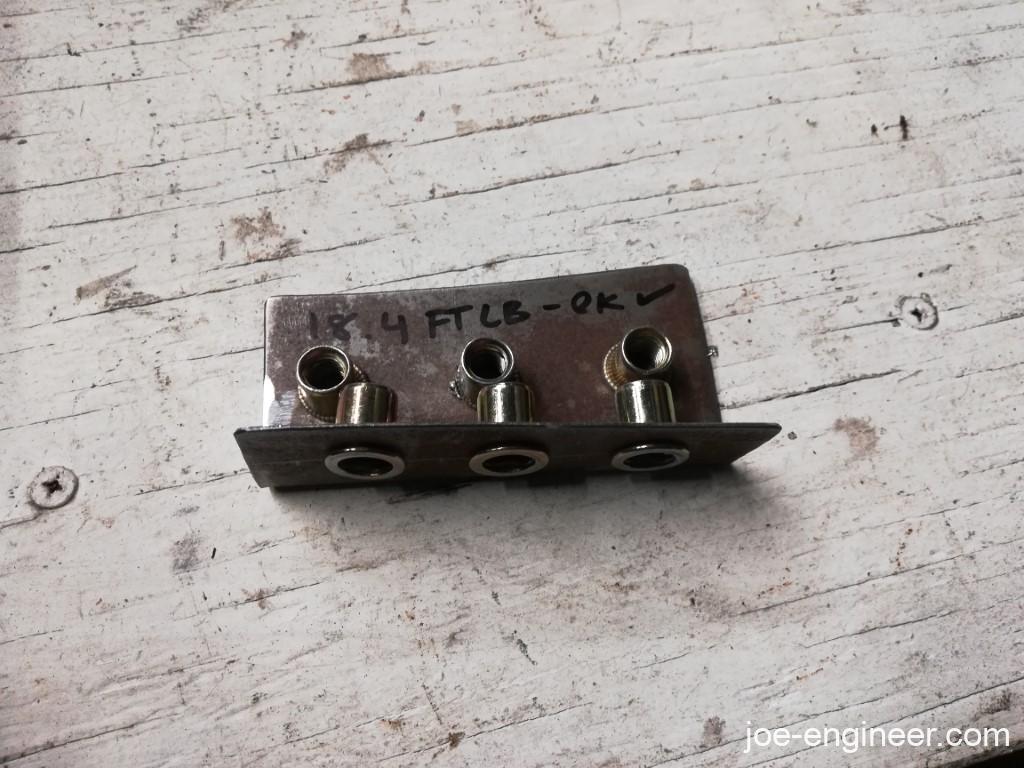
I decided to install a M8 zinc-plated steel rivnut for durability but I didnt want to spend money on a giant expensive rivnut tool that was just going to take up space in my toolbox so I fashioned a tool using an M8 bolt, a nut, a washer, and a couple of wrenches. Before screwing up on the car, I drilled 6 holes in a piece of sheetmetal and practiced installing a few rivnuts first. I successfully installed all 6 steel rivnuts using the hardware and wrenches mentioned. As an added bonus I was able to torque an M8 bolt in each test rivnut to 18.4 ft-lbs (25Nm), which is the generic torque spec for an M8 coarse thread nut in the Wayne Dempsey Engine Rebuild Book. I then felt ready to try it on the car.
I put the nut and washer on the threaded end of the bolt, threaded the rivnut onto the end of the bolt so it engaged all the rivnut threads, and inserted it into the hole. I held the bolt static and cranked down on the nut to start to collapse the rivnut. If the rivnut spins in the hole, tilting the bolt slightly will cause the rivnut teeth to bite into the edge of the hole and prevent it from spinning. Then the rivnut will start to collapse and bite further around the hole perimeter. Then you can straighten out the bolt and keep steadily turning the nut until you feel the rivnut fully squeeze shut. Then back off the nut slightly and screw the bolt out.
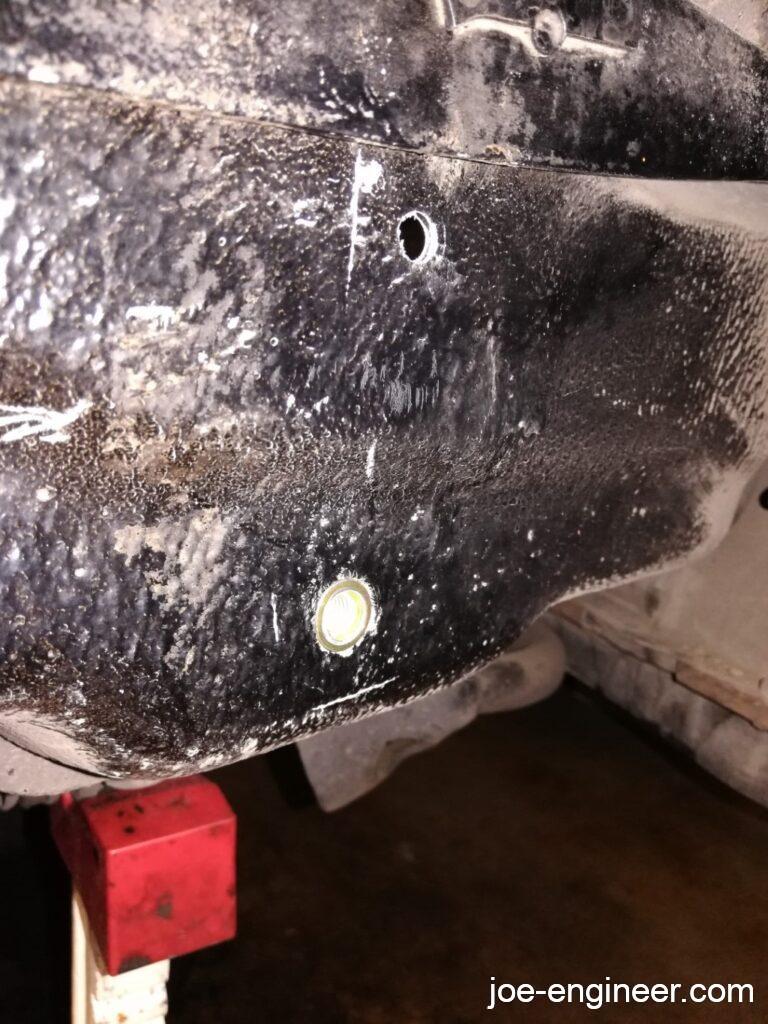
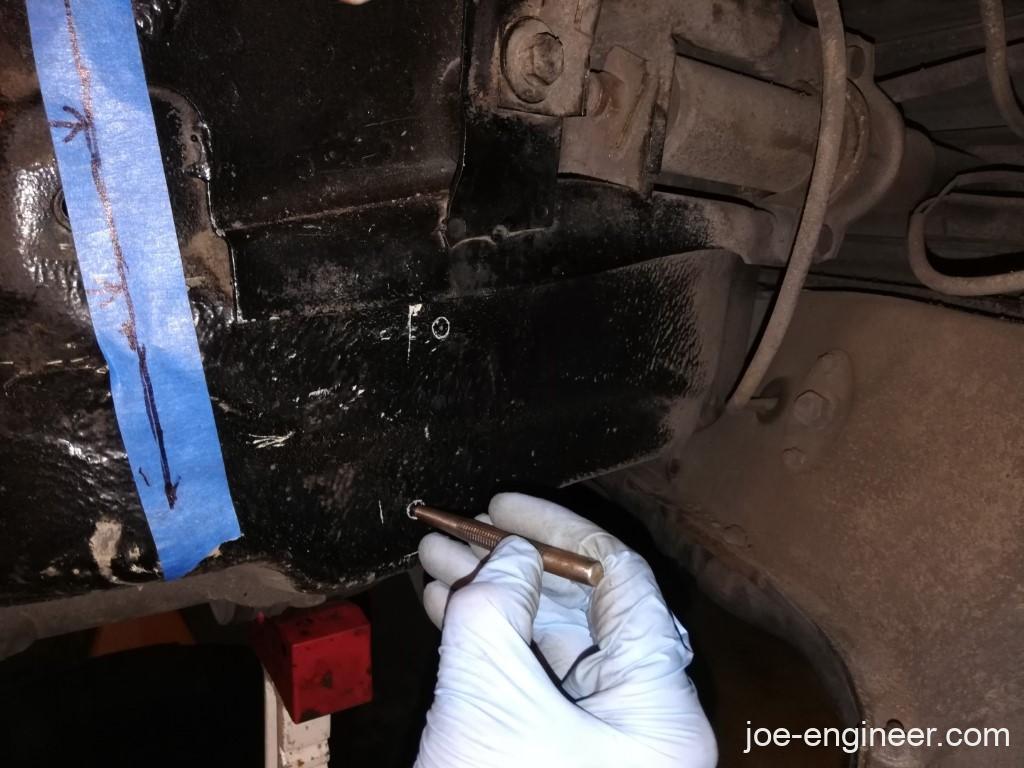
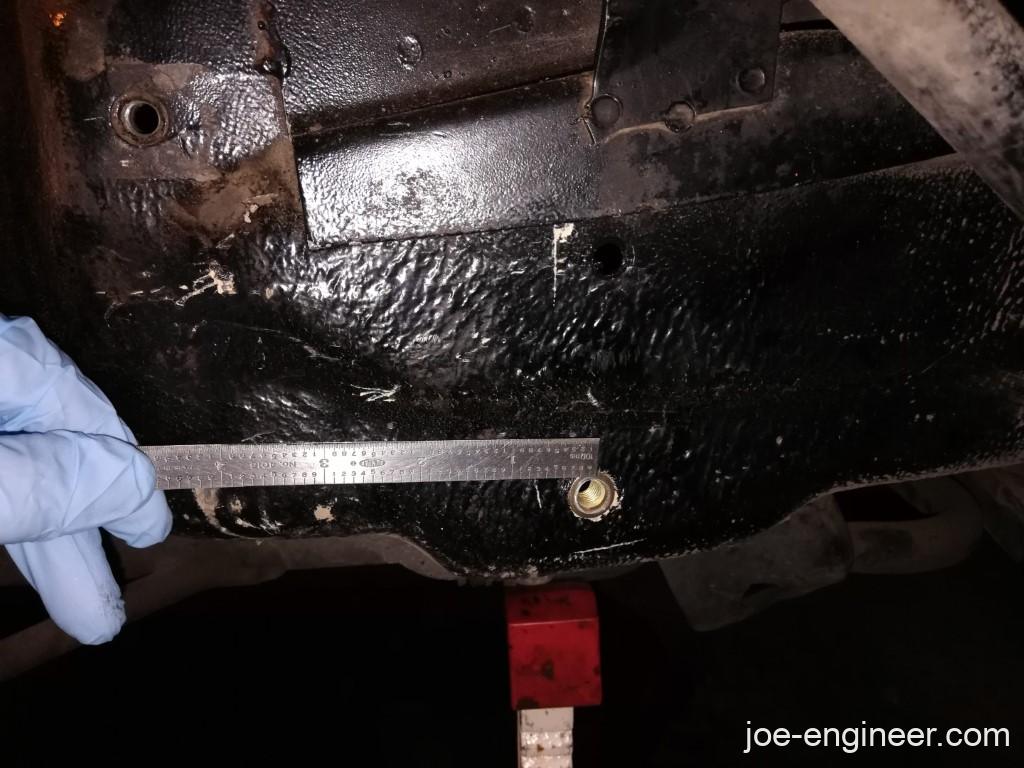
Here are very rough hole locations for my US market 83 911SC originally equipped with a trombone cooler. If you plan to do this to your car, I suggest you use these only as a reference and verify all your clearances in case there are variances from car to car. The hole near my thumb is for the trombone cooler bracket. Ignore that one. The center of the top hole to the corner of the sheetmetal lip is about 3 inches.
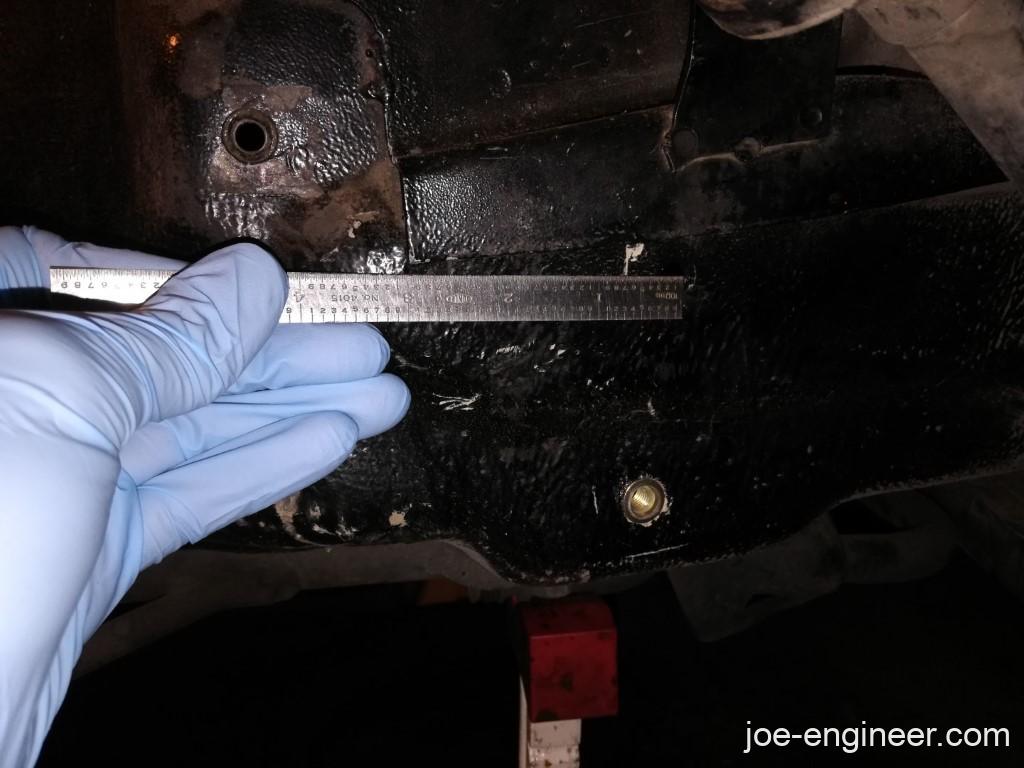
The center of the rivnut hole to the corner of the sheetmetal is a bit over 3 inches, maybe 3 1/8″. The bracket and cooler are definitely inclined slightly so the top of the cooler is leaning towards the back of the car. The height of both holes is driven by the bracket itself so I did not list those dimensions. As mentioned before I shoved the bracket upward so the top wedged itself inside the sheetmetal lip.
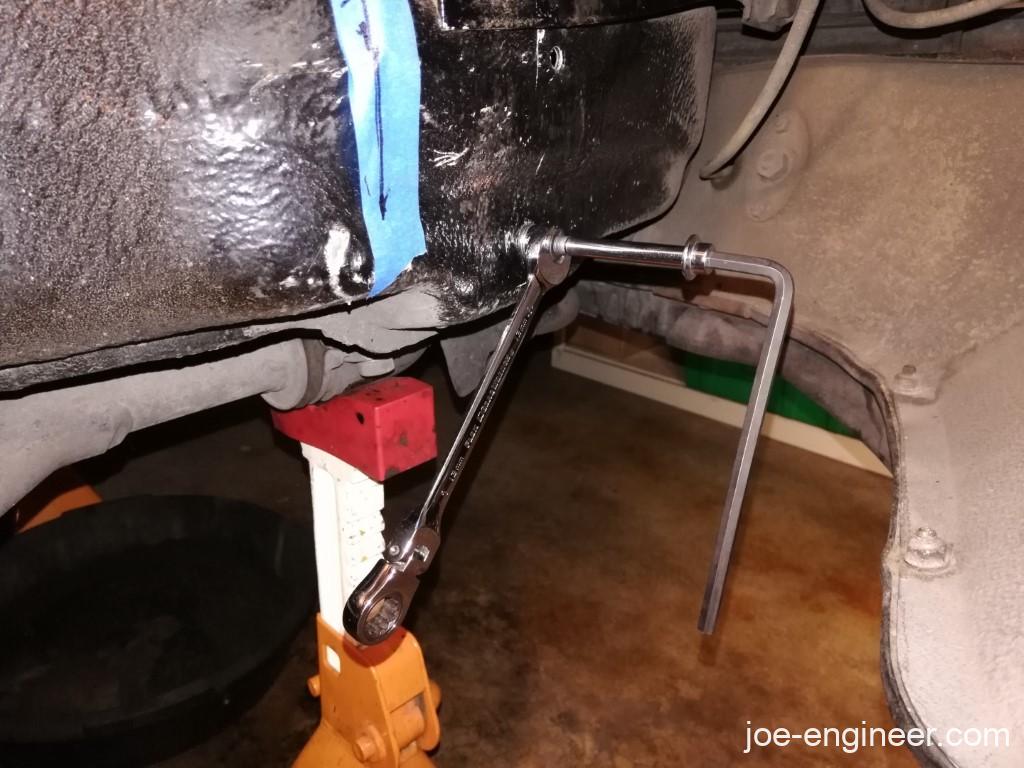
Then I final installed the bracket. I put a large fender washer inside the frunk at the top hole with a nylock nut and blue loctite, then tightened as hard as I could by hand (higher than 25 Nm for sure).
The bottom bolt is torqued to 25 Nm. Once I get the car on the road I may get it permanently welded in by a professional.
I re-installed the trombone cooler mounting bolt with Loctite so I wouldn’t have an open hole into the frunk.
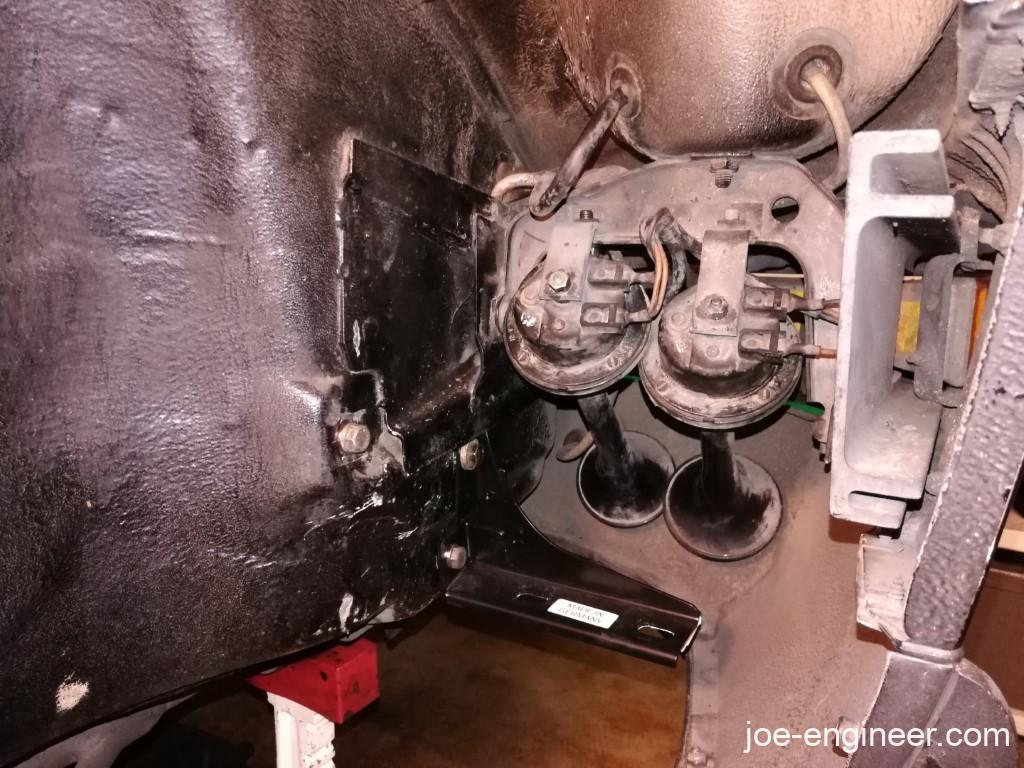
Horn Repositioning
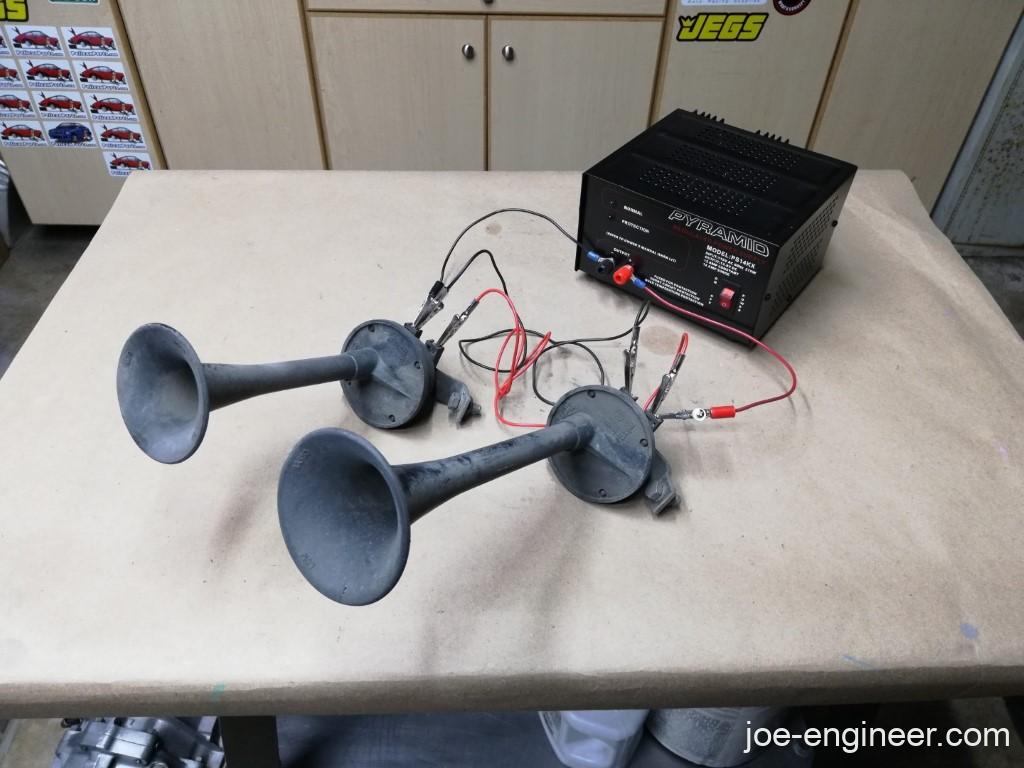
The mounting tabs for the horns were each bent forward a few degrees in order for the back of the horns to clear the front of the cooler. I took the horn units out and bent the mounting tabs while they were in place with some pliers. While I had the horns out I cleaned them up a bit and gave them a bench test run as I had never heard them before.
The horn trumpets now fire into the front valence instead of the ground, but they are still as loud and effective as before.
Final Assembly
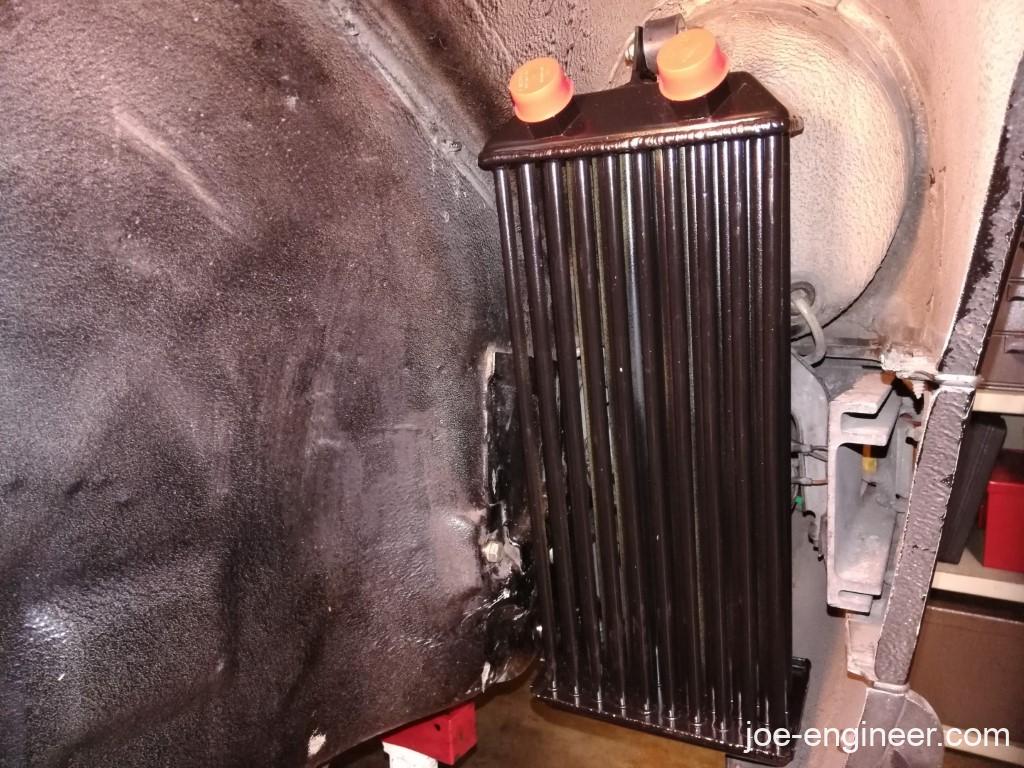
The cooler fit perfectly with the 2 rubber buffers below and 1 above, hanging off the headlight bucket hook.
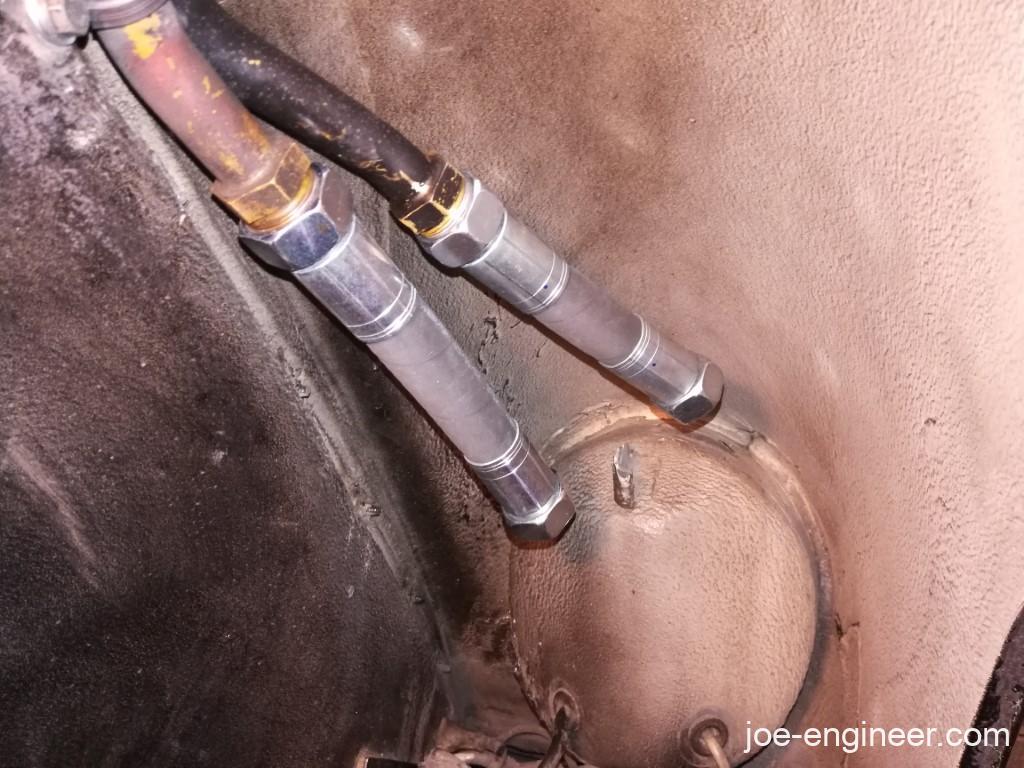
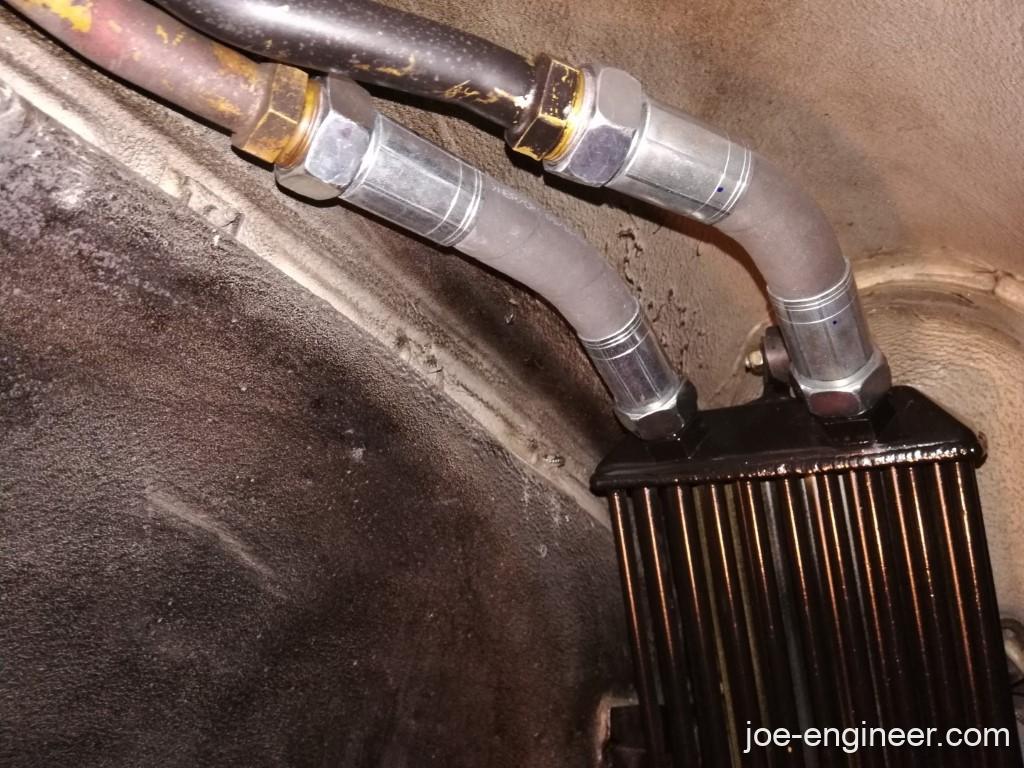
After my lesson learned connecting the external thermostat oil lines, I first hooked up the inner line with anti-seize and tightened.
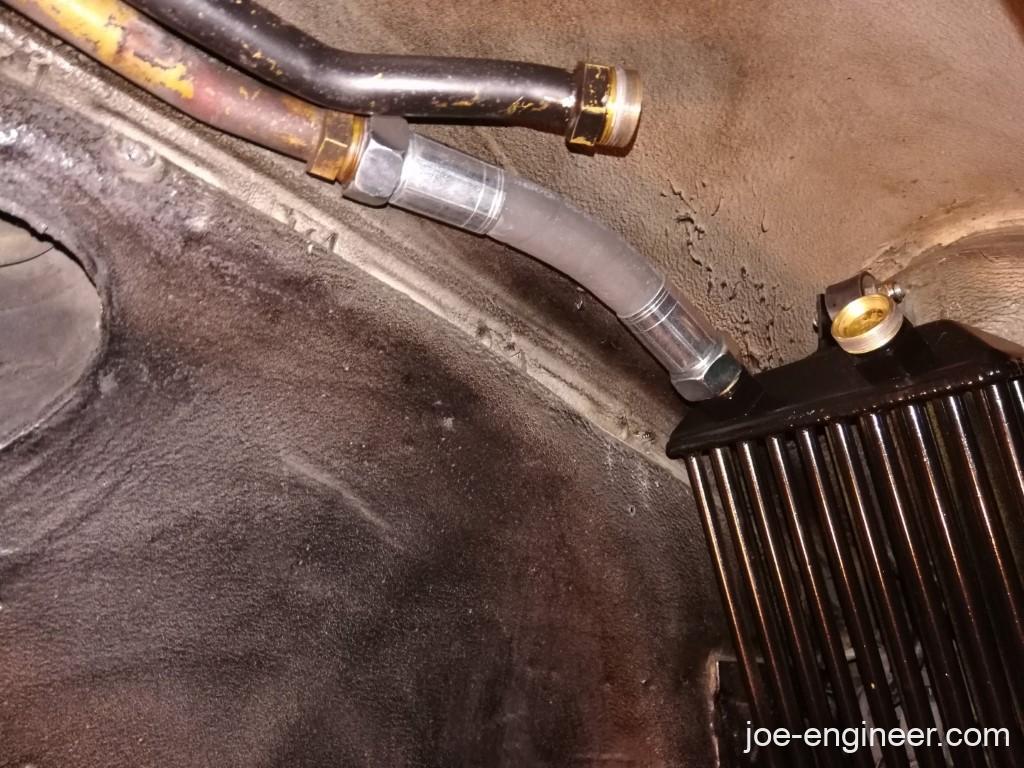
Then I followed with the outer line and I was done.
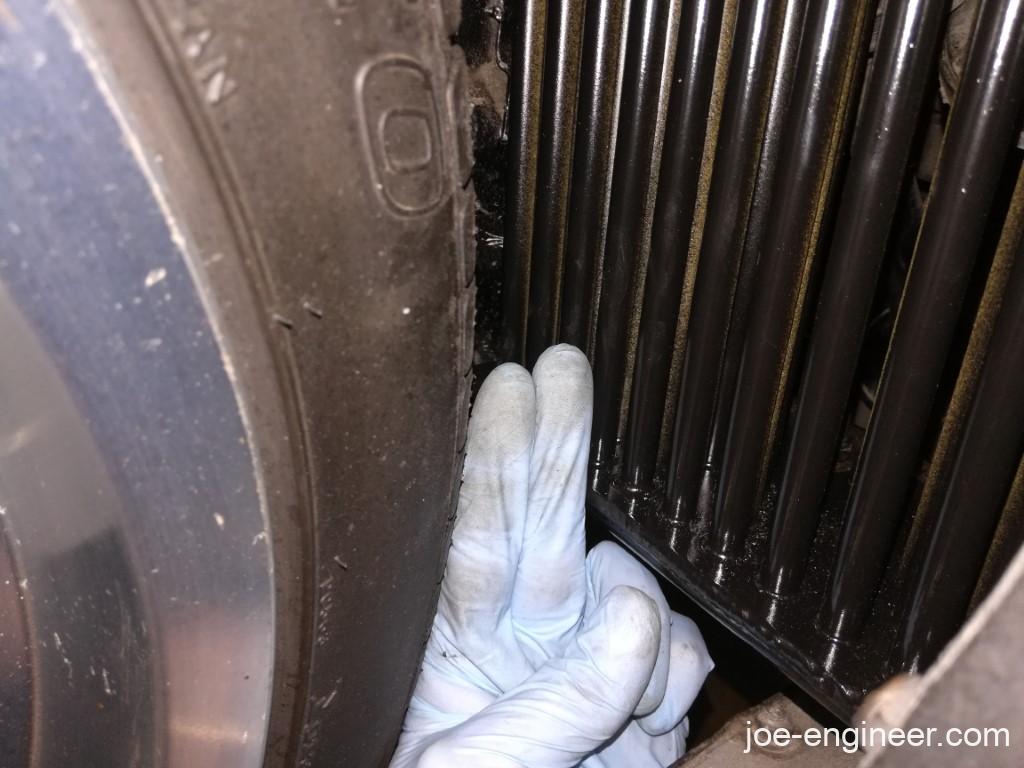
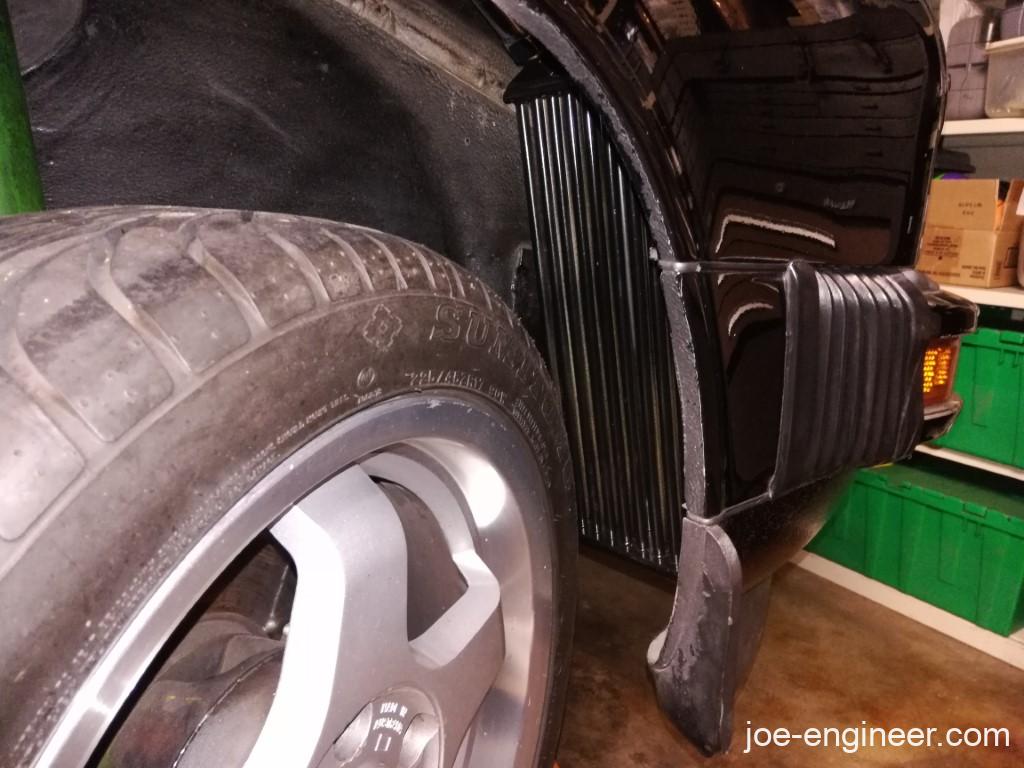
Here are my final minimum and maximum tire clearances at full suspension droop. The closest point to the tire is the base at the bottom of the tubes. Here it has a small horizontal ledge that protrudes towards back towards the tire. Regardless, minimum clearance is not too bad.
That’s it! This was not too challenging other than making sure you take your time measuring at the beginning. I cant stress how important it is to multiple-check all your measurements before you drill any holes (or weld) and mount the lower bracket.
As long as we are doing plumbing, next time I will cover replacing the original fuel lines that go down the center tunnel.