
DIY: How To Replace The Headlights on a Classic Air-Cooled Porsche 911
The classic air-cooled Porsche 911 has very outdated lighting by modern standards. Increase nighttime visibility and safety with this easy DIY.
Note: The following information is for educational use only. Before proceeding please read my disclaimer page.
Disclosure: This post contains links to Amazon products and other trusted vendors. As an Amazon Associate I earn from qualifying purchases.
The US-spec air-cooled Porsche 911 came from the factory with very poor lighting due to DOT regulations requiring sealed beam headlights on all cars up to model year 1983. Fortunately they are very easy to upgrade to H4 headlights with replaceable halogen bulbs while keeping the US-style appearance or you can take it a step further and go with the European-style H4 headlights assemblies with the same amount of effort. Read on to learn how.
Model Years Applicable:
All Porsche 911 cars up to 1989. The procedure shown here is on a US-spec 1983 911SC.
Tools Needed:
Parts Needed:
If replacing existing sealed beams:
- One pair of sealed beam headlights
If upgrading existing sealed beams to US style H4 headlights:
- One pair of H4 US-style headlight housings
- One pair of H4 bulbs
If upgrading to European style H4 headlights:
- One pair of Euro-style H4 headlight assemblies
- One pair of H4 bulbs
As needed (if yours are damaged):
- H4 wire harness plug
- Headlight assembly seal
- Aftermarket headlight relay kit
Installation Procedure:
Note: If you are increasing the wattage of your factory headlight bulbs it is strongly recommended you install a headlight relay kit beforehand. These are typically inexpensive, very easy-to-install aftermarket kits that will protect your factory wiring from potential fire and increase the brightness of your bulbs. These are out of scope for this procedure but an internet search for “Porsche 911 headlight relay kit” will point you in the right direction.
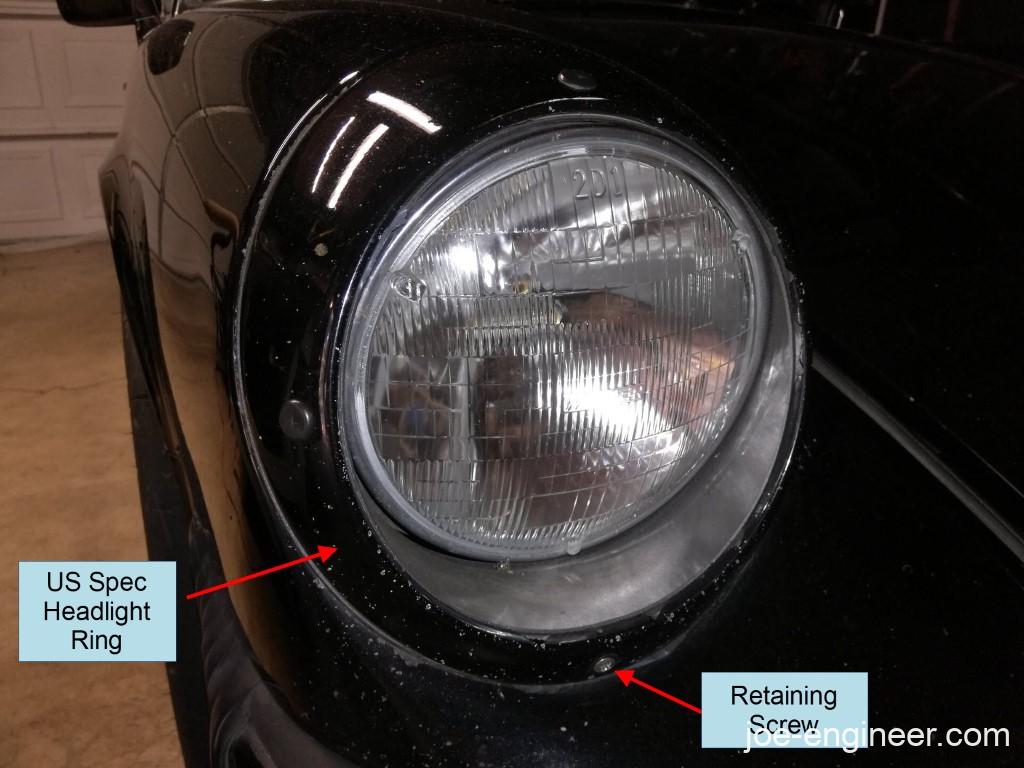
Step 1: Remove Headlight Outer Ring
Remove the headlight ring retaining screw at the bottom of the headlight retaining ring.
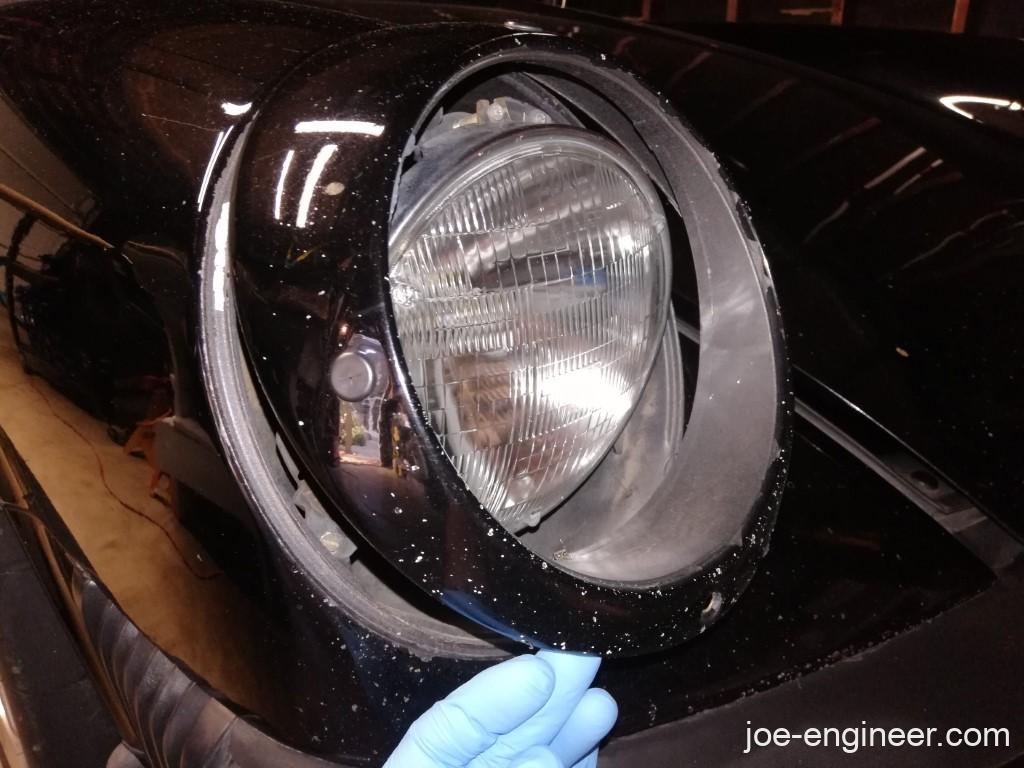
After removing the screw, lift the ring off by rotating off the bottom edge and pulling the ring up off the top edge of the headlight opening in the front fender. If you have US-spec lights only the outer ring will release; if you have Euro-spec lights, the whole headlight housing will rotate off so release them carefully and skip to step 3 of this procedure.
Step 2: Remove Headlight Inner Ring and Housing
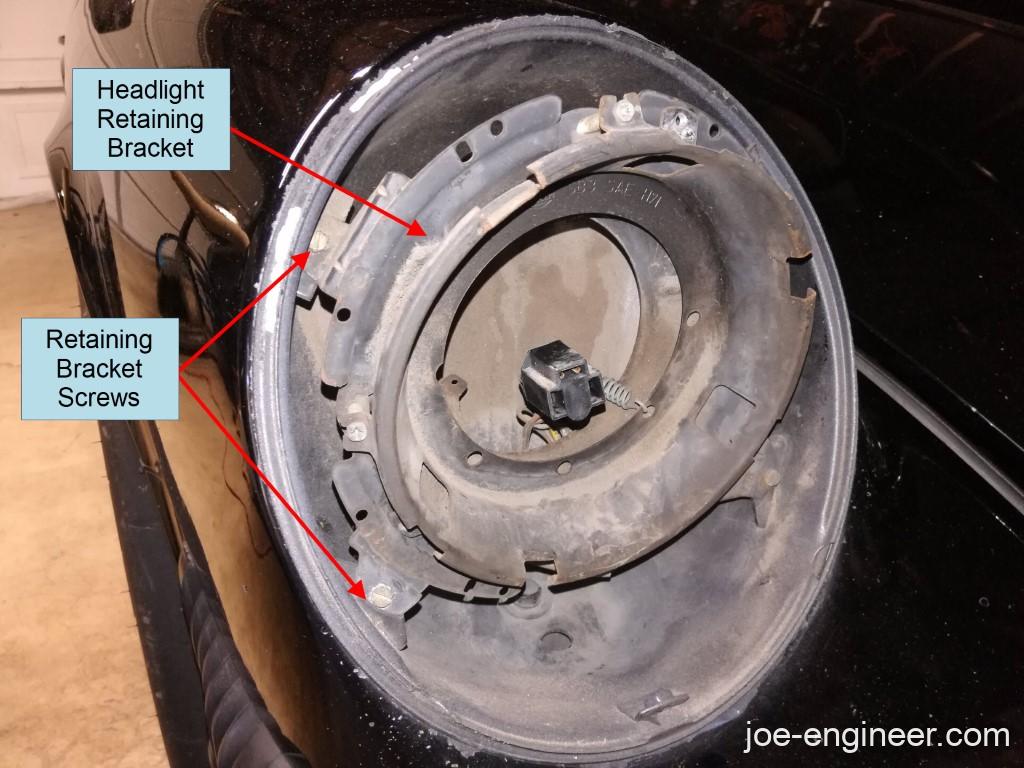
If you have US-spec headlights, either sealed beam or H4, you will find the round headlight housing secured in place with an inner ring. Carefully remove the tiny screws holding the inner ring in place. On the 911SC there are 3 tiny screws evenly spaced around the ring. Be careful not to strip them.
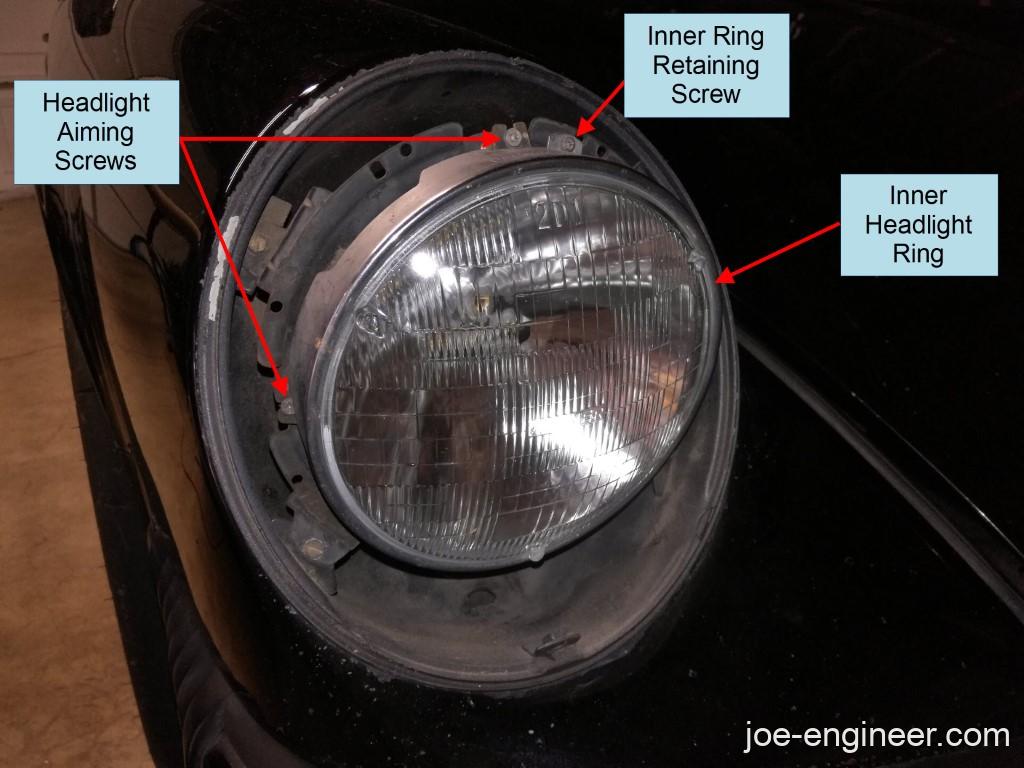
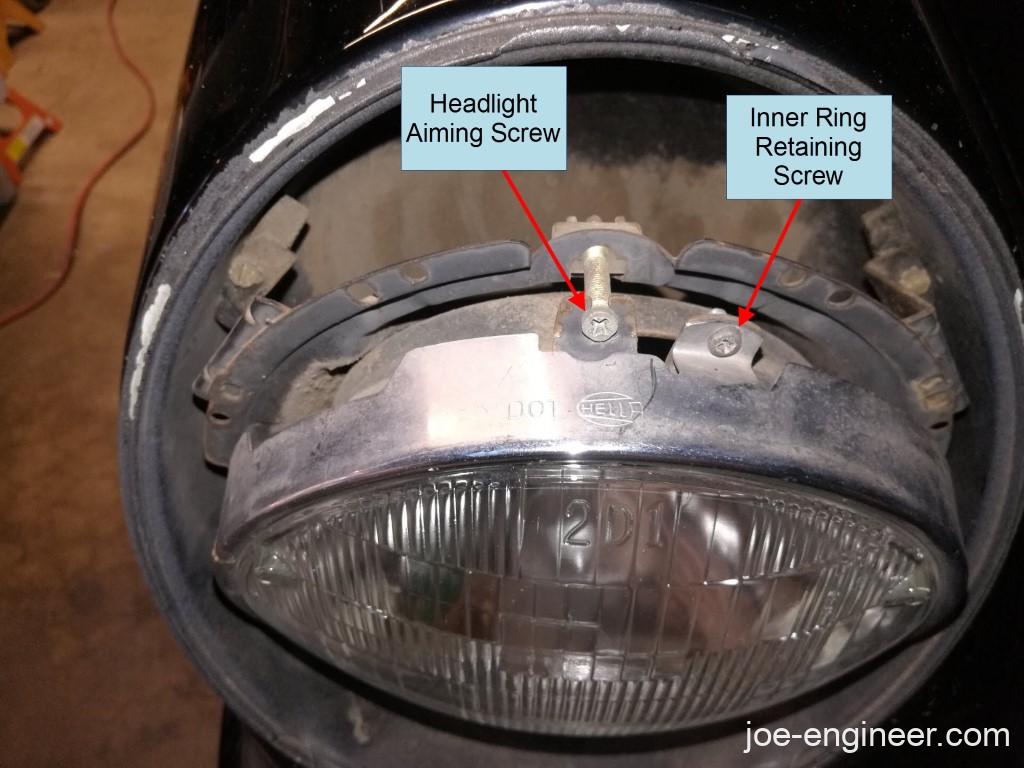
Note: make sure you are removing the retaining ring screws and not the aiming screws otherwise you will disturb the position of your bulbs and will need to re-aim them properly.
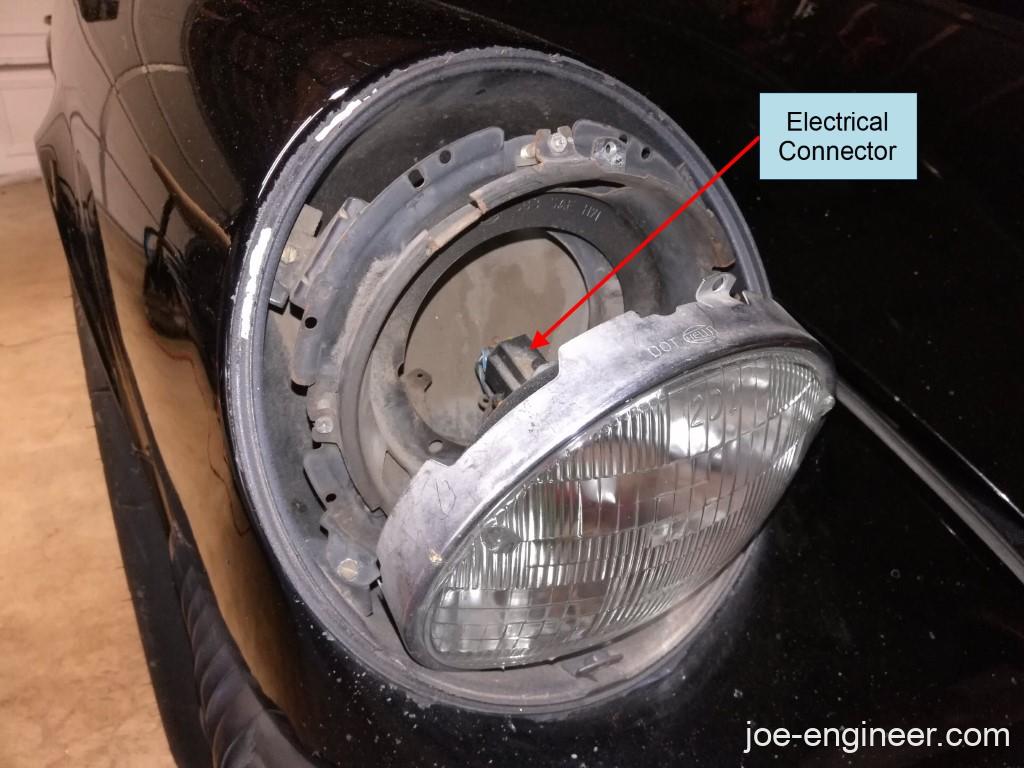
As you remove the inner ring, the glass headlight housing will also drop out. Reach behind the headlight housing and pull off the electrical connector.
Note: If you are upgrading to Euro-spec housings, at this point you will need to remove the entire headlight retaining bracket inside the fender headlight bucket. It is held in by 4 screws on the tabs inside the headlight bucket.
Check the condition of the electrical connector and wiring. It is common for the wiring to be frayed or the connector to be melted. If either is damaged you may need to splice in a new connector.
Step 3: Replace Headlight Housings and/or Bulbs
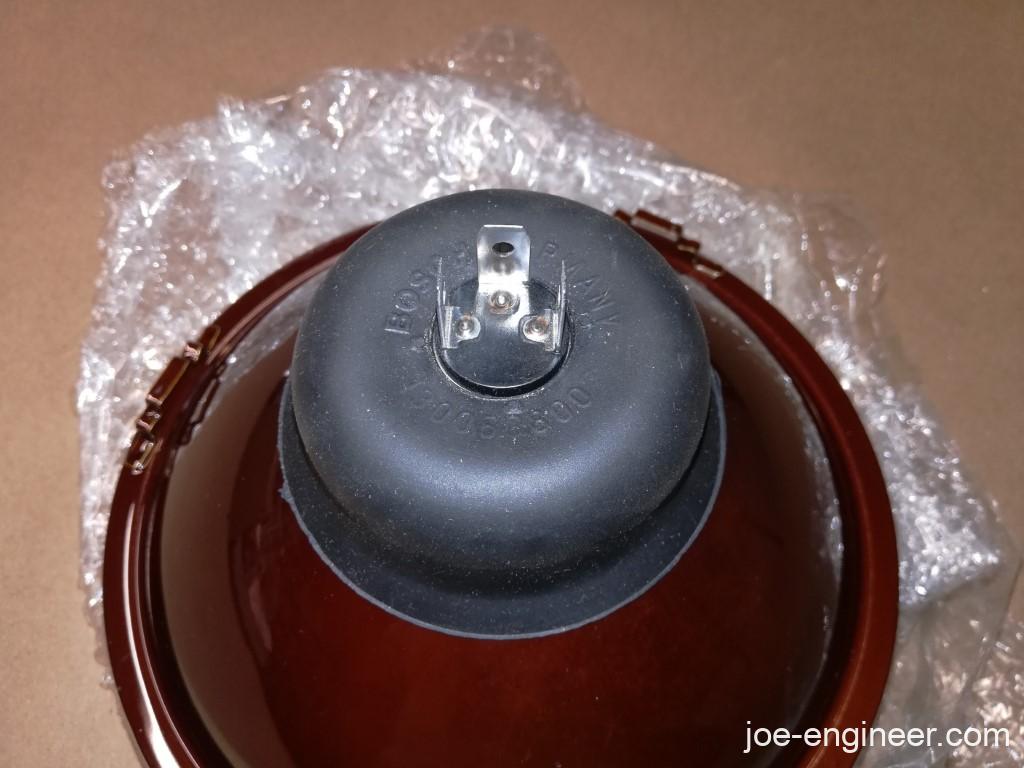
If you are simply replacing existing sealed-beam headlights, swap in a new sealed beam. If you are upgrading to US-spec or Euro-spec H4 headlights, install a new H4 bulb in the back of the H4 housing.
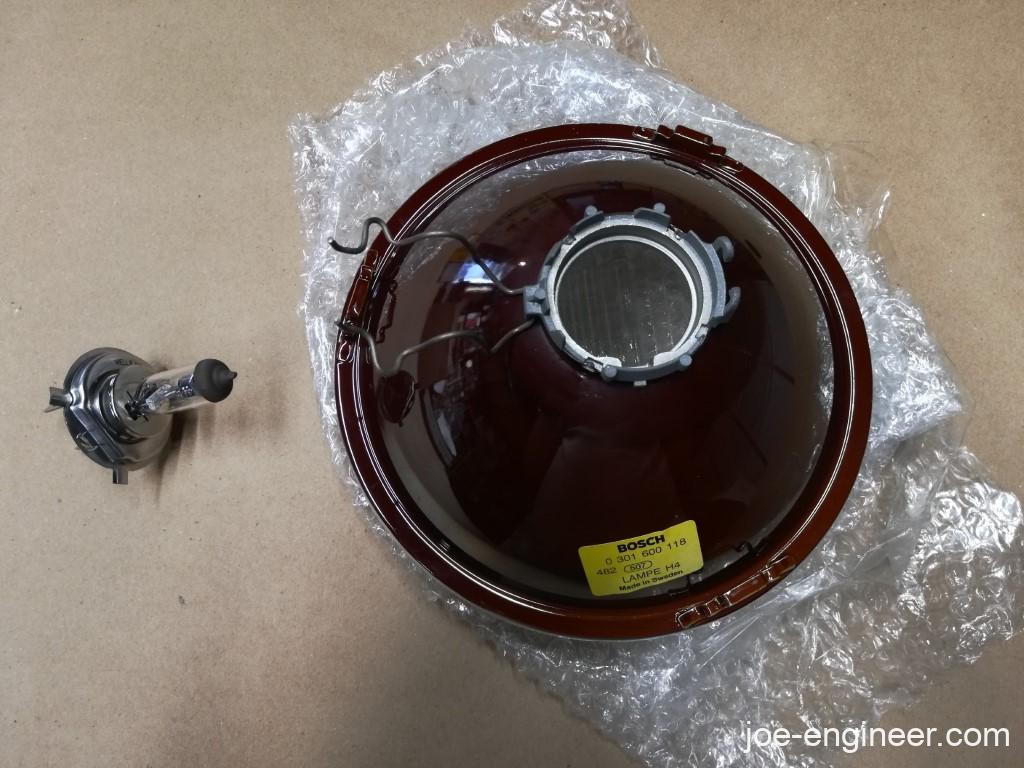
Secure the bulb in the housing with the spring clips.
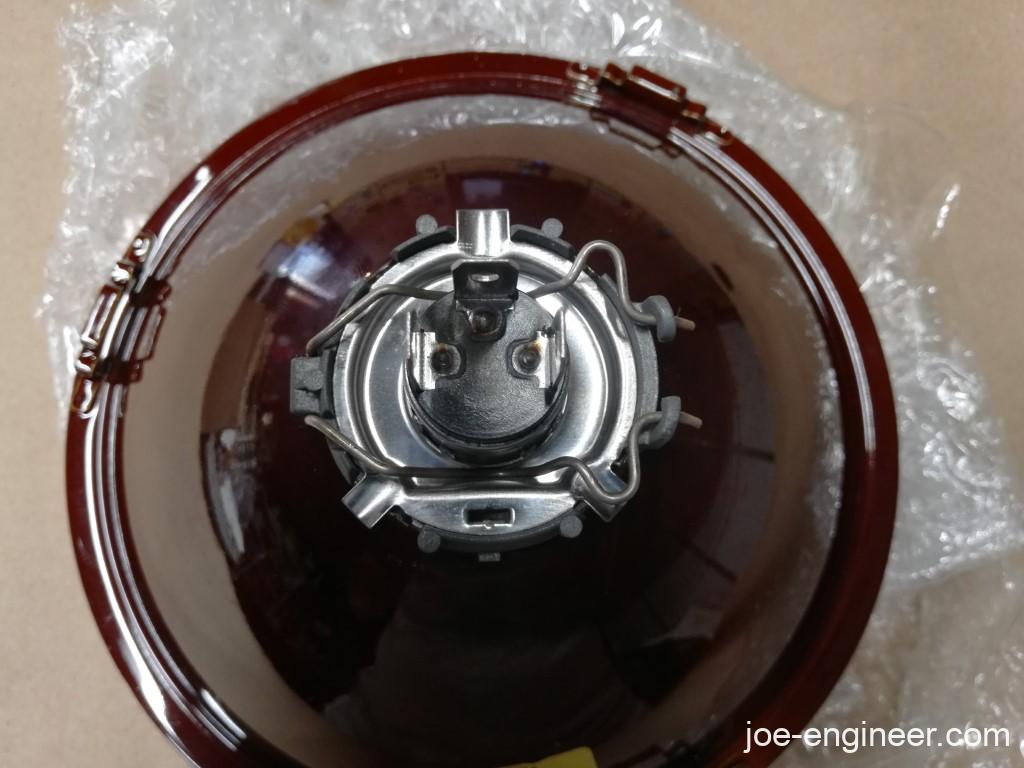
If equipped, replace the included rubber boot behind the bulb.
Check the condition of the thin rubber seal surrounding the opening of the headlight bucket. If it is damaged, replace it with a new one at this time.
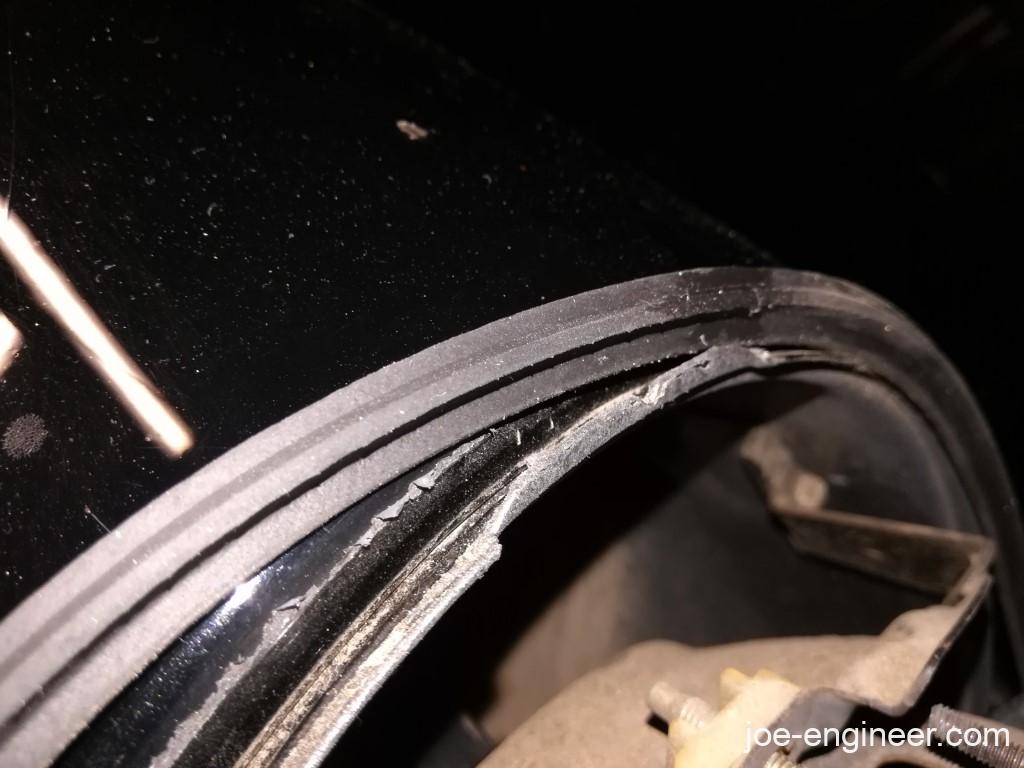
Note that a new rubber seal will be a little thicker than the old compressed seal so it may be a little challenging to re-install the exterior headlight ring.
Step 4: Re-install Headlight Housings
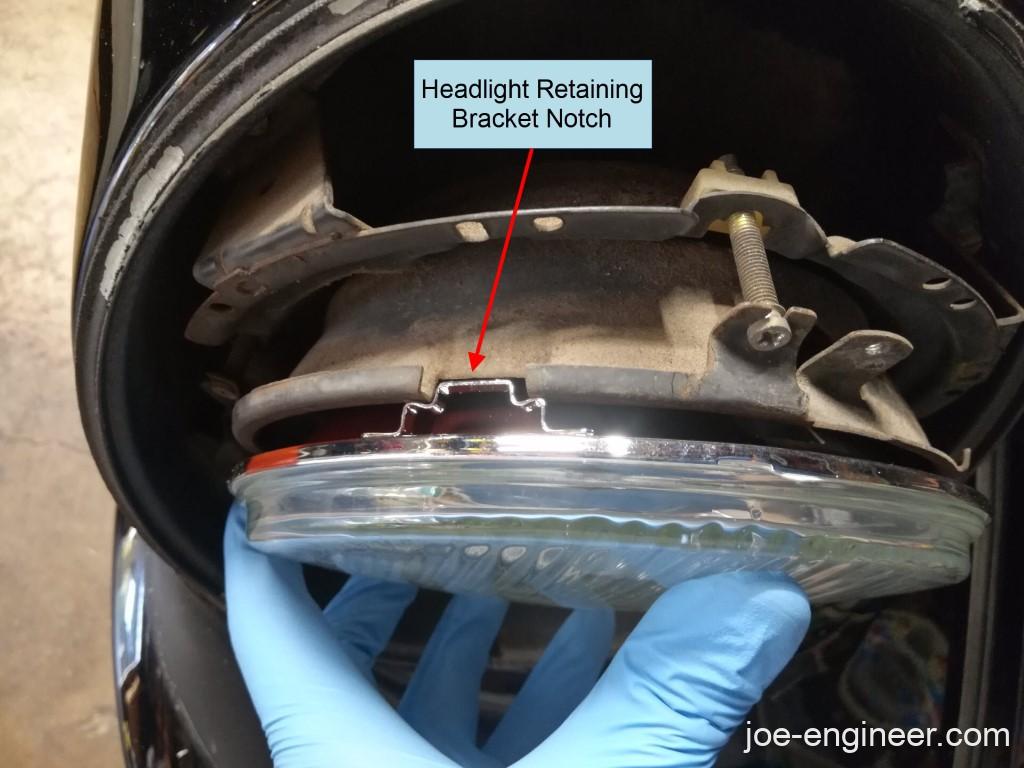
Re-connect the electrical plug to the back of the bulb and place the headlight housing back into the retaining bracket. If you are re-installing sealed beams or US-style H4s, make sure the indentations on the back of the headlight housing mate with the notches in the headlight retaining bracket to ensure the headlights are in the correct orientation.
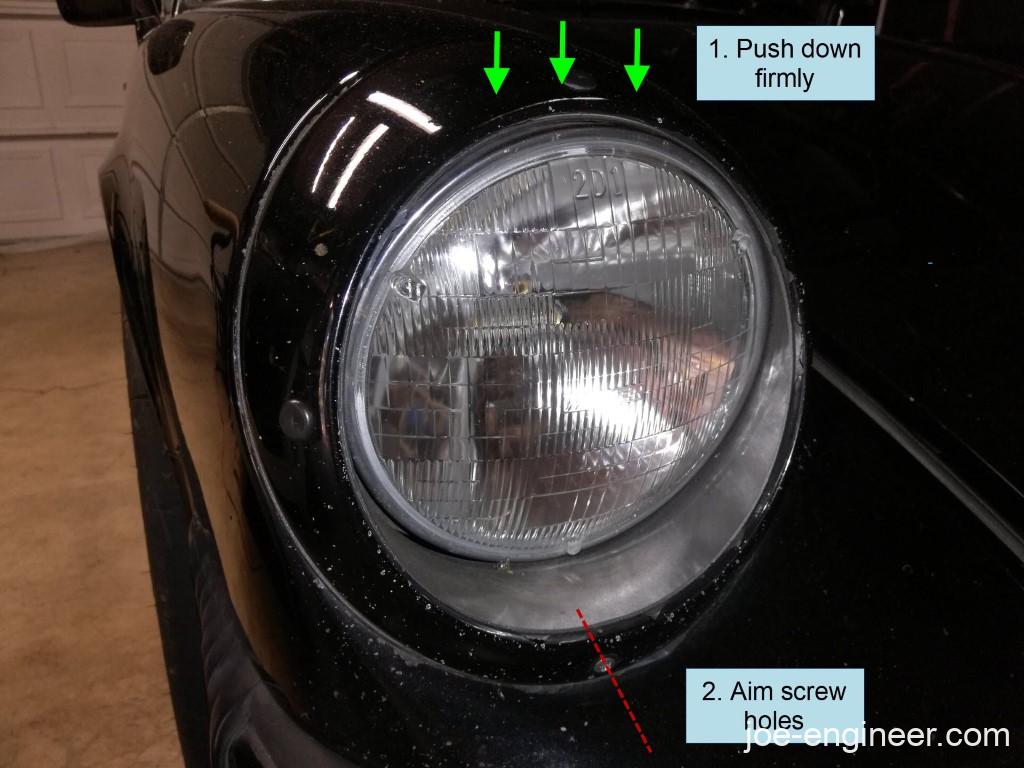
Re-install the inner ring to secure the headlight housing in place. Reinstall the outer ring by hanging it off the headlight opening top edge, rotating down and seating the ring into place. Use a flashlight to make sure the outer ring hole is lined up with the threaded retaining screw hole at the bottom. Press down firmly on the top of the outer ring while threading in the retaining screw by hand. Carefully hand tighten to secure it in place.
If you are installing Euro-spec headlight housings, there is no inner ring or headlight retaining bracket. You will simply hang the entire headlight assembly on the headlight opening top edge, rotate down and seat the assembly into place. Once again, push down on the entire assembly to compress the rubber seal and secure the assembly by installing the retaining screw at the bottom and tightening.
Repeat this entire process for the opposite side and always replace bulbs in pairs.
Step 5: Re-aim Headlights
If you replaced your sealed beams or upgraded to US-style H4 headlamps and the retaining bracket and aiming screws were not disturbed, the original aiming positions should be the same as they were before. With cars this age, it is recommended you take the car to a local gas or service station to have the aiming checked and adjusted as needed, just to be safe.
If you just upgraded to Euro-style headlamp housings, it is strongly recommended you have the headlights professionally re-aimed as the entire housing has been replaced and the aiming will not be correct out-of-the-box.
Your headlights are now ready to give you improved night-time vision for many years to come.