
DIY: How To Fix a Common Idle Issue on an Air-cooled Porsche 911
If your engine stalls or has trouble idling when you remove the oil cap to check your oil level, it’s time to check your oil breather restrictor.
Note: The following information is for educational use only. Before proceeding please read my disclaimer page.
Disclosure: This post contains links to Amazon products and other trusted vendors. As an Amazon Associate I earn from qualifying purchases.
Your air-cooled Porsche 911 has a dry sump oil system which requires that you check the oil level while the engine is running. To get to the oil dipstick you have to remove the oil tank cap. A common problem on old 911s is that the engine will have a very low idle or stall as soon as you take the oil cap off, making getting accurate oil level readings difficult or impossible. If your car suffers from this condition this quick DIY will identify a common root cause and fix.
Model Years Applicable:
Porsche 911 cars 1981-1989
Tools Needed:
- Paper towels (for oil spill cleanup)
- Rubber gloves
- Safety glasses
- Screwdrivers (Phillips and flathead)
Parts Needed:
- Oil tank restrictor (if missing or damaged)
Caution: Oil is carcinogenic so wear rubber gloves, long sleeves, and safety glasses to protect your skin.
Troubleshooting Procedure
Step 1: Start Engine and Idle
Start the car and let it warm up to a stable idle then let it run a few minutes. There is no need to let the oil get fully warmed up at this time.
Step 2: Remove Oil Cap & Note Idle Change
While the engine is running, remove the oil cap and note if there is any change in the idle speed and behavior.
If the change is very minor but it keeps running smoothly, you are done. It is behaving normally and you can now check your oil and replace the oil cap.
If the idle speed drops significantly, starts to stumble, or behaves erratically, you have just introduced a large vacuum leak through the open oil filler and we will need to look for its source. Turn off the engine at this time.
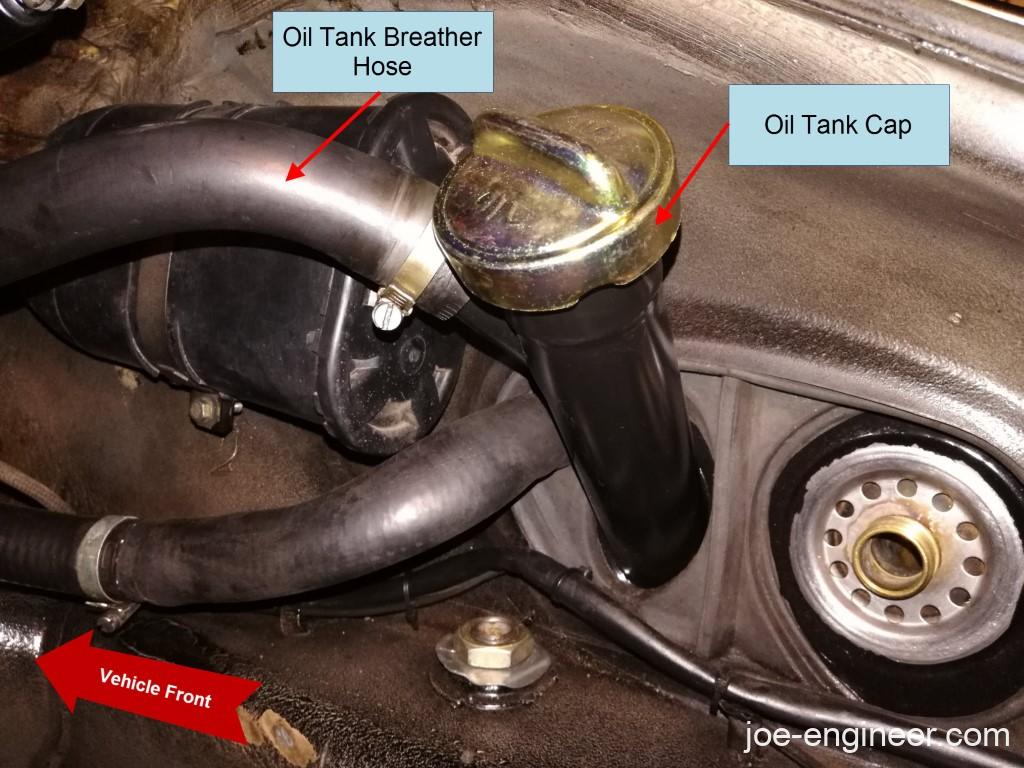
Step 3: Disconnect Oil Tank Breather Hose
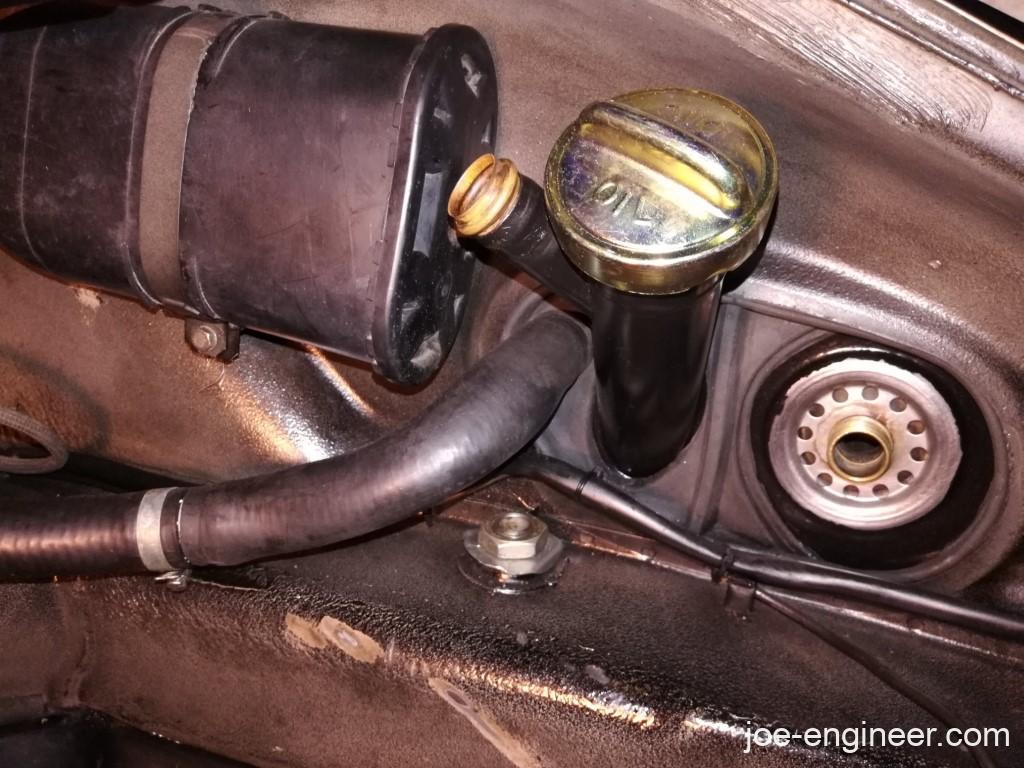
There are 1 or more engine oil breather hoses that connect to the oil tank in front of the oil filler. Find the upper one that branches out of the oil filler neck itself, just below the oil cap.
Loosen the hose clamp at the end of the hose and carefully pull it off the oil filler neck.
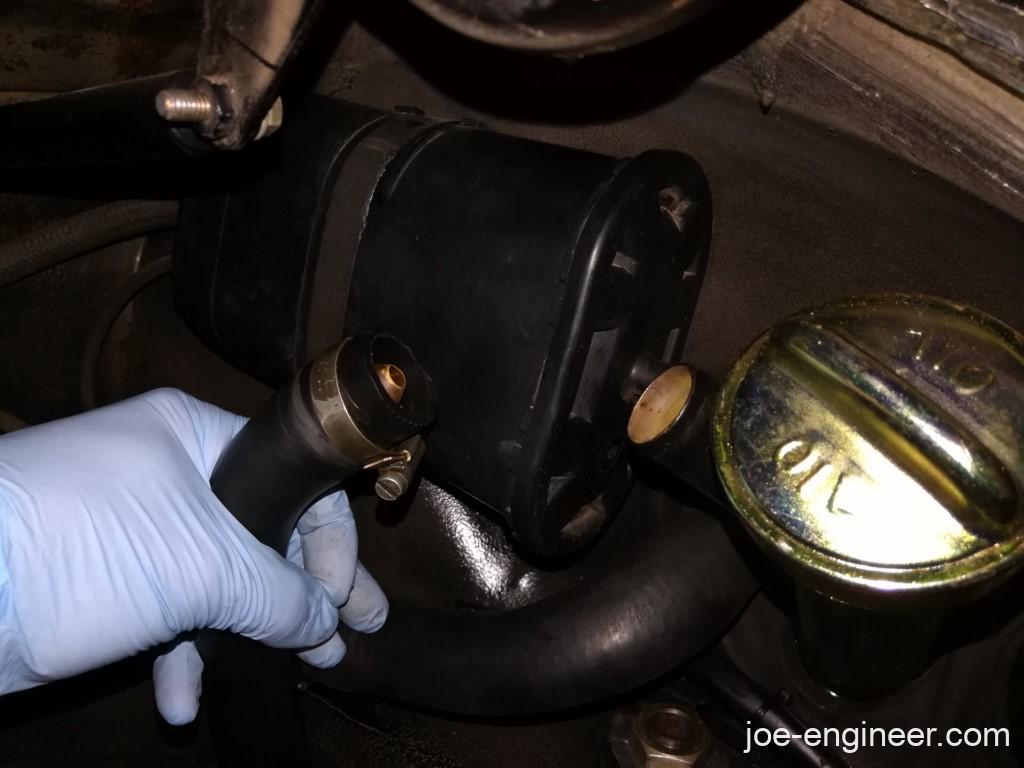
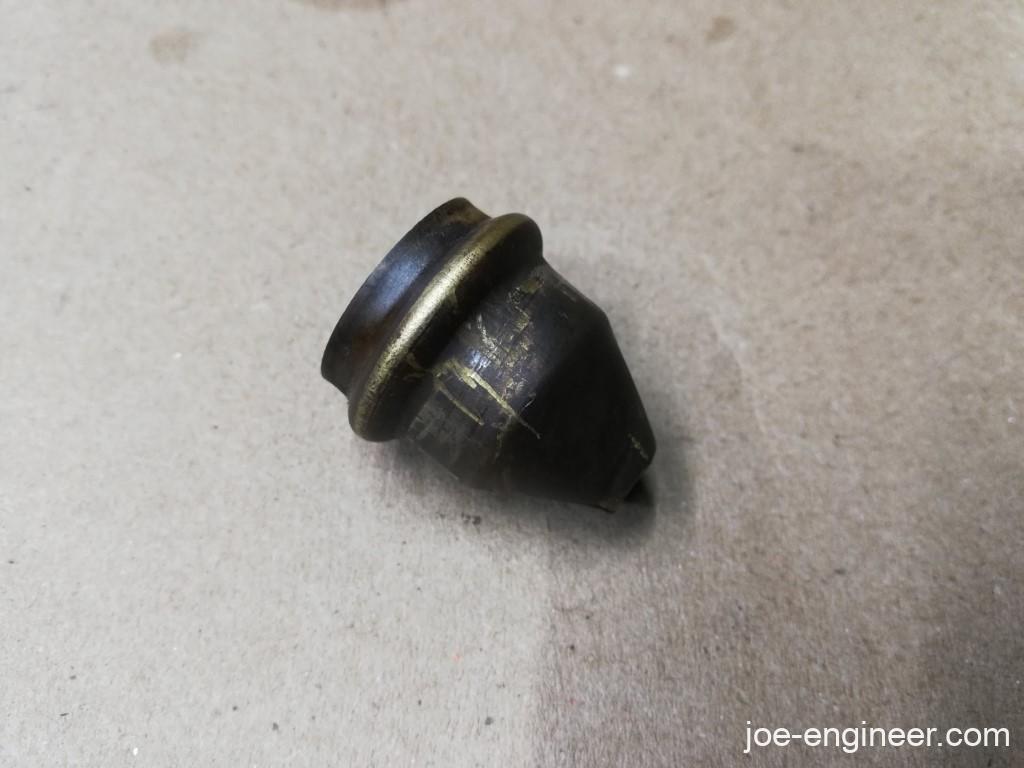
Look inside the hose and inside the oil filler neck connection and find the restrictor. It is a small acorn shaped metal shell that normally rests inside the oil filler tube but usually they are stuck inside the breather hose.
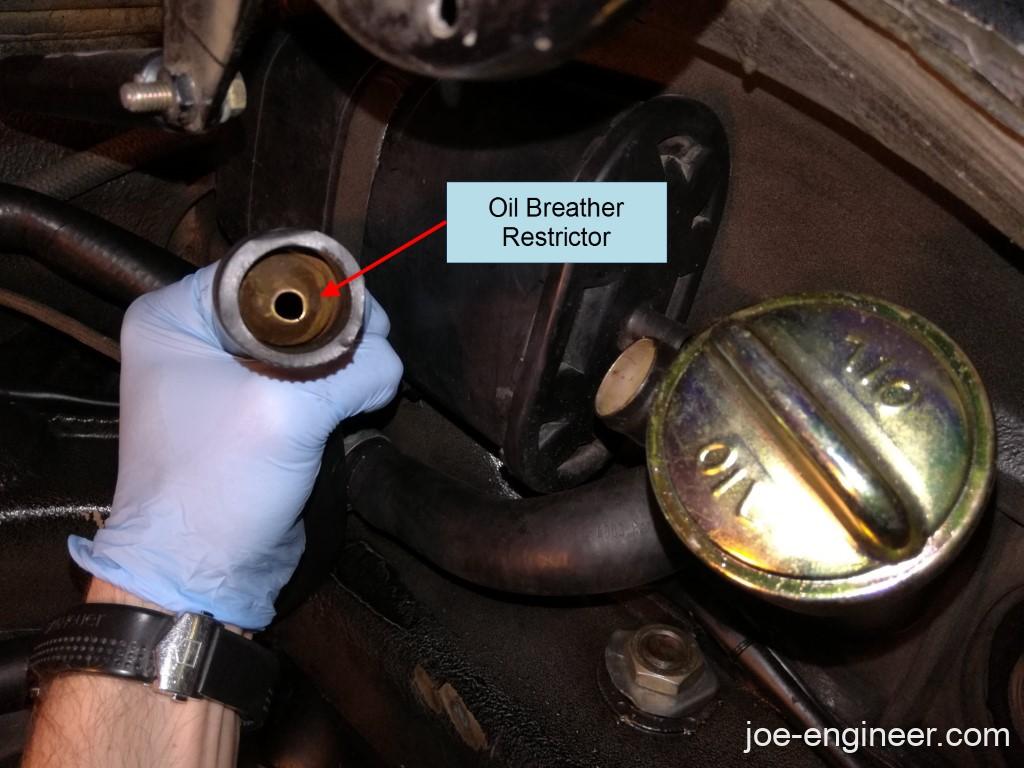
If it is inside the hose, look carefully at the restrictor’s orientation in the hose. The small hole in the restrictor is supposed to be centered in the hose to limit the amount of air travelling through the hose. All air must pass through the restrictor hole.
Many times the restrictor rotates inside the hose and the hole is blocked against the wall of the hose. The restrictor hole can also be clogged with oily debris. In these cases the air flow may be blocked completely, forcing vacuum, crankcase pressure, or oil vapor through other paths, causing abnormal idling behavior. Often you will find oil leaks accompanying this condition.
Another possibility is that air passes around the rotated restrictor. This might allow more air through than was originally intended. Often the restrictor is missing completely. Both of these scenarios will create a huge drop in engine vacuum once you remove the oil cap and result in a large drop in idle speed or engine stalling.
Step 4: Replace the Restrictor and Check Hoses
Carefully pull out the restrictor from inside the breather hose, clean it, and inspect it for damage. If the restrictor is damaged or missing, buy a replacement one.
If it looks ok insert it back into the oil filler neck connection pipe.
This is a good time to check both the breather hose you removed and any surrounding ones. Squeeze the hoses the entire length and make sure they are pliable and have not hardened. If they are hardened or cracked anywhere replace them at this time.
Step 5: Reconnect Hoses and Repeat Check
Reconnect the breather hose over the restrictor and oil filler neck connection pipe. Tighten the hose clamp securely.
Start the car and let the idle settle. Repeat the oil cap removal test and note if the idle behavior has improved. If you made any changes to the restrictor resulting in improved vacuum performance you may need to readjust the engine idle speed using the instructions and settings listed in your owner’s manual.
While you are here let the oil warm up fully to check the oil level.
Note: The engine oil level can only be checked accurately using the dipstick, when the engine is at operating temperature, running, and idling. This is described in step 6 of this procedure.
Oil breather restrictor evaluation is now complete.