
DIY: How to Change the Hood and Decklid Shocks on an Air-cooled Porsche 911
Stop propping your hood or deck lid with a stick because the shocks are tired. This short DIY will show you how to change them out.
Note: The following information is for educational use only. Before proceeding please read my disclaimer page.
Disclosure: This post contains links to Amazon products and other trusted vendors. As an Amazon Associate I earn from qualifying purchases.
The hood and deck lid (engine lid) on the Porsche 911 use 2 pressurized gas shocks to hold them open. Over time the pressurized gas leaks out and the shocks become less effective at supporting the weight of either lid. Especially if the deck lid has a large heavy spoiler on it. For some reason a lot of people dont replace them and resort to a stick for lid-propping purposes. Fortunately they are very straightforward to replace so lets get to it.
Model Years Applicable:
All Porsche 911 models up to 1989.
Tools Needed:
- Long lightweight stick to prop up hood or deck lid
- Needle nose pliers
- Flat screwdriver
Parts Needed:
- 2 front shocks 91151133100
- 2 rear shocks 91151233102
- Shock mounting hardware, if any is missing. Each shock end requires:
- 1 shock pin (2 per shock; 4 per lid)
- 1 shock pin retainer (2 per shock; 4 per lid)
Hood Shocks Replacement Procedure
Step 1: Prop Up Hood
Open the hood far enough to release the load on the hood shocks. Grab one of the shocks and give it a light twist or wiggle to make sure it is not supporting any weight. At this point prop up your hood securely so it will not bang you on the head. Use a long lightweight stick such as a broomstick.
Step 2: Remove Right Hood Shock
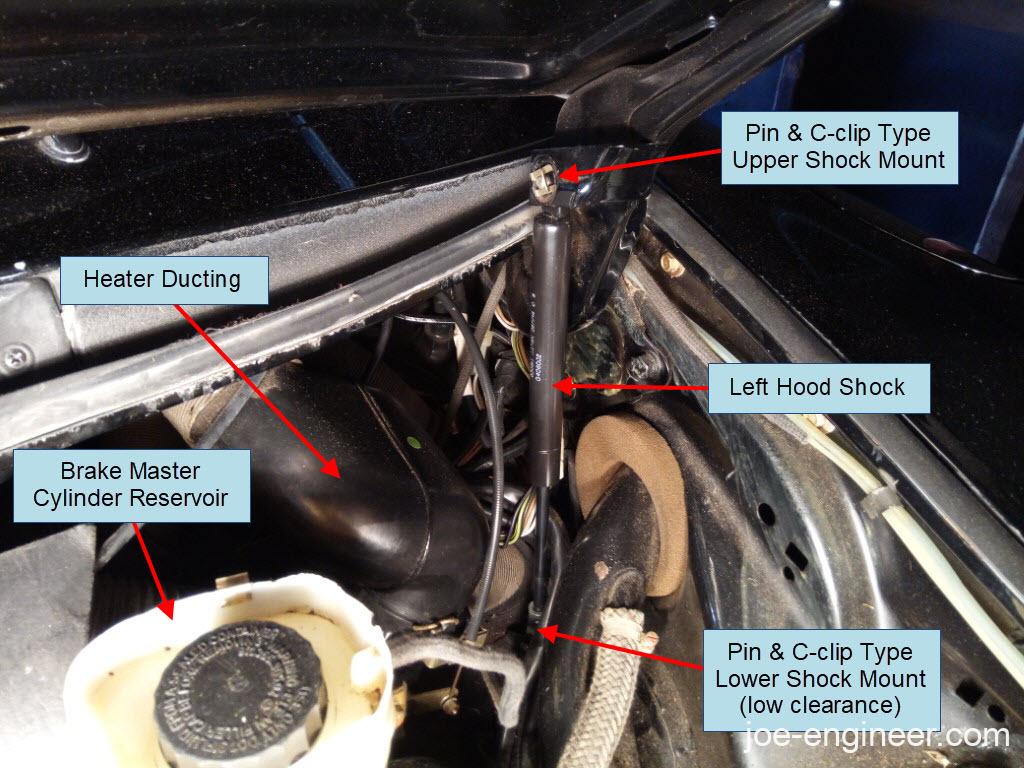
Start with the right shock first because there is less clutter in the way of the lower mount. The left side has the master cylinder reservoir, brake booster, and some heater plumbing in the way. Depending on the year of the car, the end of each shock is held in by a cylindrical pin with either a wire retainer clip or a flat c-clip style retainer. Carefully remove each retainer and pin, taking care to not drop them into the depths of the trunk crevices.
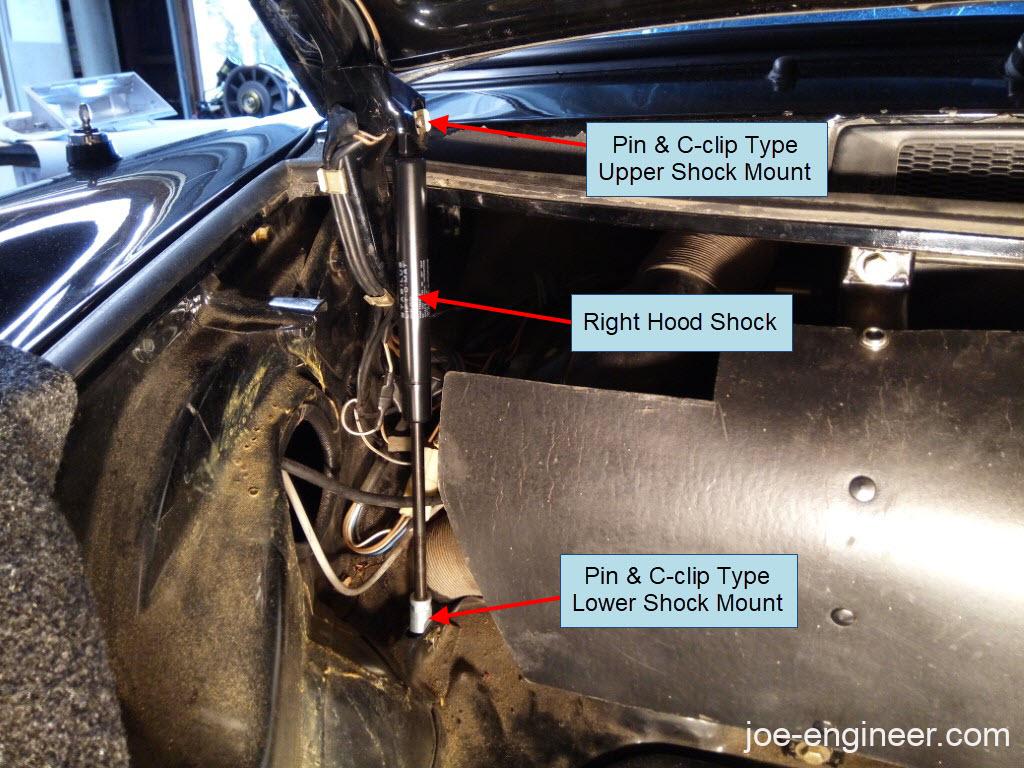
Step 3: Replace With New Shock
Install the new shock with the rod side facing down. To get the hood to open at exactly the angle you need to get the retainer pins into each end of the shock you may need an extra pair of hands or gently use the top of your shoulder to support the weight of the hood. Once you get the retainer pins into both ends of the shock install the retainer clips. Do not leave the retainers out or the pins will eventually fall out.
Step 4: Remove and Replace the Left Hood Shock
Repeat steps 1-3 for the left shock. Since you already have a fresh right side shock it may be strong enough to hold up the hood all on its own while you work on the left. You may be tempted to stop here, but it is recommended you press on and replace the left one, as it will reduce the stress on the right shock, the mounting points, and will have greater durability in the long run.
Your hood shocks are now finished.
Decklid Shocks Replacement Procedure
The process of replacing the engine lid shocks is very similar to the hood shock procedure. If you have a large rear wing such as a Carrera or Turbo tail it is even more critical to replace both shocks and not just one. Clearance is a bit tight, especially with engine induction hardware in the way, but it can be done without removing any engine components.
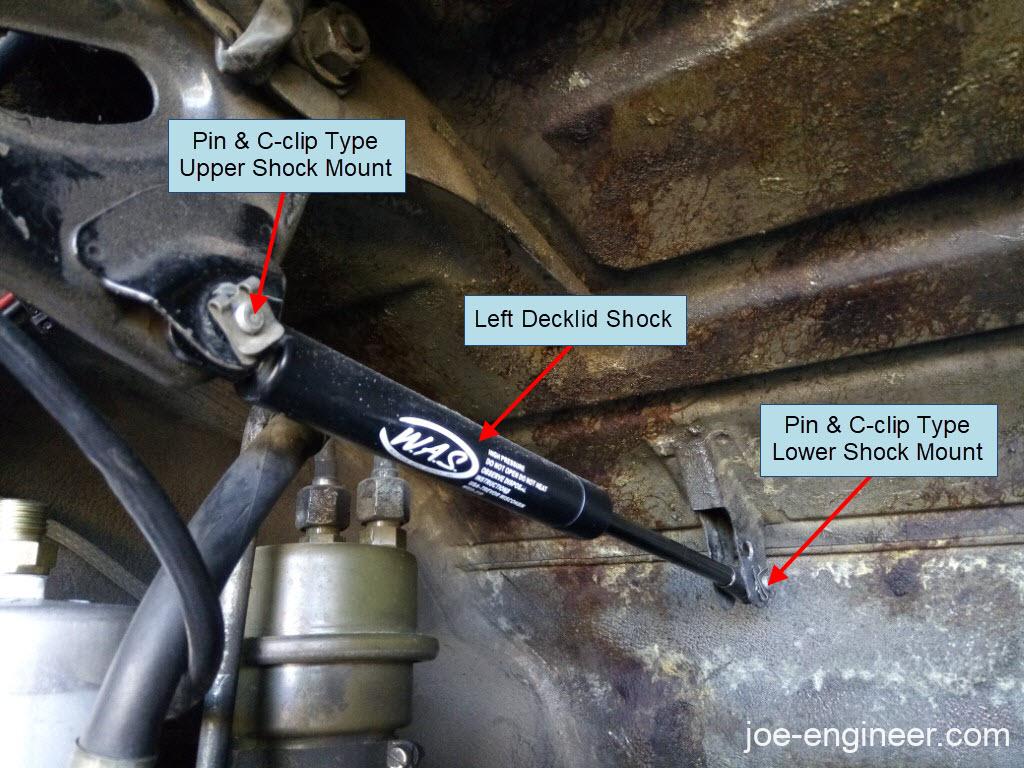
As with the hood shocks, be very careful when handling the pins and retainers so you dont drop them behind the engine. If you do drop anything, prepare to spend some time with a flashlight, a mirror, and a telescopic magnet to try and retrieve it. Some cars will have a bolt threaded into an integrated nut on some of the shock mounts. In this case re-use the bolt and take care not to over-torque it to prevent binding at that shock mounting point.
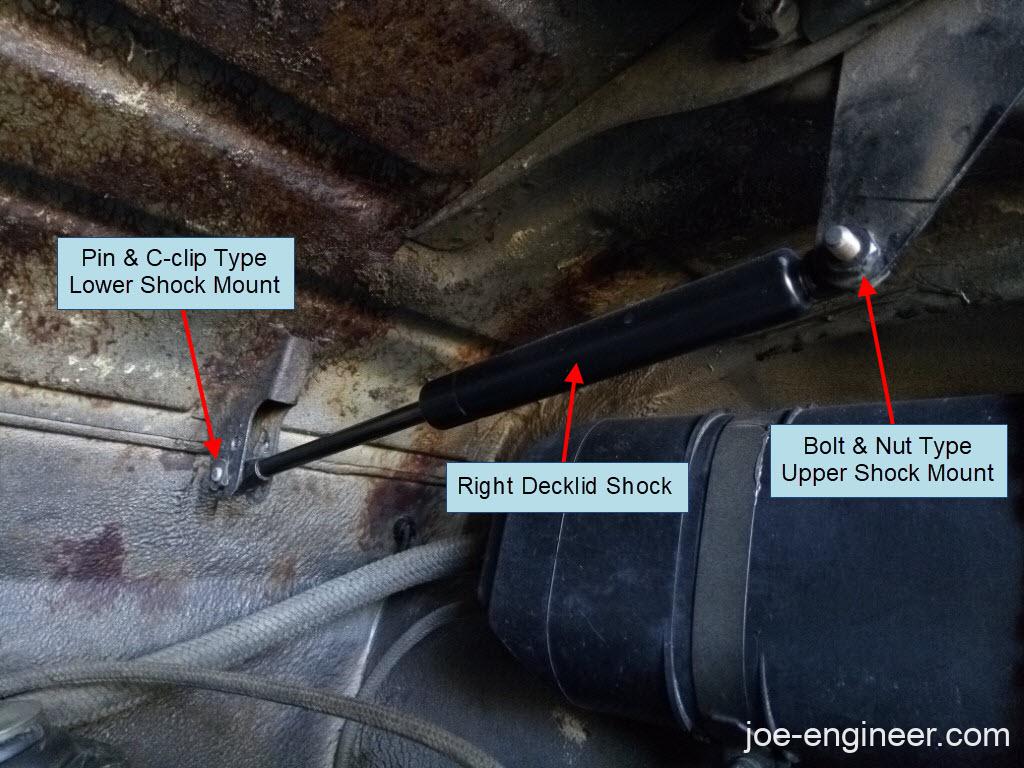
With the decklid shocks it is critical to make sure the retainers are installed on the pins. You don’t want any retainer hardware falling and getting sucked into the engine fan, or worse, down the engine intake tract.
Your decklid shocks are now finished and you can use the prop stick to break a piñata instead.