
DIY: CV Axles Replacement on an Air-Cooled Porsche 911
If your air-cooled Porsche 911 is making clunking noises from the rear, it may be time to replace your CV axles.
Note: The following information is for educational use only. Before proceeding please read my disclaimer page.
Disclosure: This post contains links to Amazon products and other trusted vendors. As an Amazon Associate I earn from qualifying purchases.
Your air-cooled Porsche 911 has an independent rear suspension with constant velocity (CV) axles that last a very long time but eventually require replacement. They wear out much quicker if the rubber boots tear and the grease leaks out. If your car has high mileage and is making noises from the rear suspension it is very likely that your CV axles are near the end of their life and require replacement.
Model Years Applicable:
All Porsche 911 cars 1989 and earlier. Early cars originally came with universal joint style axles but many have been converted to modern style CV axles. The procedure shown here is on a 1983 911SC.
Tools Needed:
- Jack stands
- Floor jack
- Rubber gloves
- Safety glasses
- Degreaser
- Paper towels
- Hex bit socket set
- Socket set
- 3/8” Ratchet
- 3/8” torque wrench
- 1/2” torque wrench (if removing outer stub axles)
- 1/2” breaker bar (if removing outer stub axles)
Parts Needed:
- CV Axles
- Axle Bolts
- Lock Washers
- Lock Plates
- CV Gaskets
- Extra CV grease
Axle Replacement Procedure
Step 1: Raise Car on Jack Stands
Raise just the rear of the car, or the entire car, on jack stands using this procedure.
Step 2: Loosen Bolts
Note: Make sure you are using the correct tool for your CV bolts. The bolts will either be a star pattern or hex socket cap screw. Do not use the wrong tool otherwise you risk stripping the bolt heads.
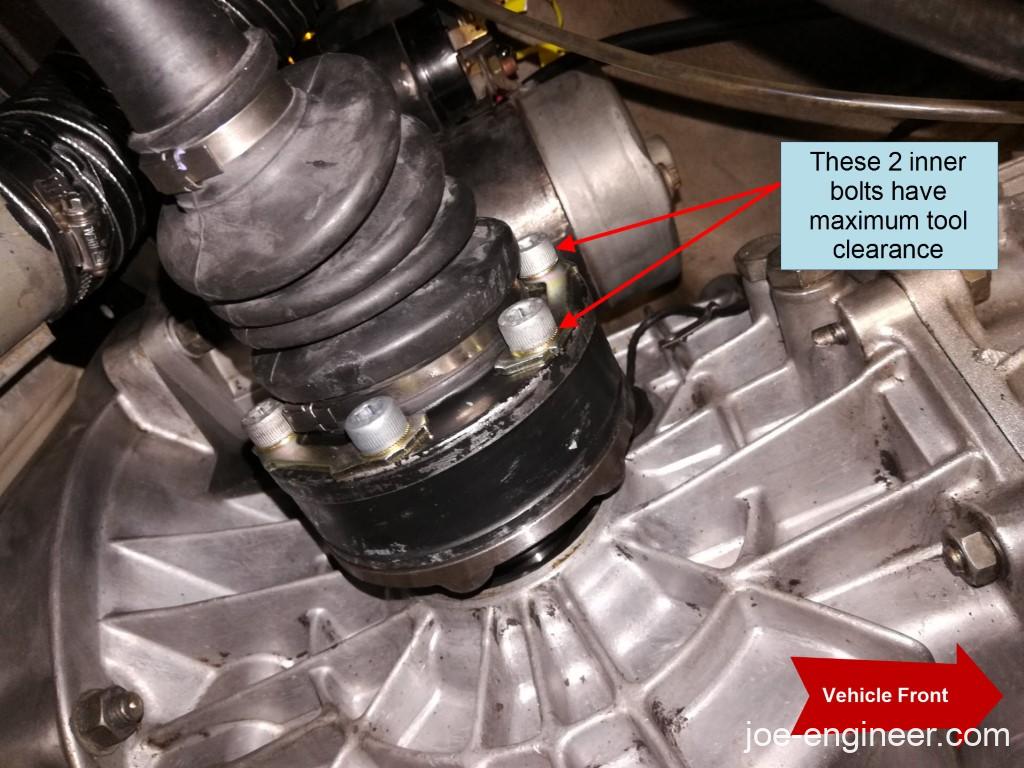
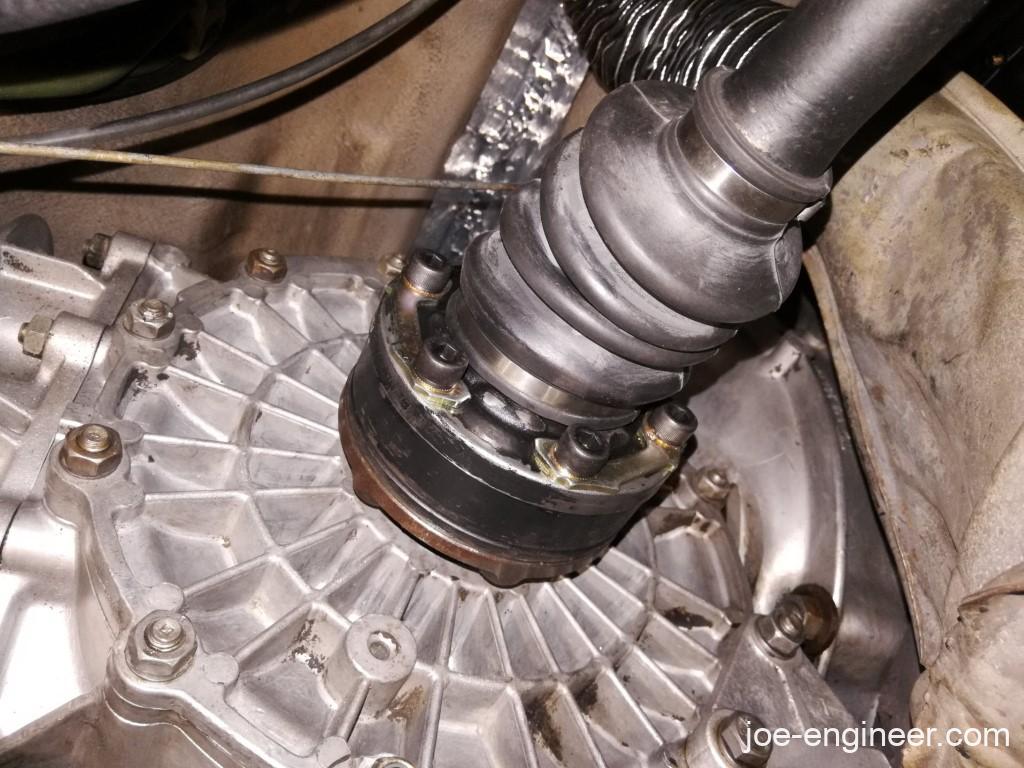
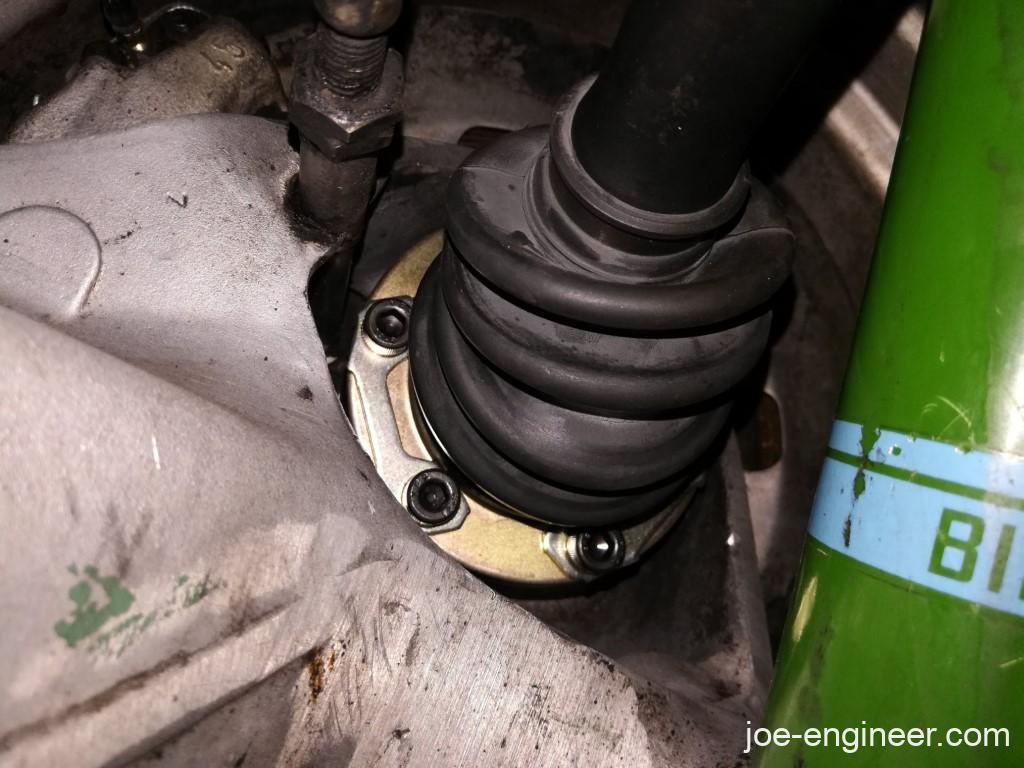
Put your parking brake on and loosen the inner and outer bolts of each CV joint. You may have to rotate the CV axle by hand to get a bolt to a position that has maximum tool clearance. For example on an 83 SC, the inner bolts closest to the front have maximum clearance to the boot. Release the parking brake to rotate the axles, and re-engage it to lock the wheels and loosen the bolts.
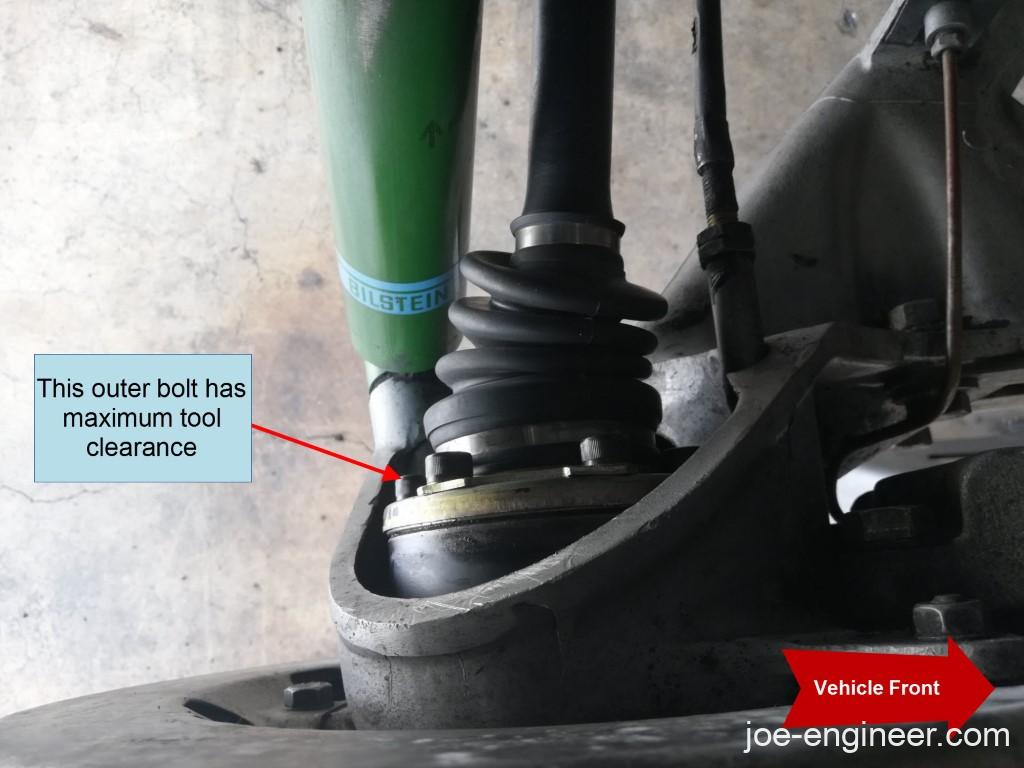
On the outer joint, the bolt closest to the rear has maximum tool and boot clearance. The outer bolts can be accessed from under the car without removing the wheel or from outside the car with the wheel removed.
Leave 2 bolts loosely installed in each joint so the entire axle assembly is held in position.
Step 3: Remove Old CV Axles
From underneath the car, support the axle shaft and remove the remaining 2 bolts from each end by hand. The axle assembly should slide right off the inner and outer stub axles. Be careful as axle assemblies are surprisingly heavy.
Early cars may have locating pins that sit between the CV joint and mating flange. Gently pry them apart with a flat screwdriver as you rotate the axle until they fully separate.
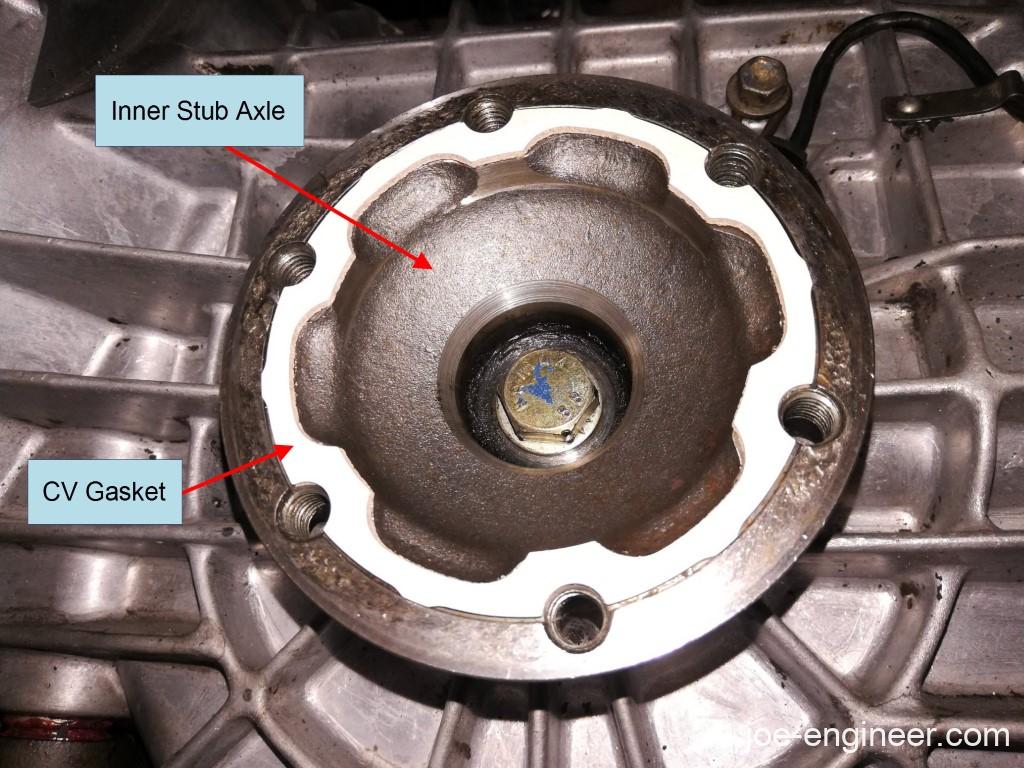
When the axle assemblies are off, clean the mating surfaces of the inner and outer stub axle flanges so you can re-attach new gaskets in place. Clean the threaded holes in the stub axles as well to make sure the new bolts go in dry.
It is also a great time to clean the surrounding gearbox and rear trailing arm areas. If you have any torn rubber CV boots, chances are that grease has been flung to all surrounding surfaces. Be forewarned that old CV grease is one of the stickiest messiest automotive fluids you will encounter. Cleaning it will not be easy.
Step 4: Re-install New CV Axles and Hardware
After cleaning the inner and outer stub axle flanges with degreaser install new gaskets. They commonly have an adhesive-backed side so you can peel and stick them in place. If they don’t, just hold them in place with a bit of rubber cement.
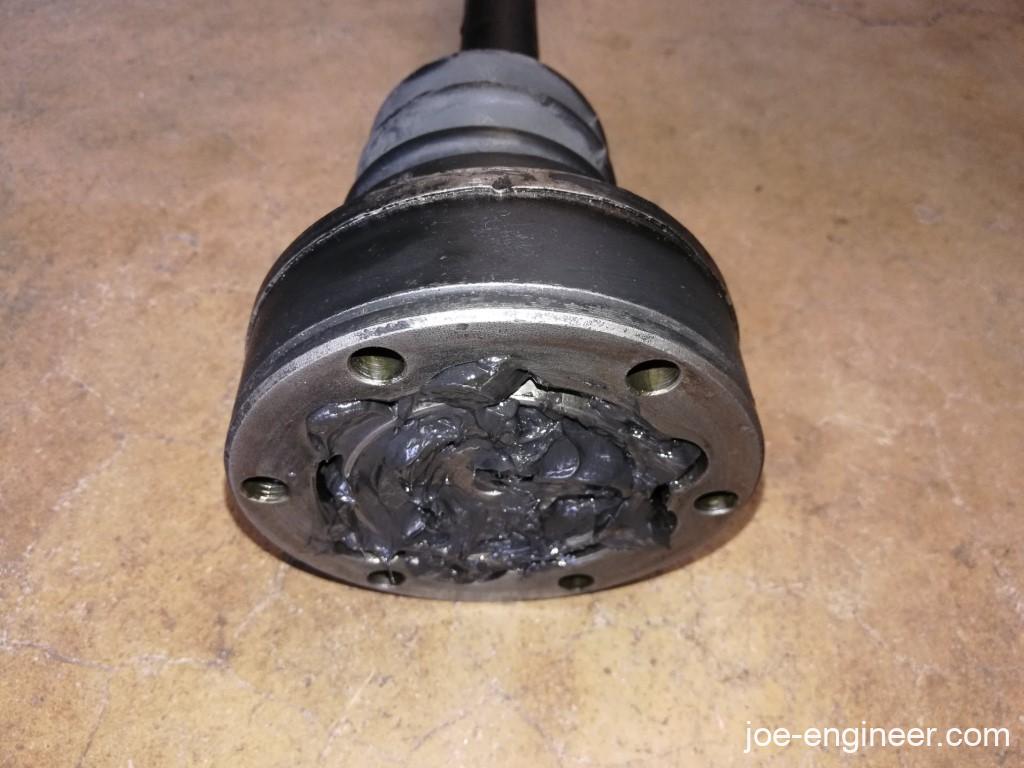
If your axles have open faces with exposed grease, make sure the CV joints are packed with plenty of grease. If necessary squeeze a bit more in there to fully fill the cavity.
Carefully mount each inner and outer CV joint to its respective axle flange and loosely screw in 2 bolts to hold it in place. Due to the limited clearance around the outer joint, it may be easier to mount the outer one first then take advantage of the telescopic joints to mount the inner ones. Once the axle assembly is in place, install the correct lock plates, lock washers, and bolts finger tight.
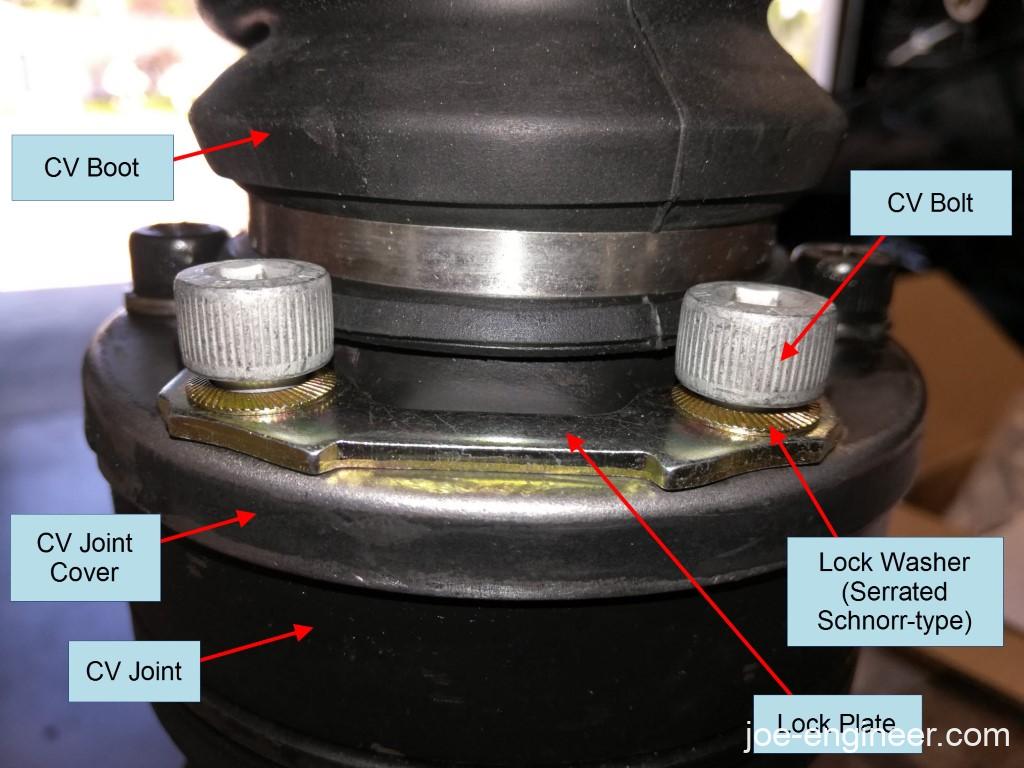
Note: most Porsche 911axles use steel “lock plates” and serrated Schnorr lock washers underneath the bolt heads. In general, axles that have thin metal covers over the boot end of the CV joint use lock plates so the bolts and washers don’t dent the CV joint cover and compromise torque retention. The lock plates spread the clamping force of the bolt head over a larger area and give the serrated washers a surface to bite into and prevent the bolts from backing out. Some Turbo axles have bolts that sit directly on a heavy solid steel surface on the CV joint and do not require lock plates. In general, do not omit the lock plates if your old axles used them. You risk the bolts loosening themselves and a loose axle end rotating at highway speeds can cause severe damage to your car.
Once all the hardware is installed finger tight, snug the bolts down the rest of the way with the correct hex or star socket and a ratchet. Torque specs vary considerably depending on CV bolt size, CV joint diameter, and the quantity of bolts per joint. Consult a shop manual for your year car to get the exact values, but in general, 33 ft-lbs for M8 bolts on 100mm CVs and 60 ft-lbs for M10 bolts on 108mm CVs is the expected range of torque values. Put the parking brake on to prevent the axles from rotating. If necessary, put the gearbox into first gear, have a helper prevent the tire from rotating, or put the car on the ground to achieve final torque.
Make sure nothing is resting on the CV boots that could tear them. Some parking brake cables get very close to the outer CV boots and need to be secured out of the way through the suspension’s range of motion.
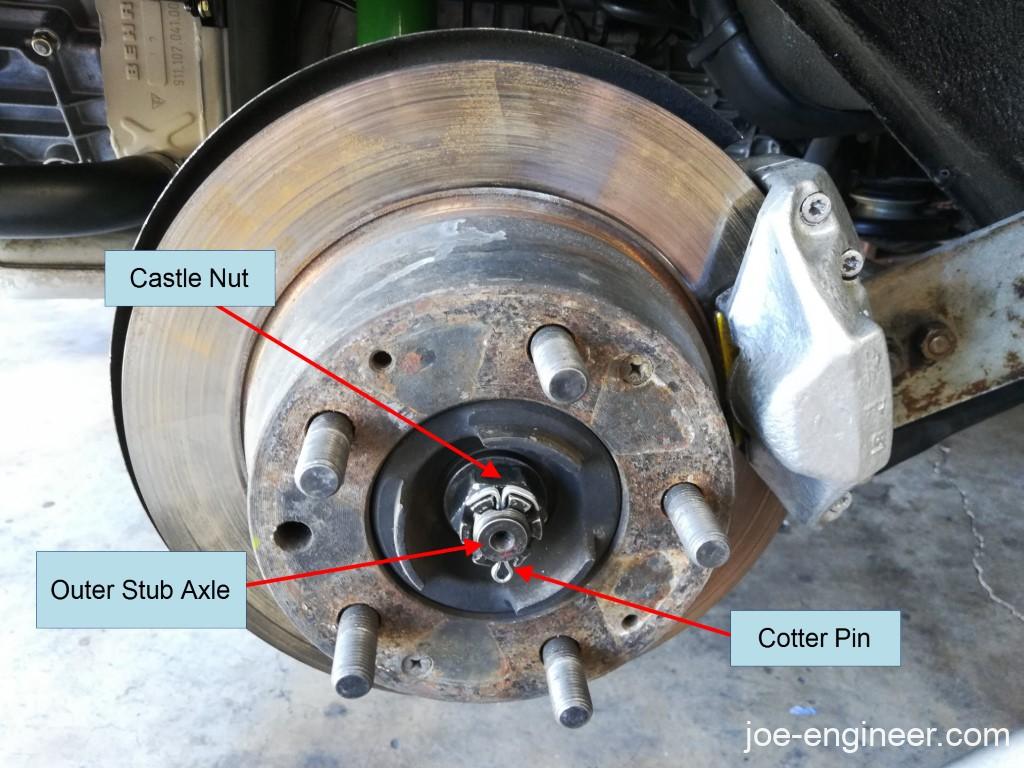
Alternate Method: Replace CV Axles with Outer Stub Axles Attached
An alternate method that takes a bit longer but some may find ultimately easier, is to remove the cotter pin and large castle nut on the outside of the rear wheel hubs and pull the CV axles out with the outer stub axles still attached.
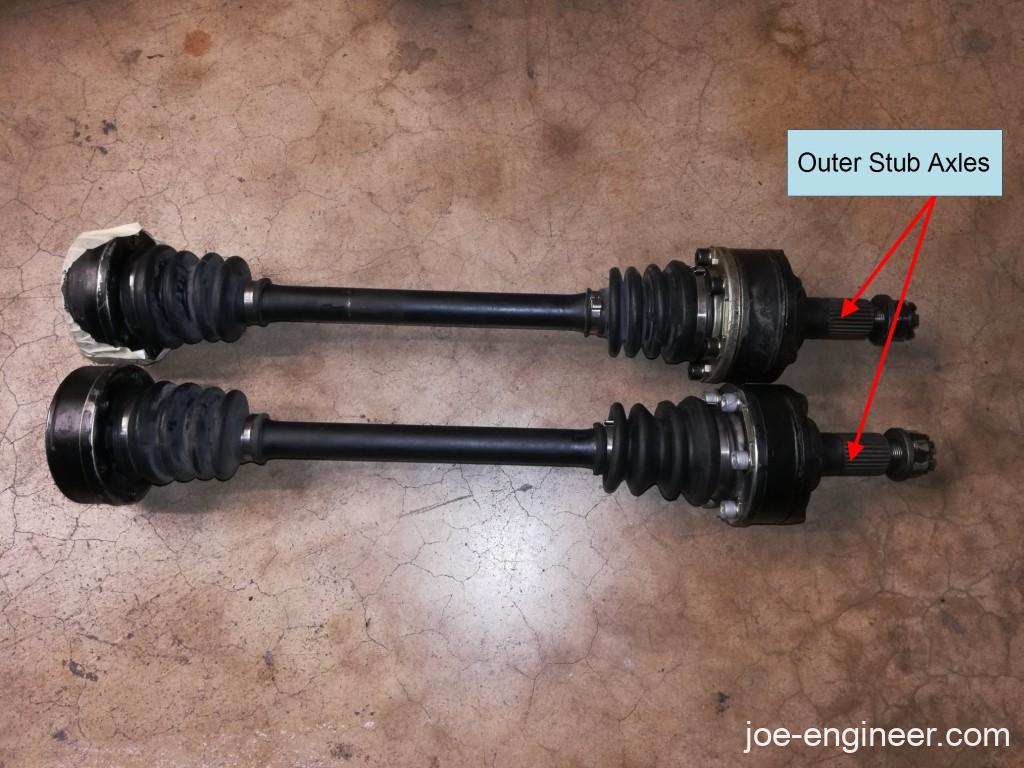
The advantage here is that you can reassemble the outer stub axles to the new CV axles on the bench or clamped to a vise, rather than fighting limited clearance around the rear control arms and shocks.

You also gain access to the back of the hub to clean off the old CV grease build up in that cavity. Once you have the bolts torqued to the outer stub axle, you can slide the splined stub axle shaft into the wheel hub from the inside and concentrate on connecting the inner CV to the gearbox stub axles. You may need to remove the lower shock bolt and push the shock out of the way to clear the CV joint.

Additionally the large castle nut is torqued to a very high value so you will need a helper to stand on the brake pedal while you loosen it with a breaker bar and torque it with a large 1/2” torque wrench. You can also use a large flat screwdriver or a prybar between the wheel studs to keep the hub steady while you torque it. On an 83 SC the nut is an M20 and is torqued to 217-231 ft-lbs. Always use new cotter pins to secure each nut in position.
Step 5: Test Drive
Once your bolts are all torqued to spec, lower the car back on the ground and take it for a drive. The clunking noises should be gone and there won’t be any more CV grease leaks for many years to come.