
DIY: Adding License Plate Lights On A Classic Air-Cooled Porsche 911
Illuminate your rear license plate and add another finishing touch to your Porsche 911’s exterior with this easy procedure.
Note: The following information is for educational use only. Before proceeding please read my disclaimer page.
Disclosure: This post contains links to Amazon products and other trusted vendors. As an Amazon Associate I earn from qualifying purchases.
The 1974-1989 air-cooled Porsche 911 has big chunky rubber impact bumpers hanging off the rearmost part of the car. For weight reduction and aesthetic reasons, many of these impact bumpers were eventually deleted, along with the integrated license plate lights. As these cars have come full circle back to classic status and undergo restorations, bolting the impact bumpers back on will allow one to add the license plates back in. Read on to find out how.
Model Years Applicable:
All Porsche 911 cars from 1974 to 1989 with either large US-spec or smaller Euro-spec impact bumpers. The procedure shown here is on a US-spec 1983 911SC with Euro-spec impact bumpers.
Tools Needed:
- Two 13mm box wrenches
- 3/8” drive metric socket set
- 3/8” drive ratchet
- 3/8” drive extension set
- Screwdriver set
- Masking tape
- Length of sturdy speaker wire or string, about 2 feet long
- Multimeter or automotive test light
- Safety glasses
Parts Needed:
- 1-2 muffler gaskets (depending on your exhaust system)
- Two license plate light assemblies
- Service manual for your car’s model year
Installation Procedure:
Warning: Do not perform this procedure if you cannot read automotive wiring diagrams or are not comfortable with basic automotive electrical work. You may discover wiring damage or modifications that you will need to repair at that moment using the factory wiring diagrams as a reference.
Step 1: Disconnect Negative Battery Terminal
Disconnect the negative battery terminal before starting.
Step 2: Raise Rear on Jack Stands
Raise the rear of the car on jack stands using this procedure. You only need to go high enough to get underneath the muffler and rear bumper. Leave the rear wheels on.
Step 3: Remove Muffler
Unbolt the muffler from the remainder of the exhaust system. 1974-1977 cars have 2 muffler inlets and 1978 and later cars have 1 muffler inlet typically bolted to a catalytic converter.
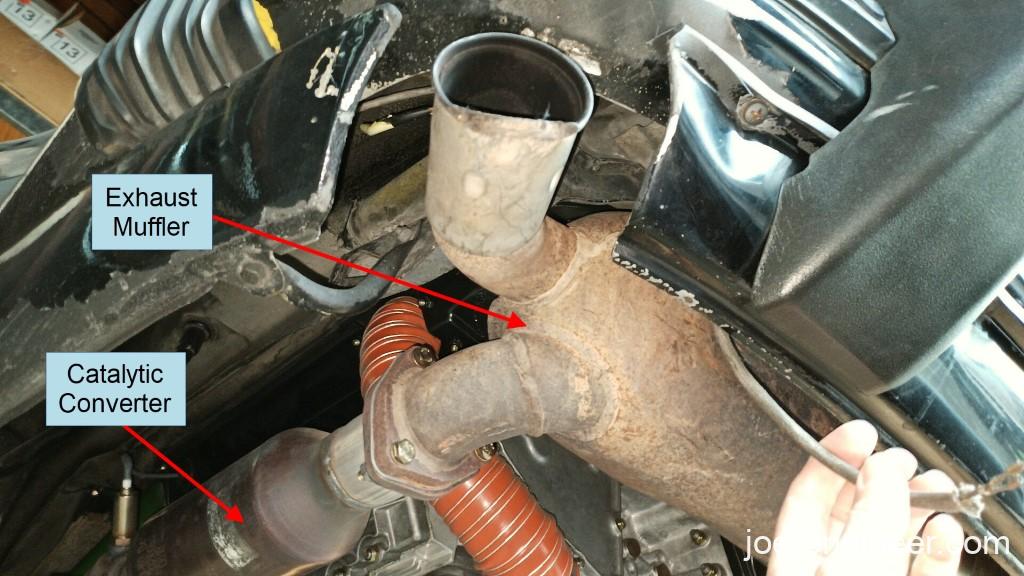
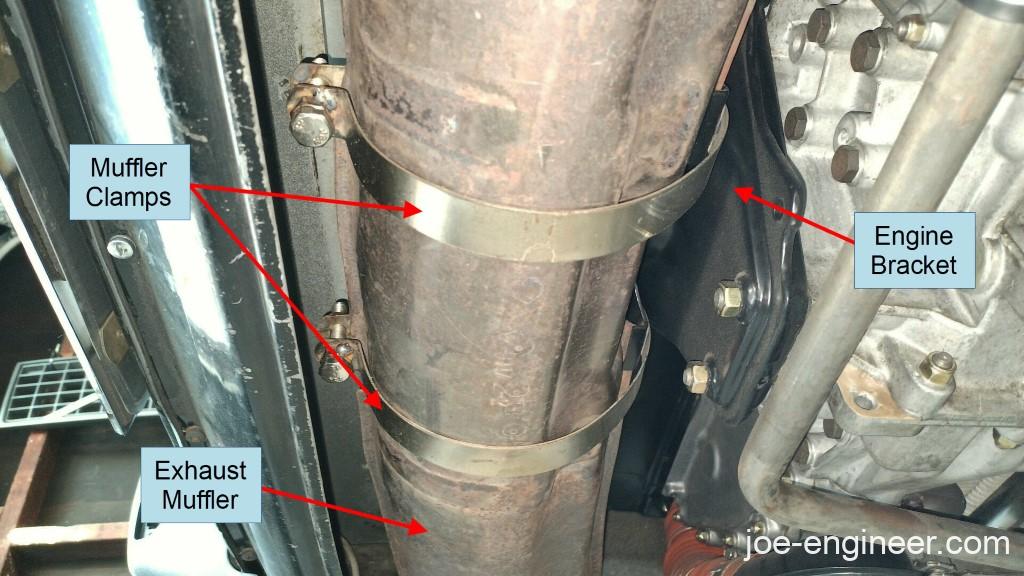
There are two large clamps holding the center of the muffler body to a bracket on the rear of the engine. Loosen those and slide them off the engine bracket to release the muffler. Be careful not to drop the muffler on yourself.
Step 4: Locate License Plate Lights Wiring & Test
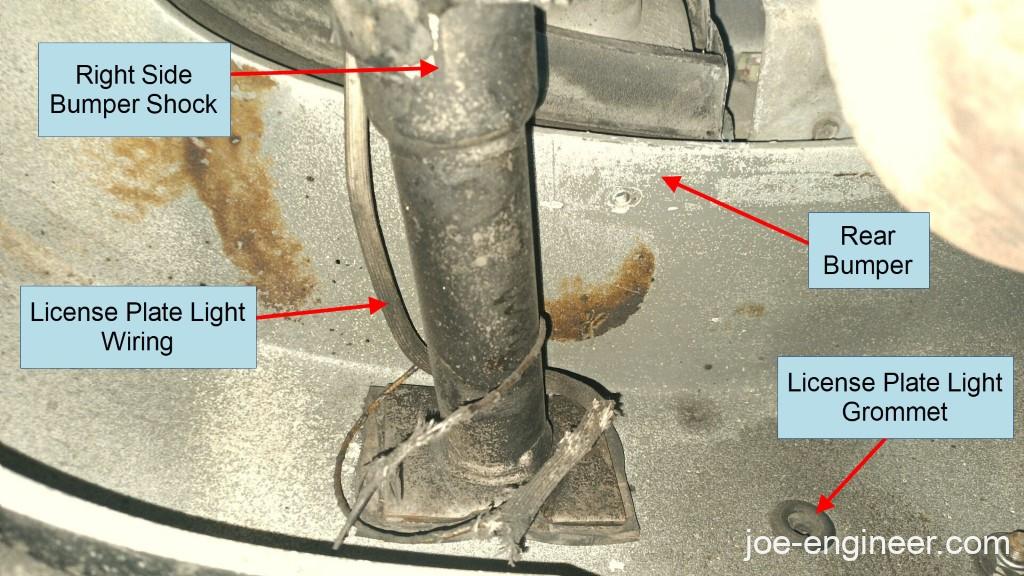
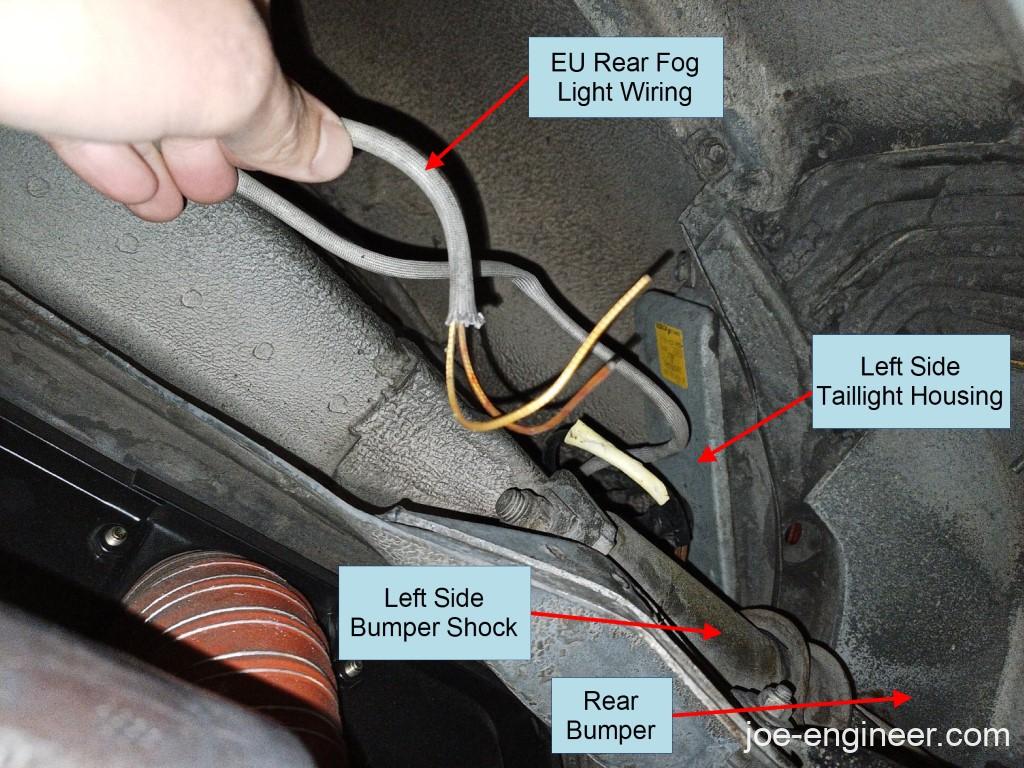
Get underneath the rear bumper and look for the fiberglass sleeve-covered license plate light wires. There should be one sleeve coming out from behind each taillight housing. They might be stuffed in the corners, or wrapped around the rear bumper shocks when they were last disconnected.
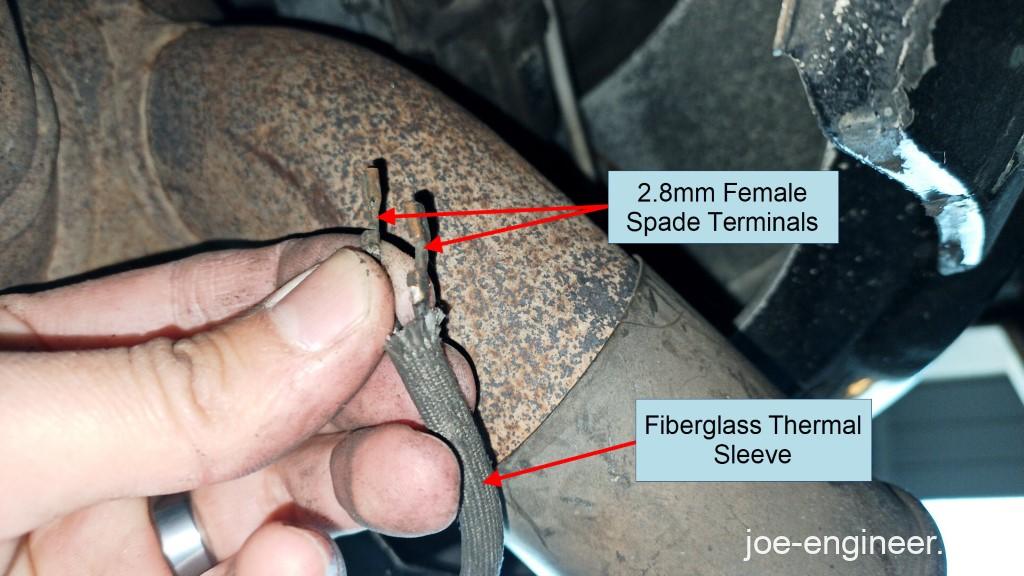
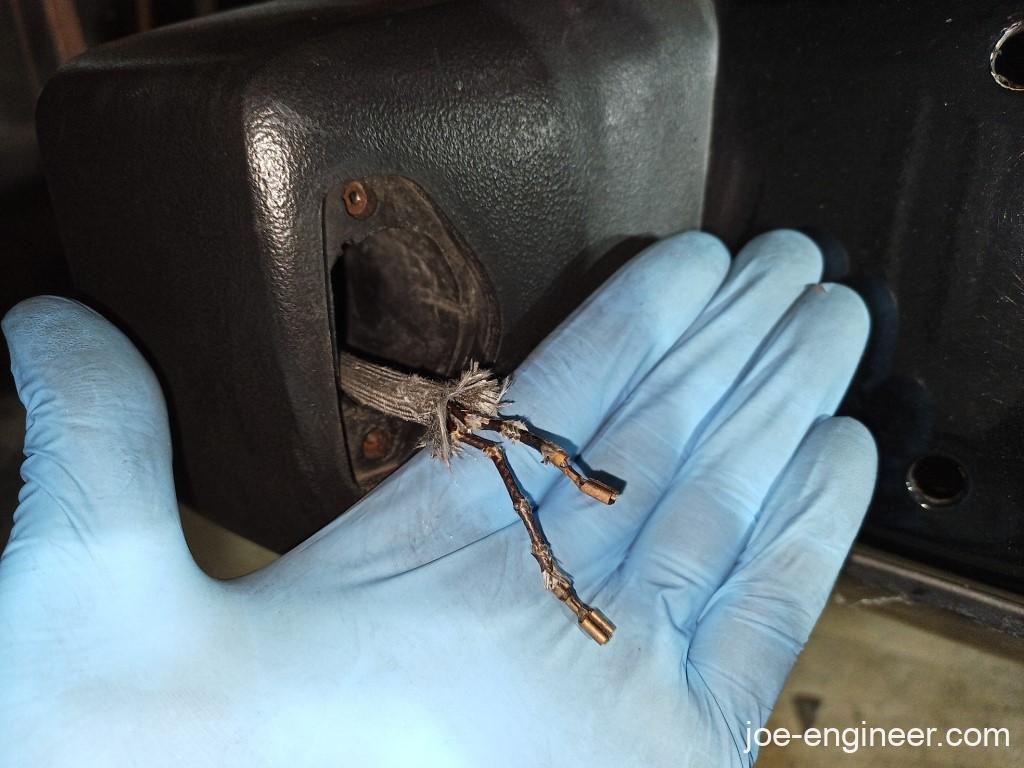
The entire length of license plate wiring should be covered in the fiberglass sleeve and each should have two individual wires (12V+ and ground) with 2.8mm female spade terminals.
Check the back of your fuse box cover or service manual for the location of the license plate lights fuse. On the 1983 911SC this is fuse #2 rated for 5 amps. Replace the fuse with a known good one. Make sure the license plate light terminals are not shorting out against each other or on the chassis and temporarily reconnect the negative battery terminal. Use a test light or multimeter to verify the presence of 12 volts between both wires. Do this for both the left and right pairs of wires then disconnect the negative battery terminal again.
Note: US cars are pre-wired for a European style rear facing fog light on the left side. This third pigtail looks similar to the license plate light wiring but should not have terminals on it nor should it have any power when the light switch is pulled on. Make sure you verify the presence of 12 volts before accidentally trying to use this pigtail to wire your left license plate light.
If you discover any broken wires you may need to repair them using appropriate gauge high temperature automotive wire, thermal sleeve, and the wiring diagrams in your service manual. Regular automotive wiring will not survive the hot environment right behind the muffler.
Step 5: Run Wiring Into Impact Bumpers
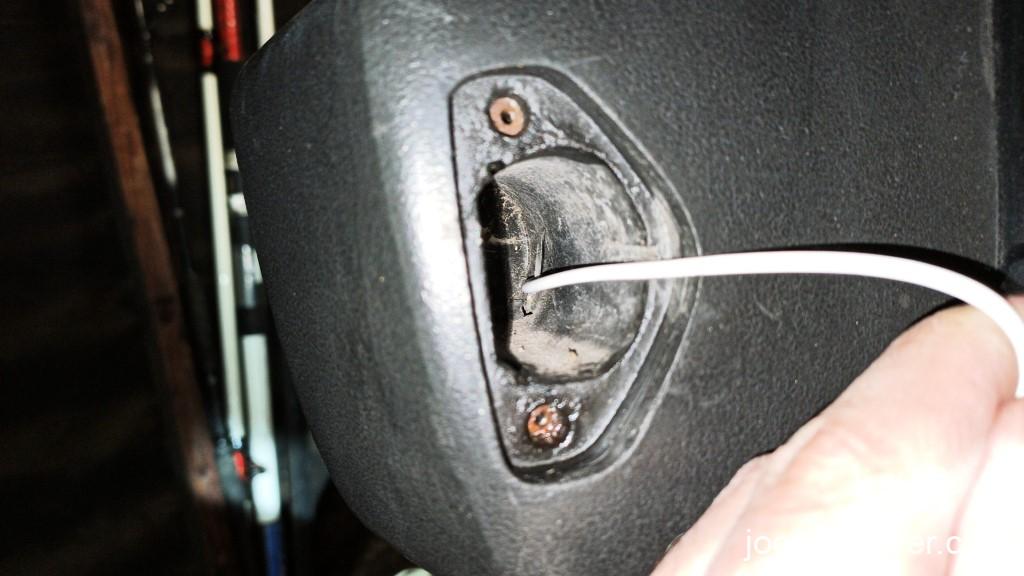
If your wiring is intact or repaired, you should be able to insert the wires and sleeve through the rubber grommet in the rear bumper. This will lead directly into the license plate light cavity in each rubber impact bumper.
If the wires and sleeve are not rigid enough to pass through the hole, you can fish a length of sturdy wire (16-18 guage) through the hole and light cavity, tape it to the end of the wires and sleeve, and gently pull it through the license plate light cavity.

The thermal sleeve should cover all the wiring beneath the bumper to protect it from excessive heat.
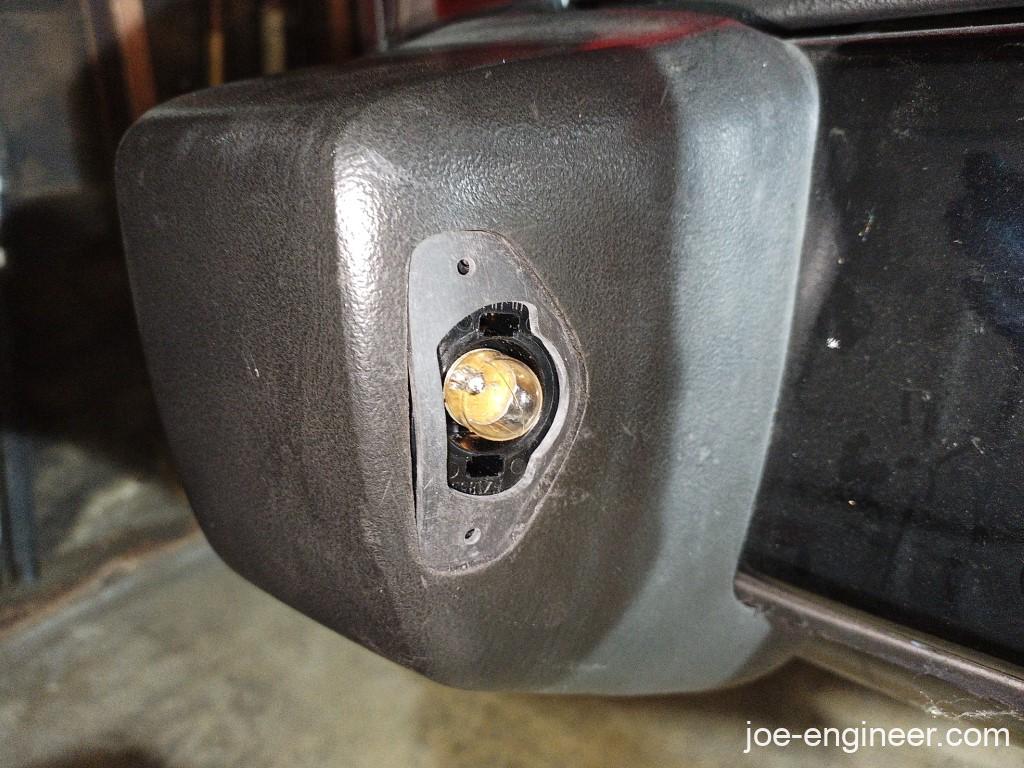
Step 6: Connect Lights & Test
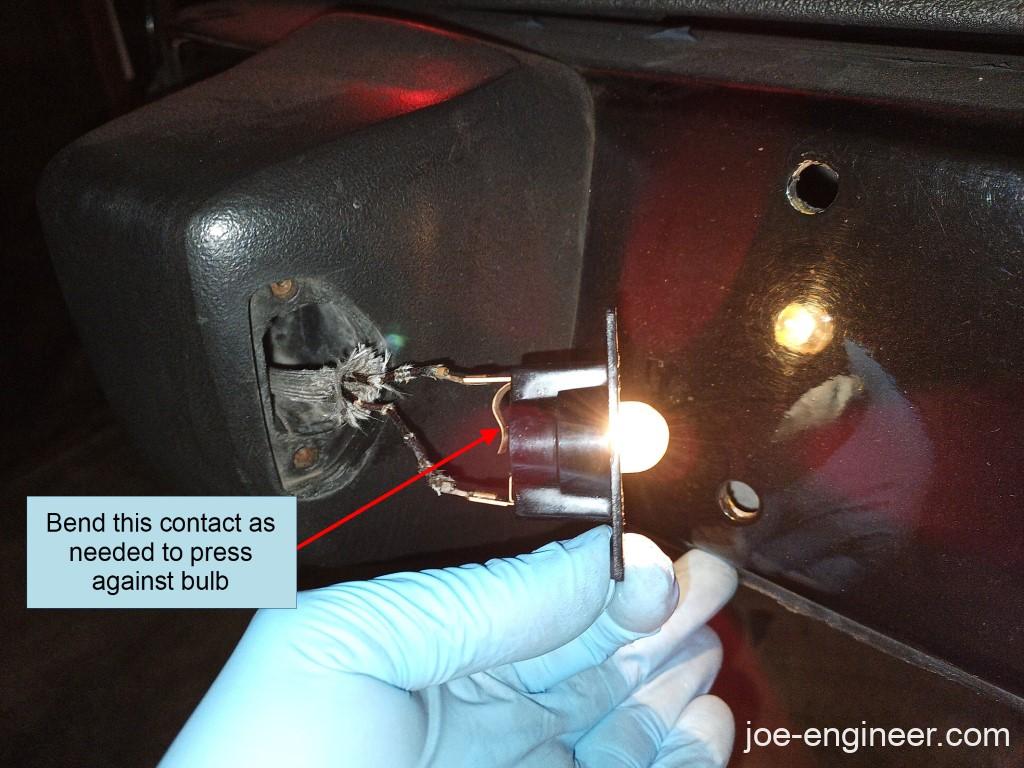
Connect both wires from one side onto the license plate light housing. Reconnect the negative battery terminal, pull the light switch to the “on” position, and check if the license plate light bulb turns on. If you are getting a bulb that turns itself off/on erratically, check the lower electrical contact that touches the bottom of the bulb. If necessary bend the contact up slightly to make sure it is a tight fit against the bulb.
Once you verify the light works well, turn the light switch to the “off” position and disconnect the negative battery terminal again. The light cavity in each impact bumper is very small, so in order to seat the light housing in place you may need to reach behind the bumper and gently pull some of the wire and thermal sleeve back out.
The wire and thermal sleeve exiting behind the bumper face should have a little slack in it and should be secured into a retaining clip at the top of each bumper shock. This will prevent the wire and sleeve from dangling around and touching the hot exhaust muffler.

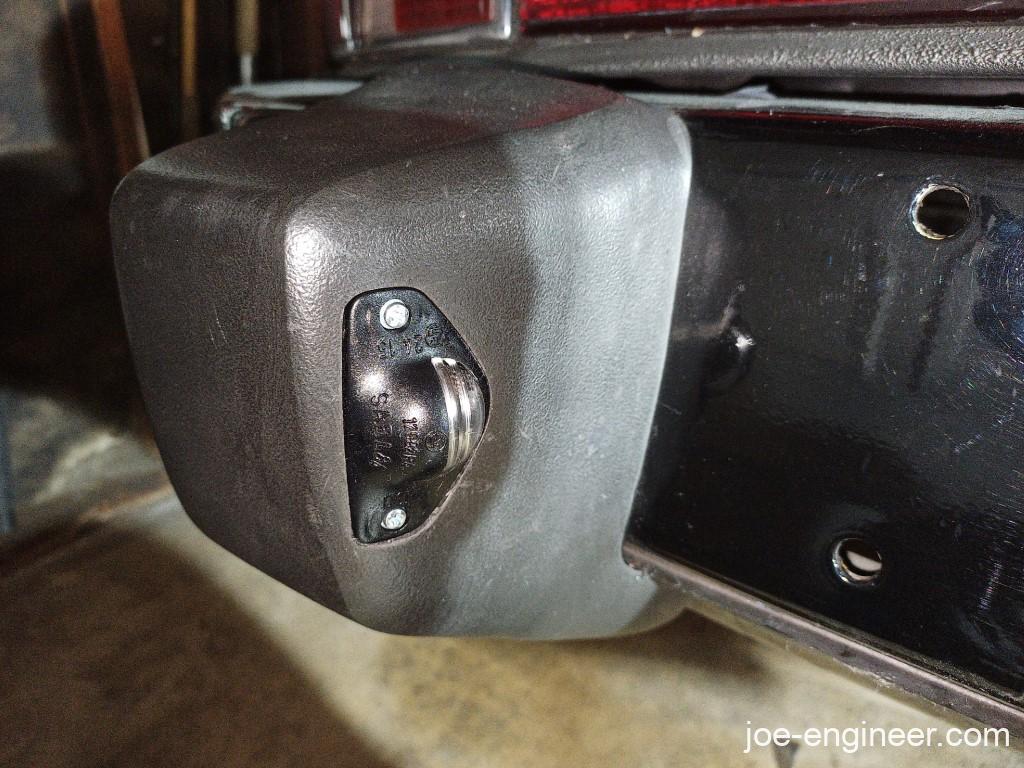
Carefully press the light housing into the light cavity. Follow it up with a gasket and the outer lens housing.
They are a tight fit in each hole and you may need to work the rubber bumper to fully seat the license plate light lens. Use a sharp straight pick or a tiny screwdriver to center the holes in the inner and outer housings and gasket, with the threaded holes in each impact bumper to allow the tiny screws to thread in. On the 911SC the screws are M3 x 0.5mm. Alternating between screws as you tighten will also help fully seat the light lens straight.
Once you have both license plate lights installed, reconnect the negative battery terminal one last time and turn on the lights to verify they still light up.

Step 7: Reinstall Muffler
Re-install your muffler using the large clamps attached to the rear of the engine and bolt it up with new muffler gaskets. Once the muffler is secured in place, lower the rear of the car back on the ground and your license plates lights installation is now complete.
Now you will be in greater compliance with local law enforcement and have a quality finishing touch on the rear of the classic impact bumper Porsche 911.