
911 Aluminum CIS Airbox Rebuild
After tearing down and evaluating my cast aluminum CIS airbox, let’s cover my modifications, rebuild, and testing for this unit.
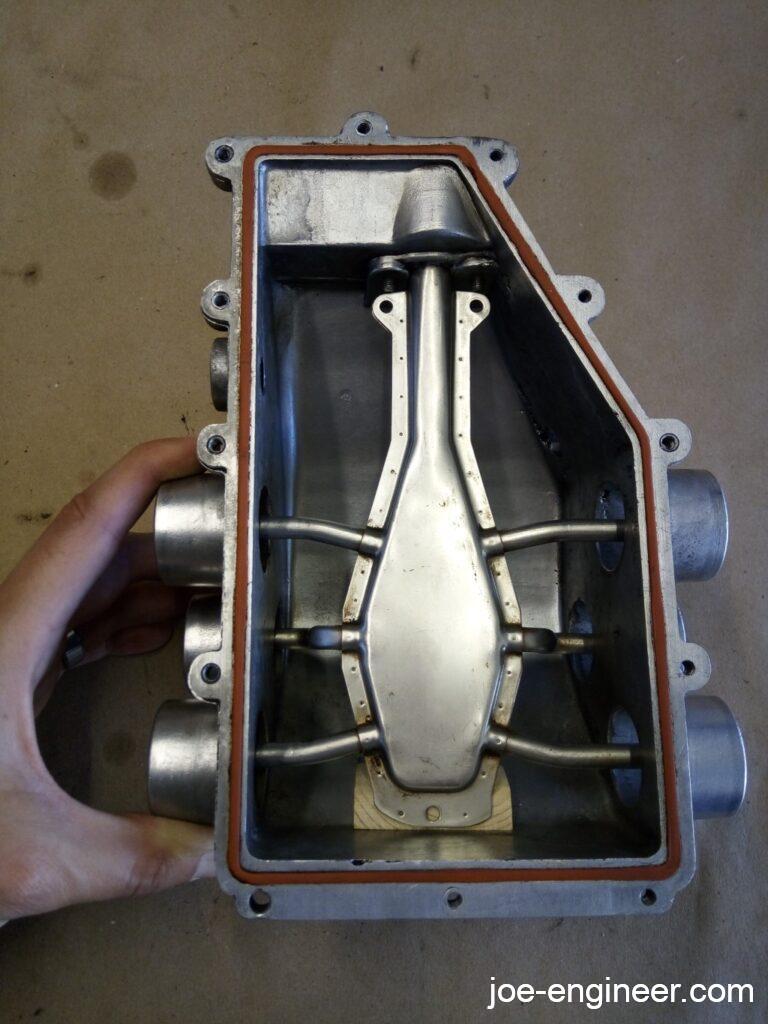
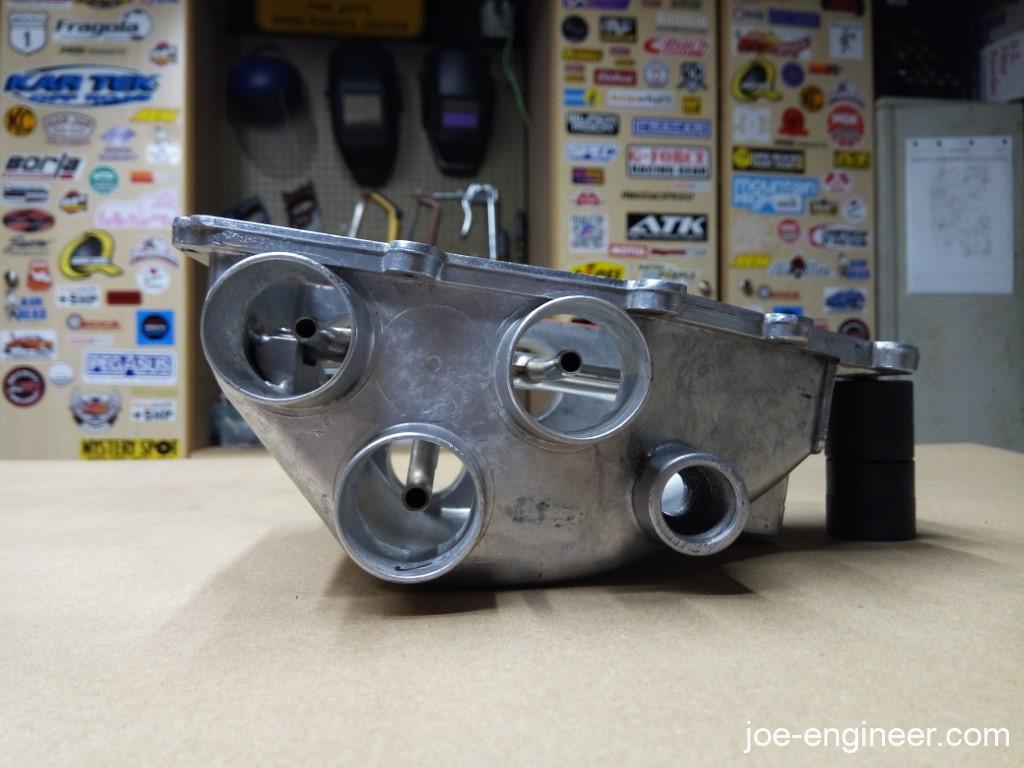
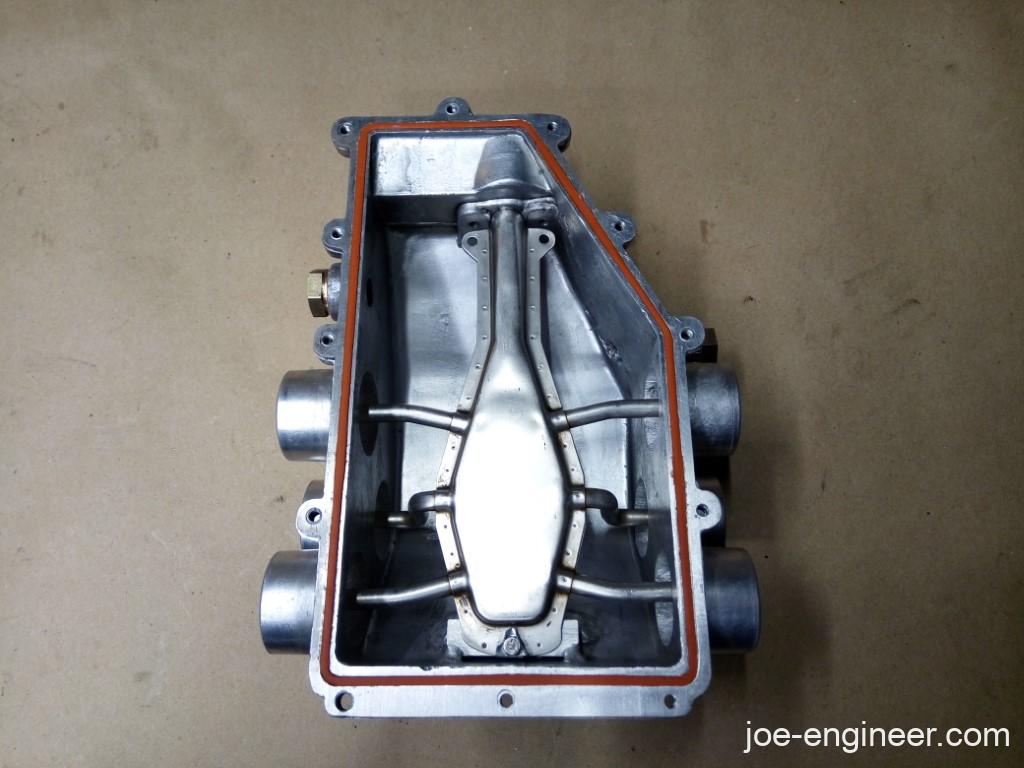
As you know the lower airbox had a few issues:
- No cold start manifold
- No mounting provisions for cold start manifold
- The port IDs were too small
This was going to result in some mandatory modifications to fit this box to my 1983 SC application.
Airbox Modifications
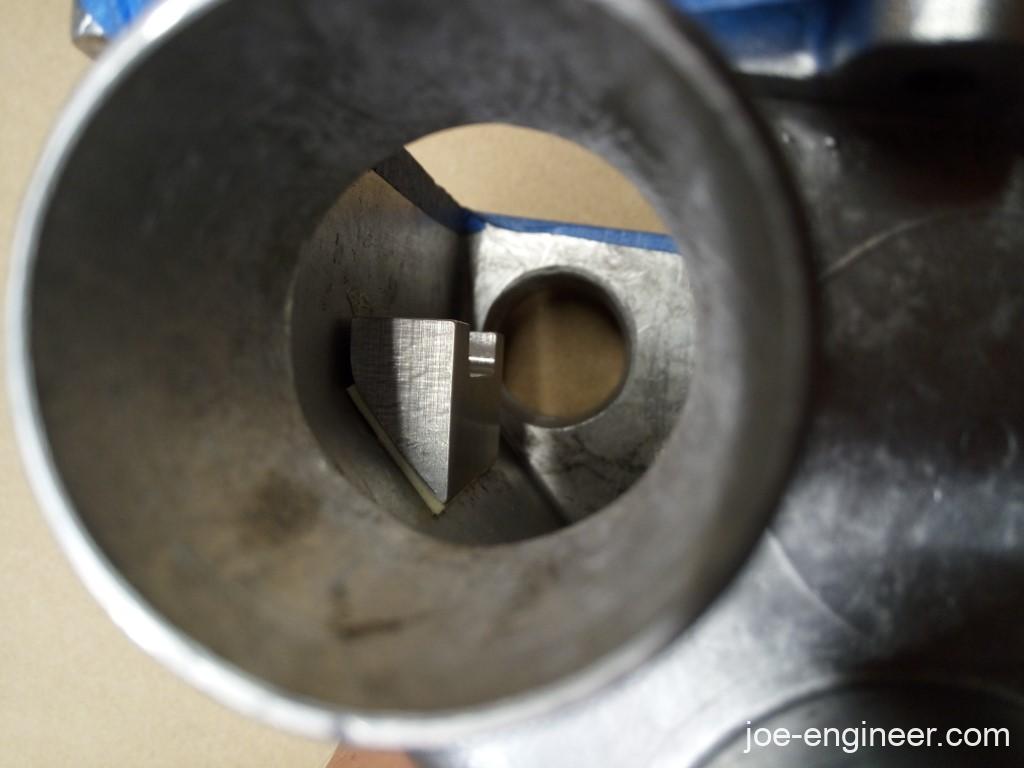
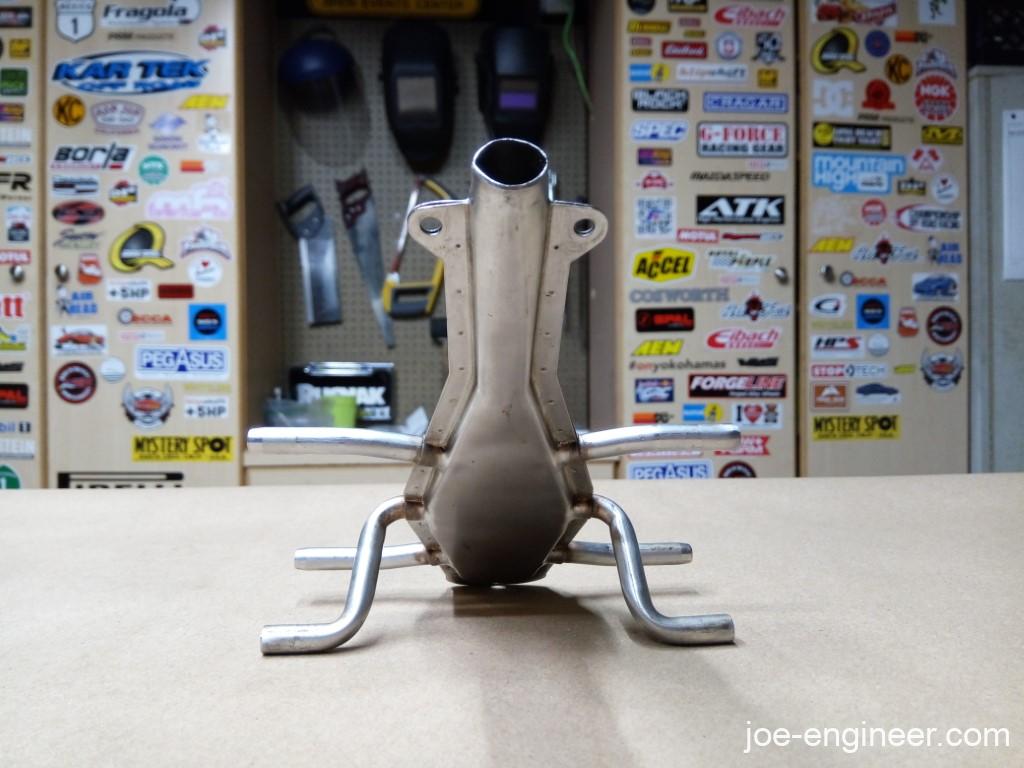
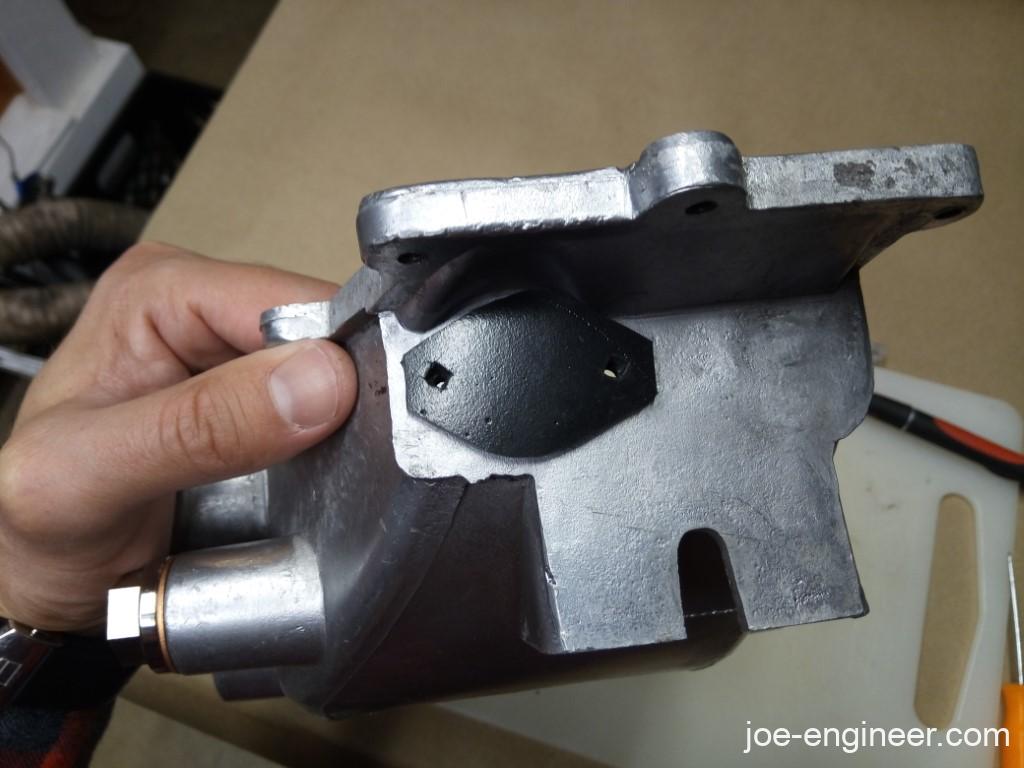
I grabbed the cold start manifold from my old plastic airbox and ground off a small amount of material off the center legs. Just enough to be able to maneuver it into and out of the lower chamber but still have the ends stick into the ports to spray fuel into the runners and not in the chamber itself. Now I could mock it up in position and figure out how the heck to mount it.
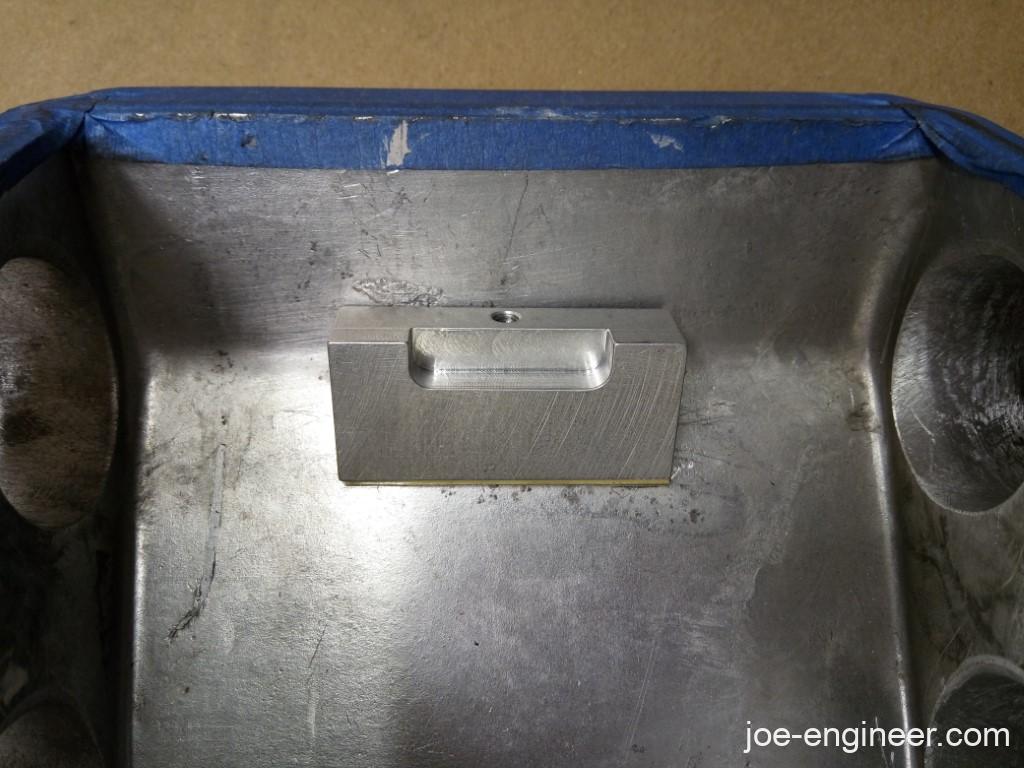
I then fabbed a small wedge of wood to create a flat mounting surface for the lower end with the single bolt hole. I then gave the wedge to an old machinist I know to make me an aluminum version to tack into the airbox.
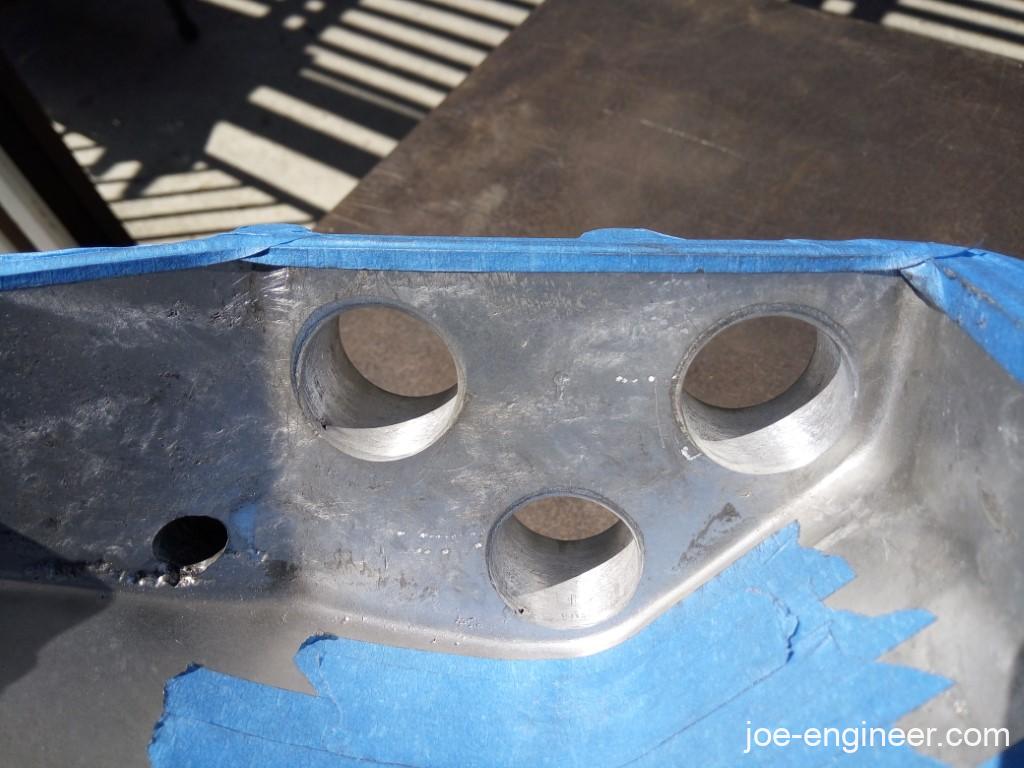
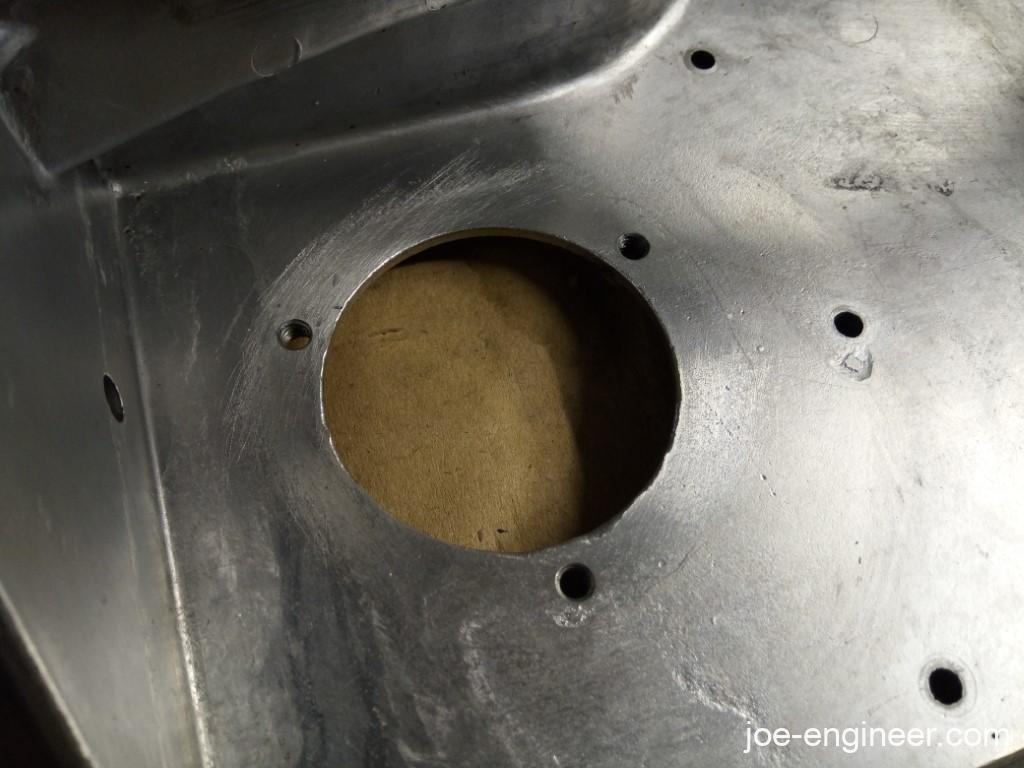
I then measured the port IDs and using a drill and carbide burrs, opened up the IDs on the lower airbox chamber to match.
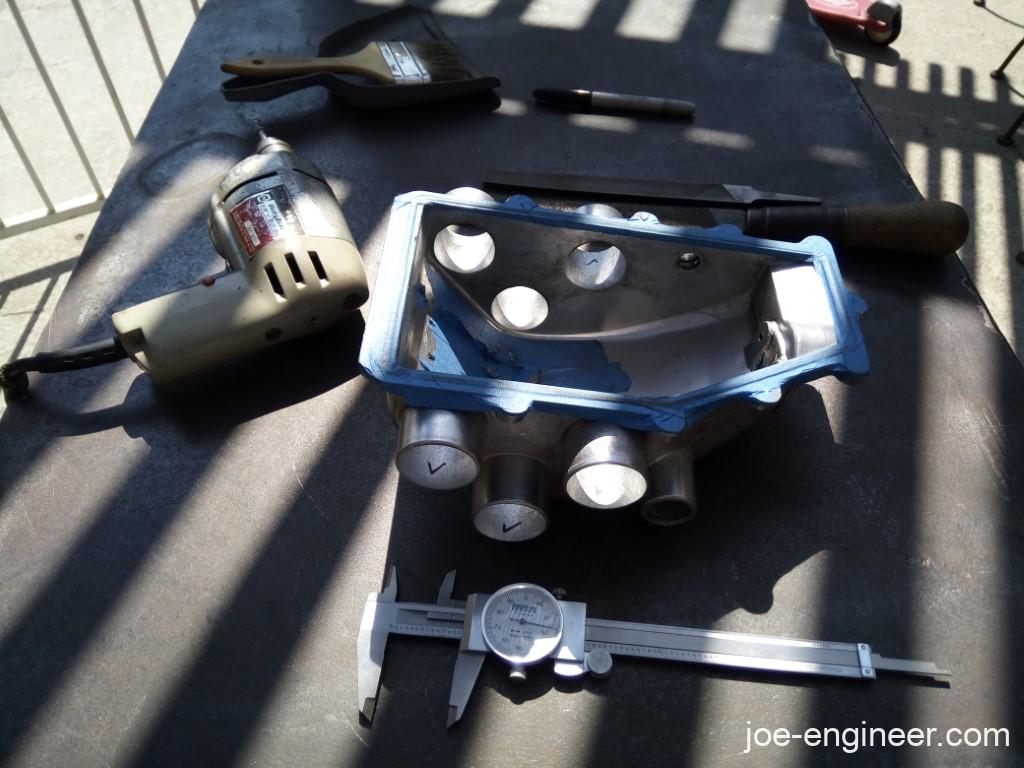
Even though it was a painfully slow process, I used a low-power drill instead of a die grinder because I wanted to slowly sneak up on the correct ID and reduce the risk of screwing anything up. If I junked this airbox it was going to be difficult to source another one. I then ground and filed radii on the inner corners as best I could in that cramped space.
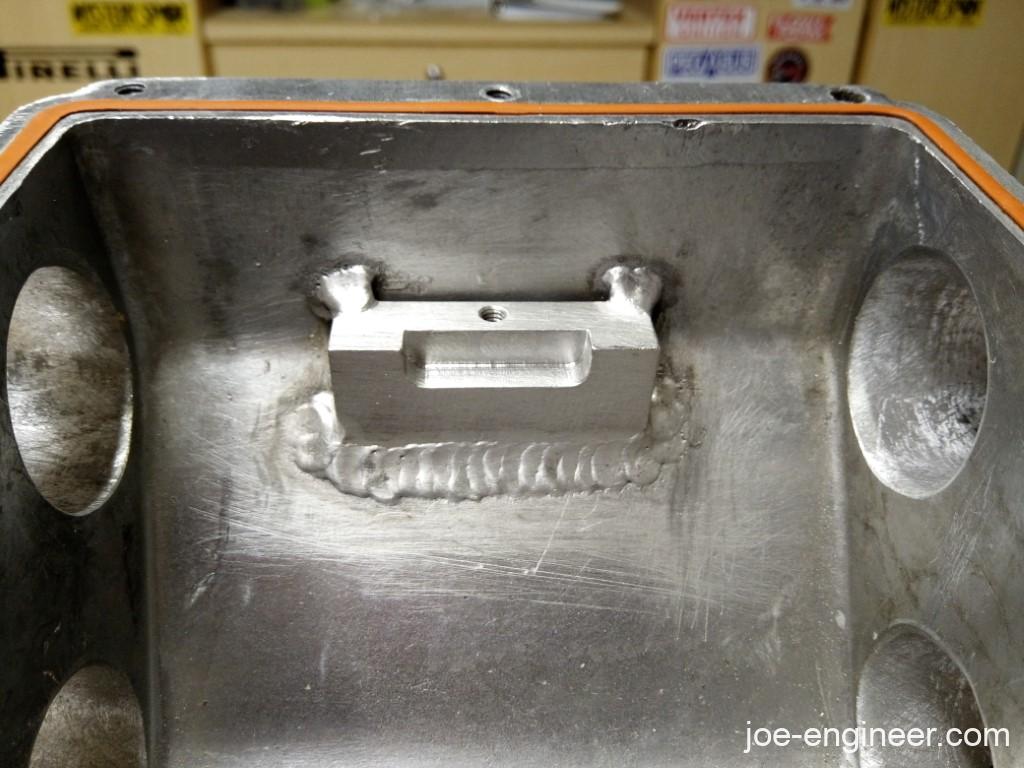
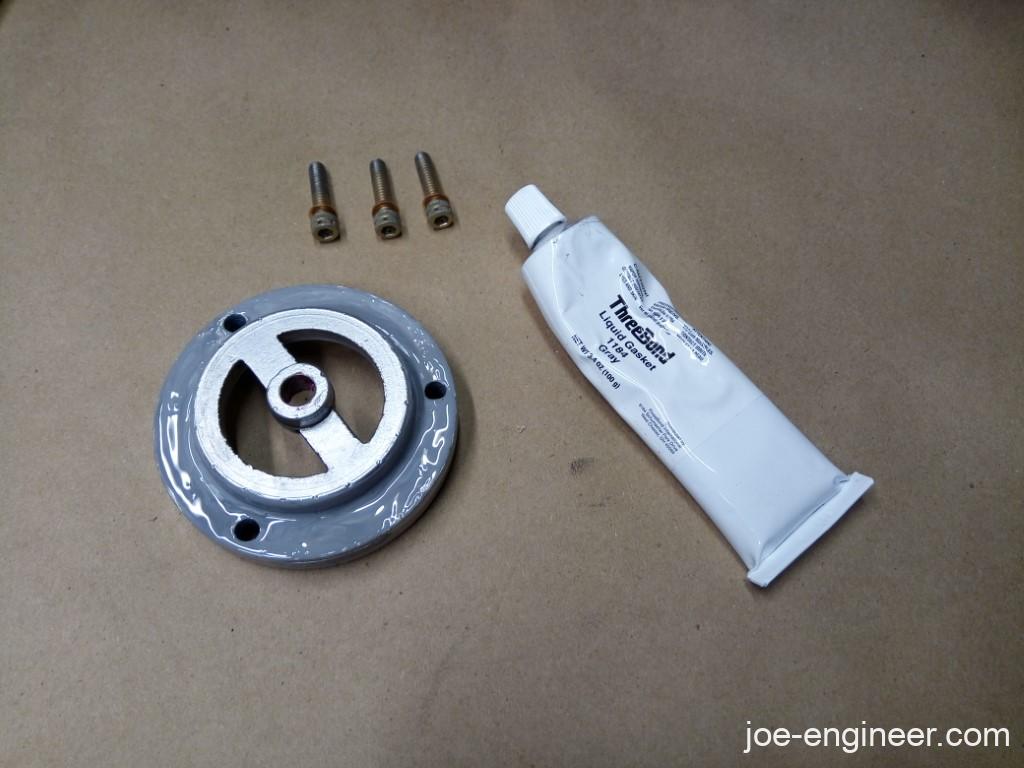
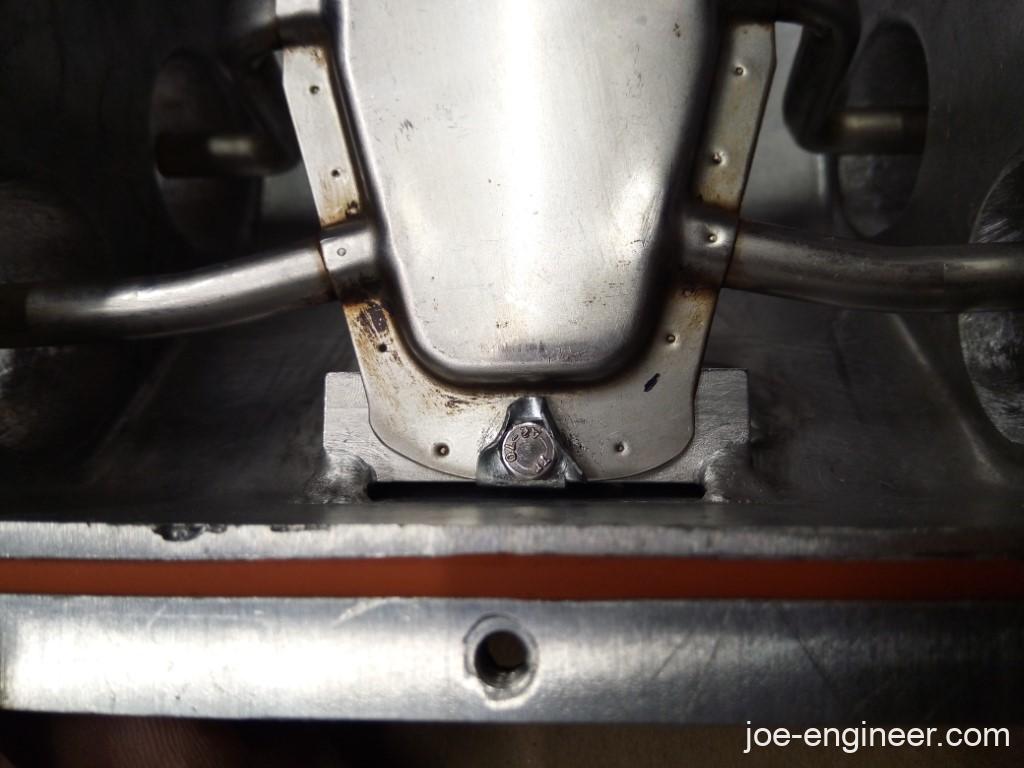
A few days later my machinist came through with a little aluminum wedge that fit the box perfectly. It contains a threaded hole for a hex bolt that matches the hole in the cold start manifold. I cant remember if its an M2 or M4 but its tiny. That pocket is to clear the center part of the manifold body.
I double-sided taped it to the inside of the box and tried installing and removing the manifold as if the wedge was welded in place.
With a bit of practice it was easy to install and remove the manifold with the wedge in place…
…so I went ahead and had a local weldor tack it in. The vertical wall has a small gap between the wedge and the wall which is a perfect place to locate a lock tab.
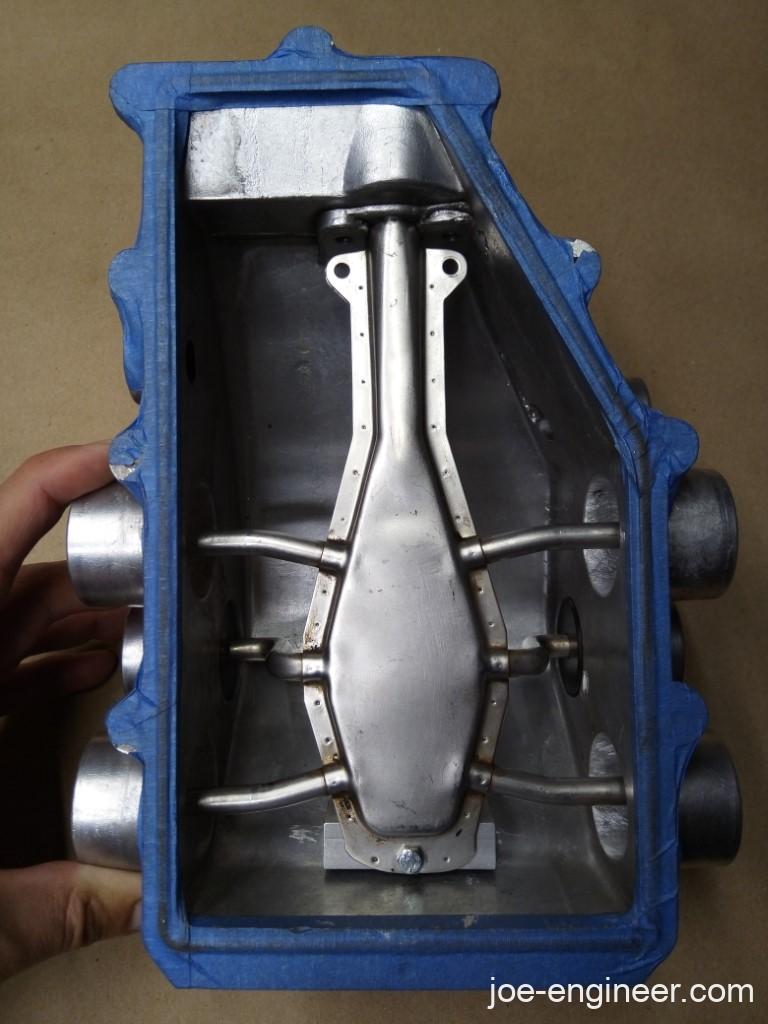
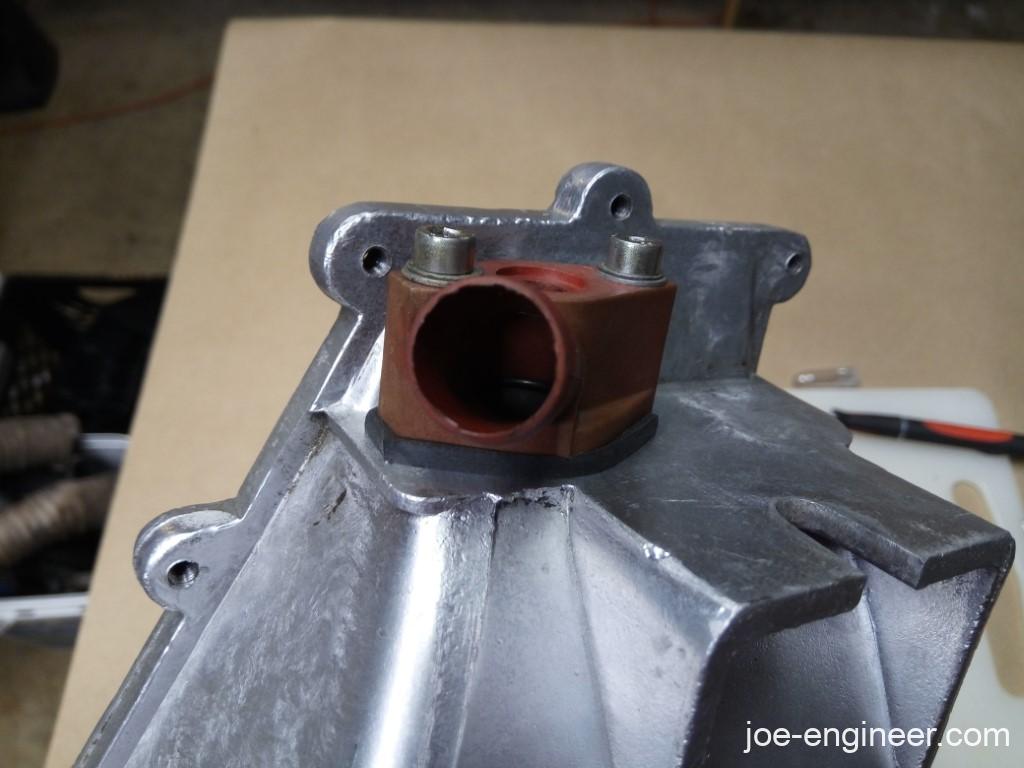
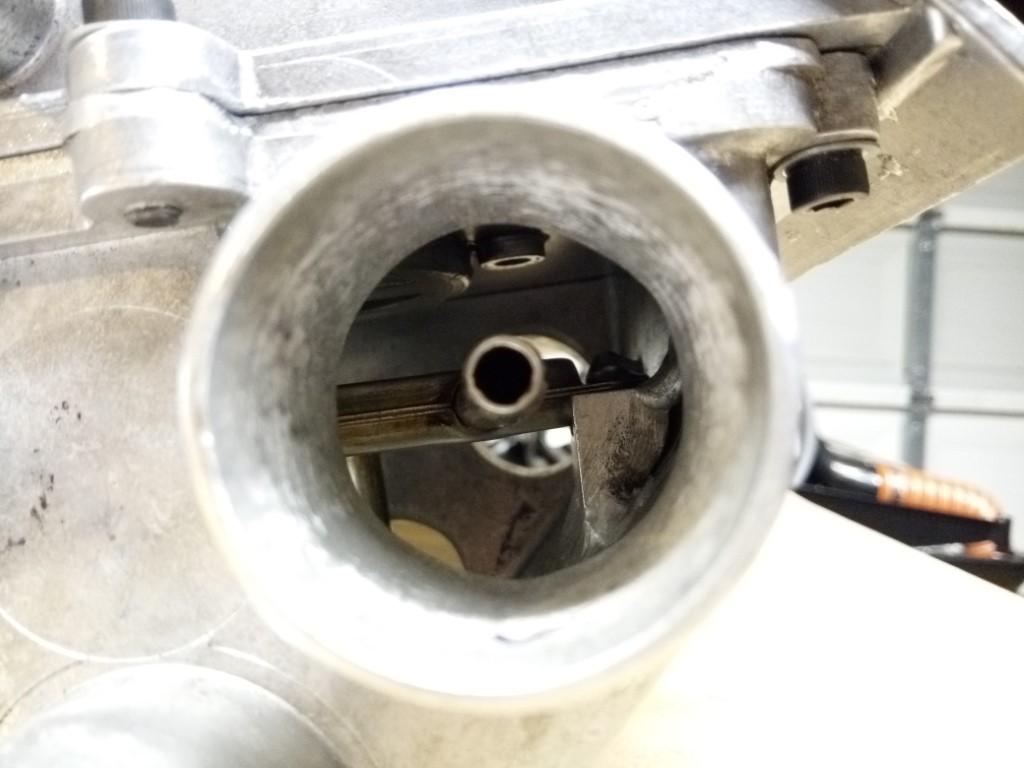
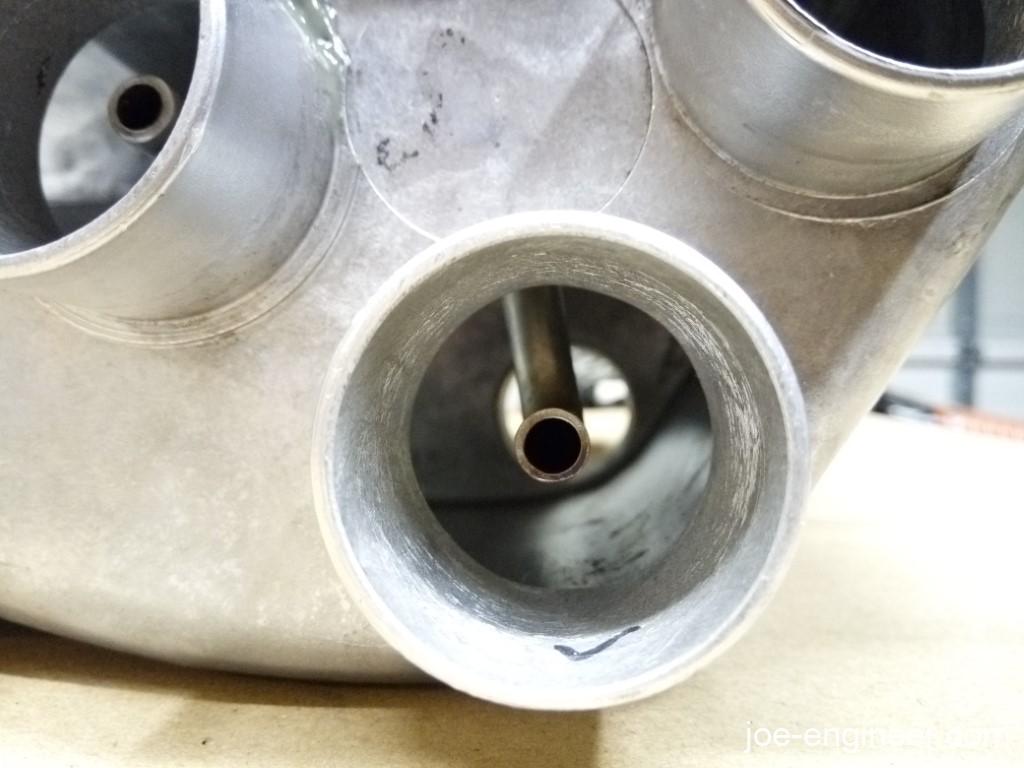
Here is the manifold installed with the single bolt in place. With the nose of the stainless steel manifold inserted into the airbox wall right behind the cold start valve, and with the hex bolt on the other end, torqued, threadlocked, and lock tabbed into place, the manifold should never come out without my permission.
The plastic airbox has 3 simple screws holding the manifold in. I have read a few threads here where they occasionally like to come out and take road trips to the nearest combustion chamber. That wont be happening here.
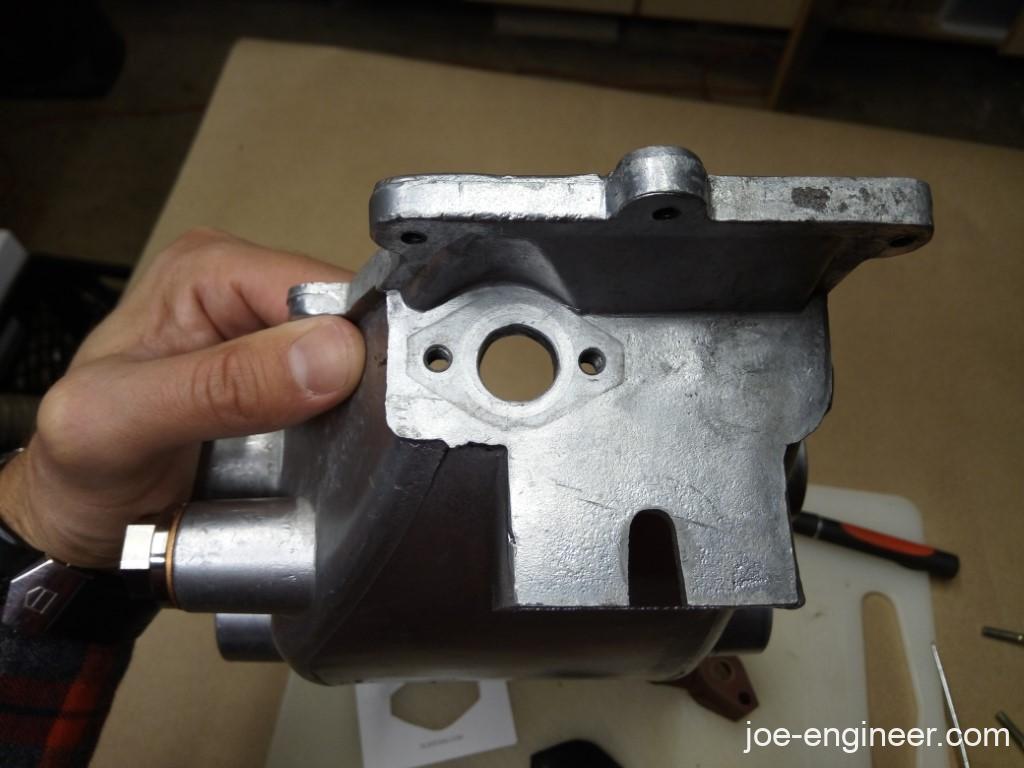
Here is the cold start manifold threatening to spray fuel at me.
Pressure Relief Valve Blueprinting and Testing
Next step was to figure out how to get the pop-off valve to seal as best as possible. Since this is just a big valve I started with some valve grinding compound to lap the valve and valve housing seats together.
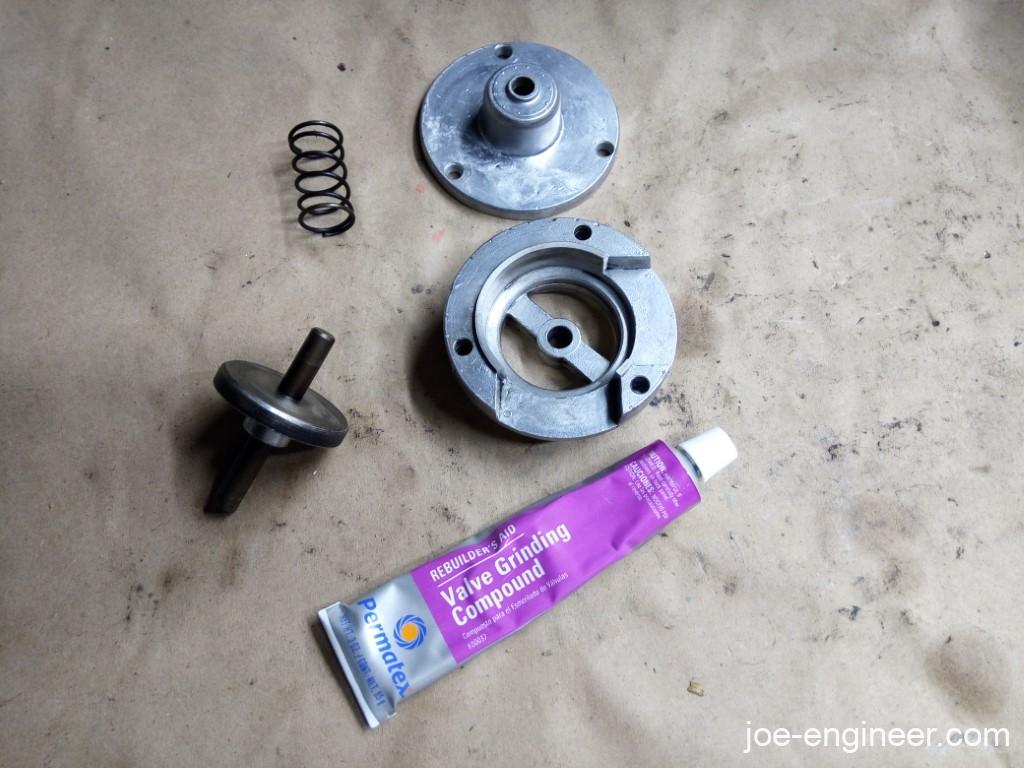
I then cleaned and assembled them and leak tested with some rubbing alcohol. I dont know why this stuff is green but it made it easy to see leaks.
I bolted the pop-off valve assembly together to have the spring exert some pressure on the seat. I then filled the top of the valve housing with alcohol and it held for about 1 minute before it began collecting the drops you see here.
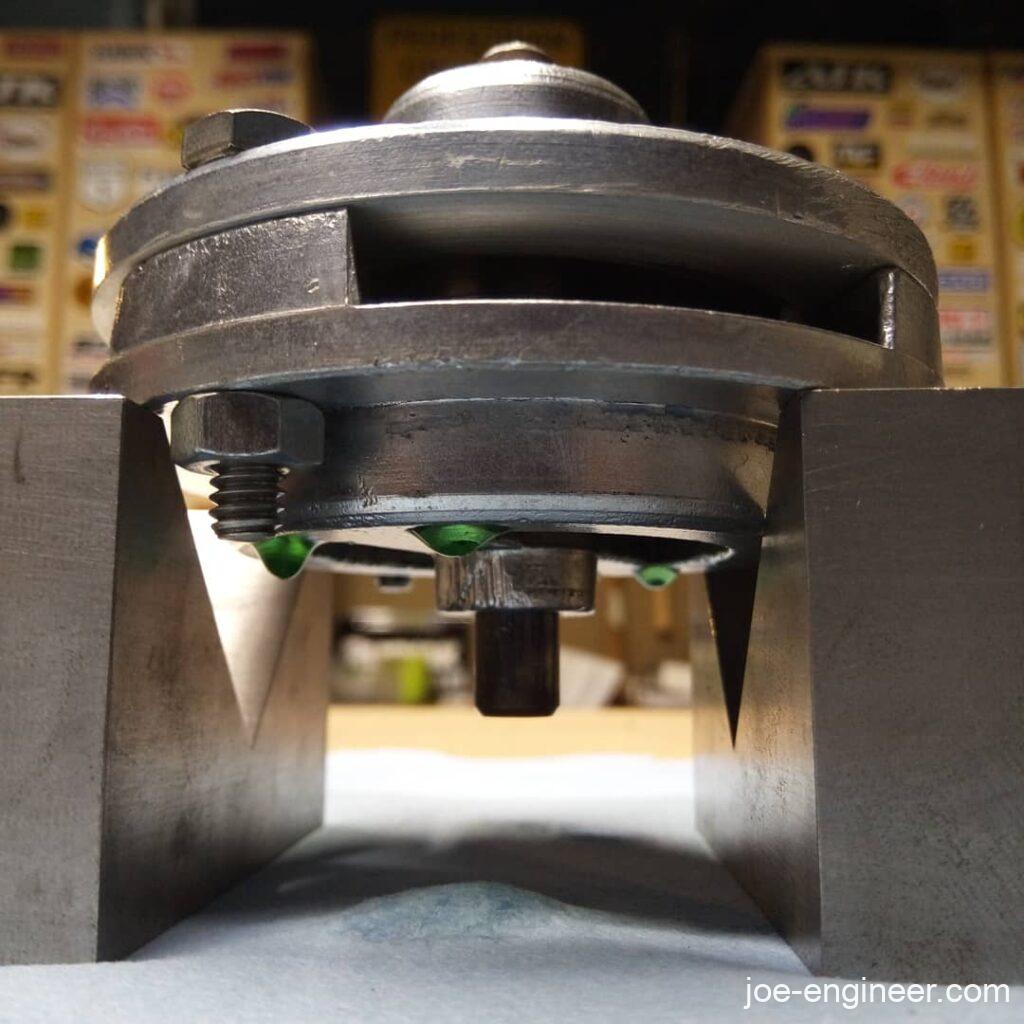
I then lapped the valve and seat with some metal polishing compound and repeated the test. It then held a leak free seal for about 10 minutes! To me that was good enough to now assemble the box and proceed to a pressure and vacuum test. The box needs to hold vacuum for normal engine operation and we need to verify that the pop-off valve pops at some reasonable pressure in case of a backfire.
I then cleaned the valve housing and airbox mating surfaces…
…and sealed with Threebond 1184 for a leak-free seal at this joint.
I then torqued the assembly to the airbox with some NAS spec cap screws. The reason for this is that the screws themselves are in the intake path and I dont want them to ever come off and get sucked into a cylinder, so since they come with drilled heads I can safety wire them together.
Next I made a block-off gasket for the cold start valve with some silicone sheet I had lying around. I made a similar gasket to block off the throttle body and sandwiched them in place.
Next I sourced an EGR block off plug (shown on the left) with Belmetric, then re-used another hex plug from my plastic airbox for the hole on the right. Some rubber stoppers in the port holes will help seal those openings.
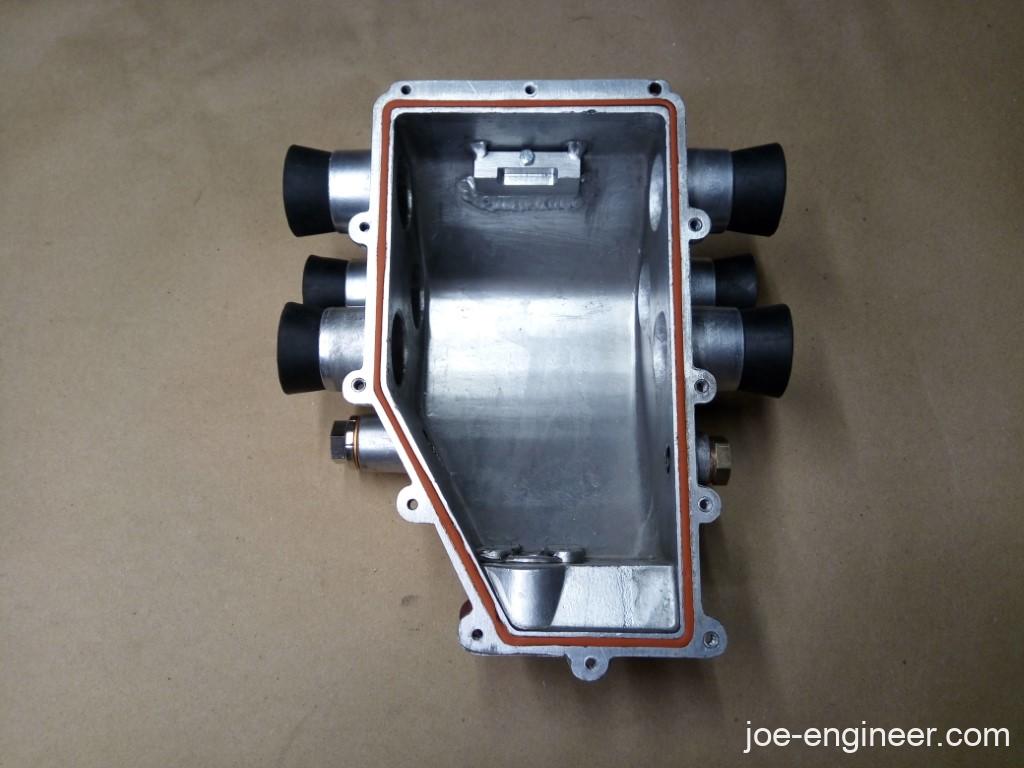
I drilled a hole in one of the stoppers so I could insert a fitting for an air line and cut a pair of plywood plates to clamp together and seal the ports with the rubber stoppers. One of the plates has a hole to clear the air line.
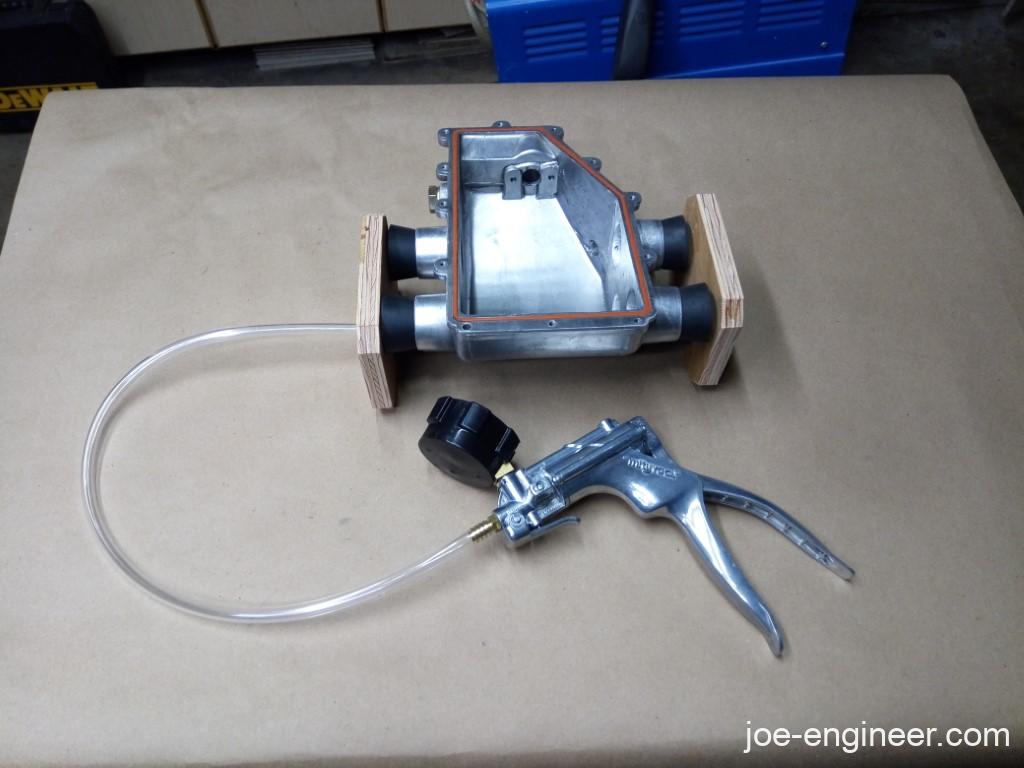
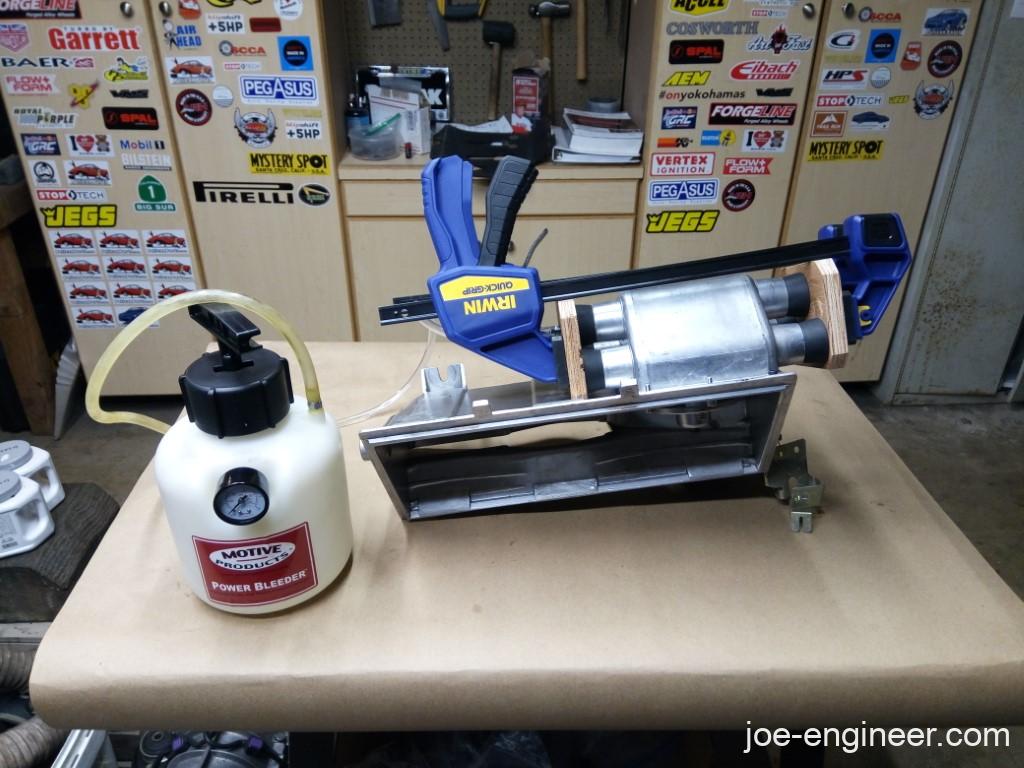
I assembled the airbox (without the cold start manifold) and was ready to test.
Airbox Leak Testing
I tried to use a hand vacuum pump and quickly realized it didn’t have big enough lungs to evacuate the large volume of air in the airbox chamber and draw a significant vacuum. Maybe a venturi style vacuum pump attached to an air compressor would have worked better. Regardless I was able to draw several inches of vacuum and it held it for about 20 seconds before slowly starting to drop off. To me this was good enough since the engine has much much bigger lungs and will be inhaling continuously so it should draw a healthy vacuum. Since I am replacing all the rubber components in the vacuum assembly there should be no other sources of unmetered air coming in.

I then conducted a pressure test with a pressure brake bleeder because it moves more air than the hand pump. I found that the pop-off valve cracks at about 3 PSI, according to the pressure bleeder gauge. Very low pressure and likely at a safe point before anything else can be damaged during a backfire.
Ultimately we wont know for sure until we run it. Time for final assembly.
Note: During my pressure test I discovered a few airbox leaks due to cast aluminum porosity. They showed up as hissing sounds that were detectable once you put your finger over them. They were mostly in sharp inside corners such as the base of the airbox ports. I identified them, sanded, cleaned, and epoxied those leaky spots with EA9340 (the same stuff I used to seal my engine case plugs) and repeated the pressure test until I achieved the 3 PSI result posted above.
Airbox Final Assembly
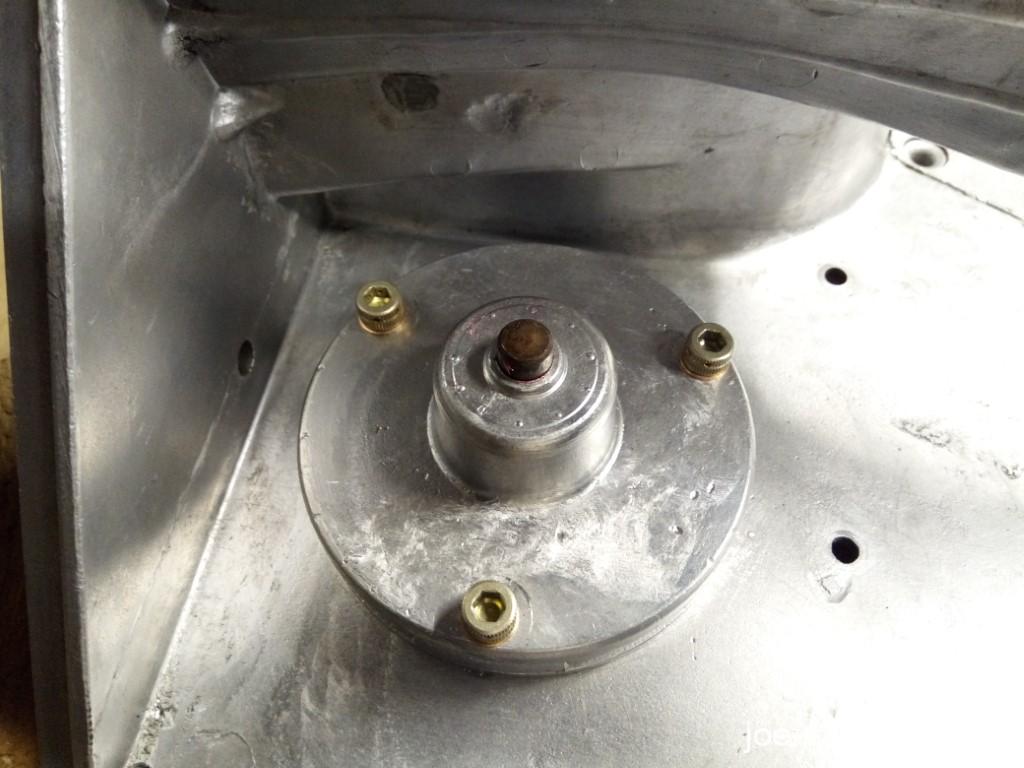
I installed the cold start manifold, applied blue loctite and torqued the mounting bolt.
Underneath the bolt I had pre-bent a lock tab into the slot and locked 2 faces of the bolt head as well. The stainless steel manifold is mounted nice and solid.
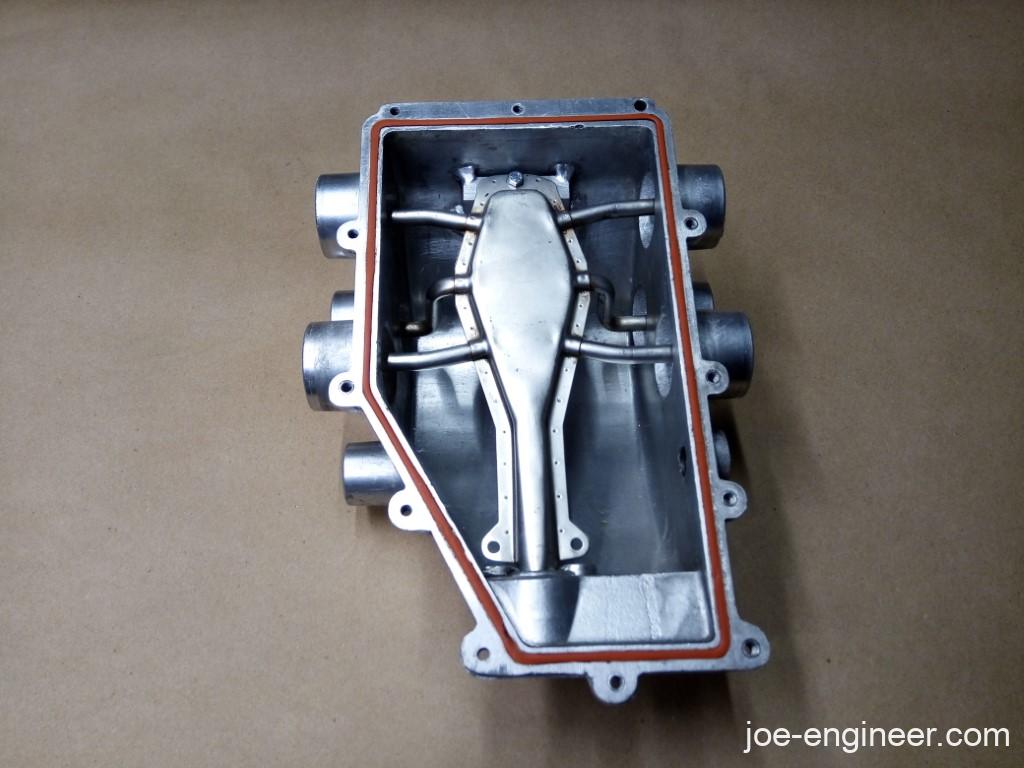
I then assembled the lower and upper airbox halves with regular cap screws on the outer flange and more NAS cap screws on the interior and torqued everything down.
After a YouTube crash course in lock wiring and a few attempts…
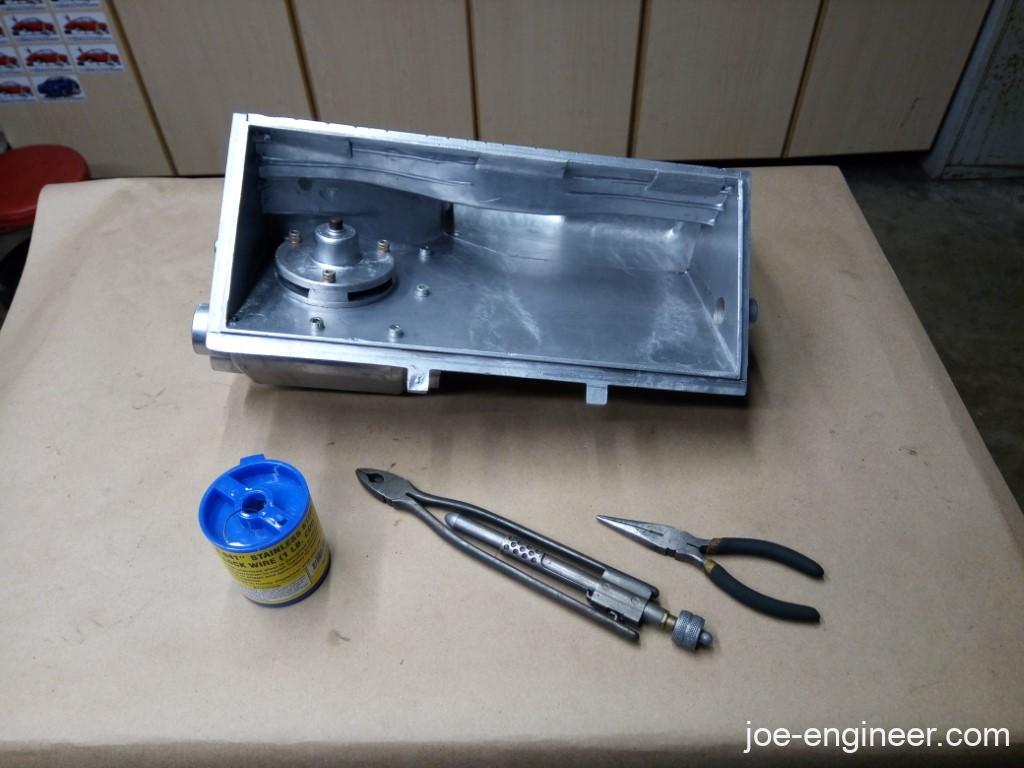
…we ended up with this.
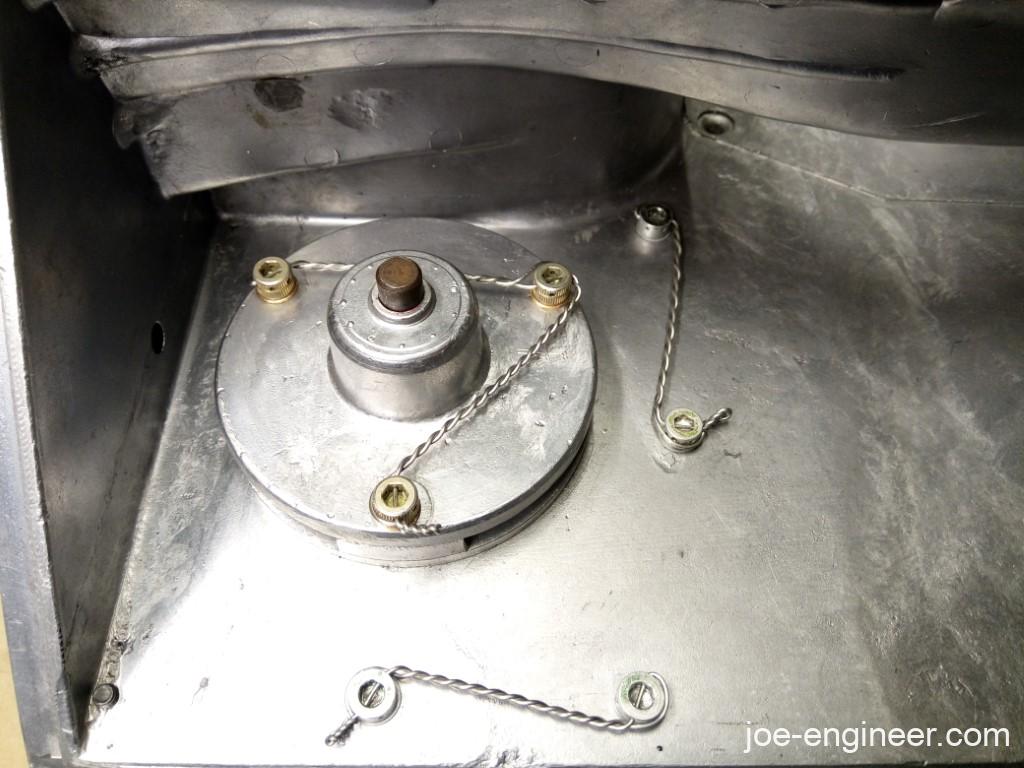
Perfectly over-engineered, just the way I like it. 🙂

You can see that the manifold is located exactly where it should be, at the center of each port.
This concludes the remainder of my cast aluminum airbox blueprinting and I can now proceed with the rest of my CIS rebuild to test it out!
Note: If you plan on repeating the pressure release valve leak testing I just covered, it didn’t work. The valve resulted in a huge vacuum leak on the running engine. I’m just covering the mistakes I went through to get to the working solution. Read on to my engine start-up/break-in to see how I fixed the valve (coming soon).
Next time Ill teardown the rest of the CIS so I can get ready to test all the subcomponents.