
Porsche 911 Pedal Cluster Rebuild
With the plumbing all done, it was time to work on the foot controls.
Disclosure: This post contains links to Amazon products and other trusted vendors. As an Amazon Associate I earn from qualifying purchases.
After rebuilding the brake, oil, and fuel plumbing, I decided to rebuild the pedal cluster since I already had it out. This is one of those commonly neglected items where you have no idea how utterly screwed up it is until you pull it apart. Then after you fix it, it makes such a difference you cant believe you didn’t do this sooner.
I have already written a very detailed DIY on rebuilding the pedal cluster over on FCP Euro’s DIY Blog. I don’t plan on re-writing it here mainly because it is very detailed and very long. I recommend going to the FCP Euro link and reading it there so you see what an easy job it is. Instead I’m going to try my hardest to scare you into rebuilding yours by showing you all the things that were broken on mine. 🙂
Here is a list of some common Porsche 911 pedal cluster failure points:
Clutch Cable Clevis Pin
Before removing the cluster, you need to disconnect the clutch cable clevis. If the last person in here was thinking about you, they would have spent the extra minute to insert the pin from the right side of the car towards the left. This is because as the clevis pin and clutch pedal arm bushing wear, they tend to create a groove or slot in the clevis pin. Then when you want to slide the clevis pin out, the wear groove prevents it from sliding out. If the clevis pin is inserted from right to left, you can push on the end of the pin with a pick or a screwdriver as you jiggle the clevis and the pin is more likely to slide out even if its worn.
If the last person in here didn’t know or care, they might have installed it in this orientation, from left to right.
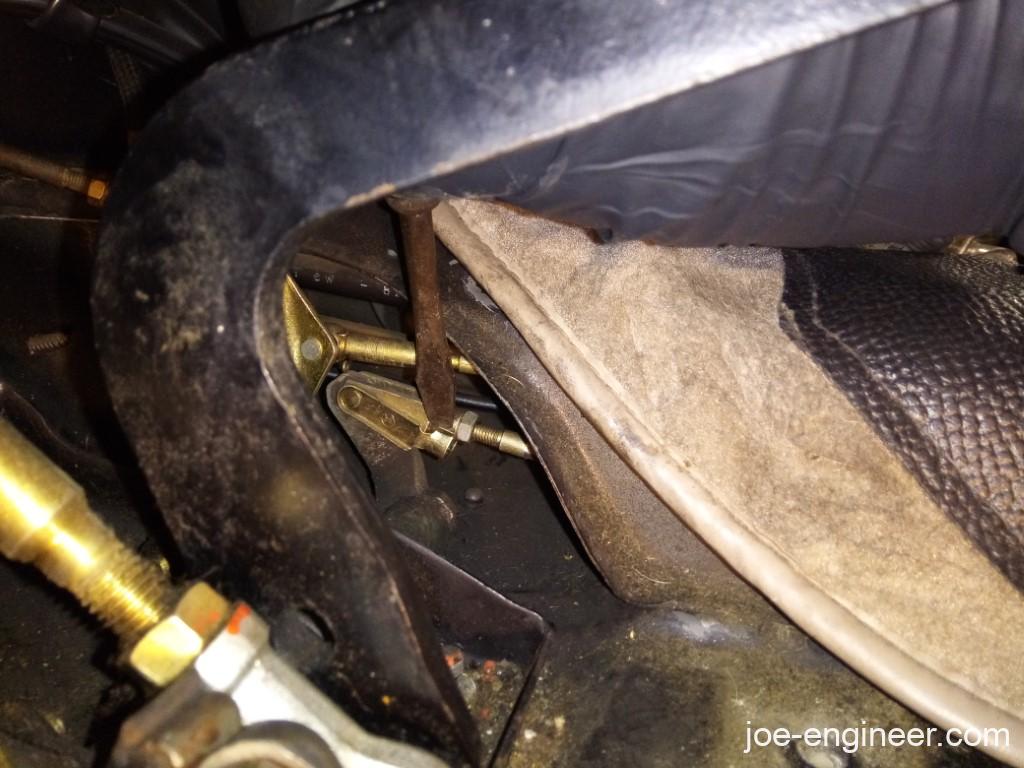
In order to get this pin out, I needed to push on the end of the pin, which was inaccessible because I would need to push from the center tunnel out. I unsuccessfully tried to gently pry with a flat screwdriver but it would not budge. It was so stuck I even broke a screwdriver in the process. Eventually I grabbed it with needle nose pliers, bent it out and tried to wiggle the pin free but no luck. As a last resort I pulled on the cluster to expose some length of cable, maneuvered a tiny hacksaw in that space to cut the threaded end of the clutch cable, and finally free the pedal cluster after I had disconnected everything else.
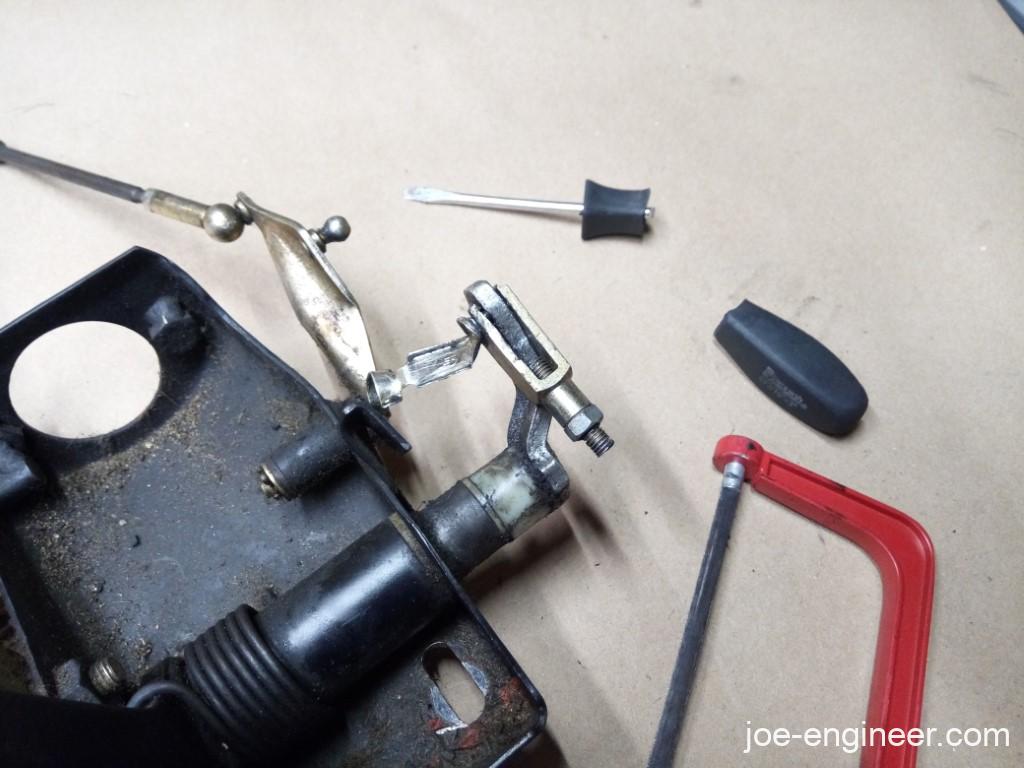
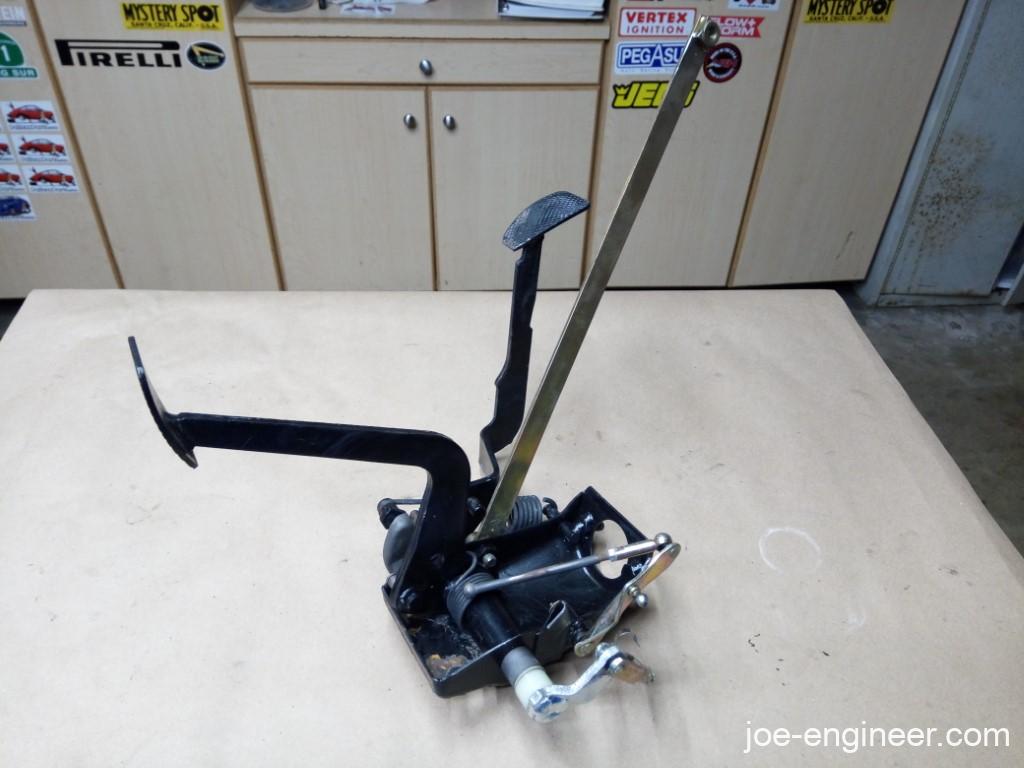
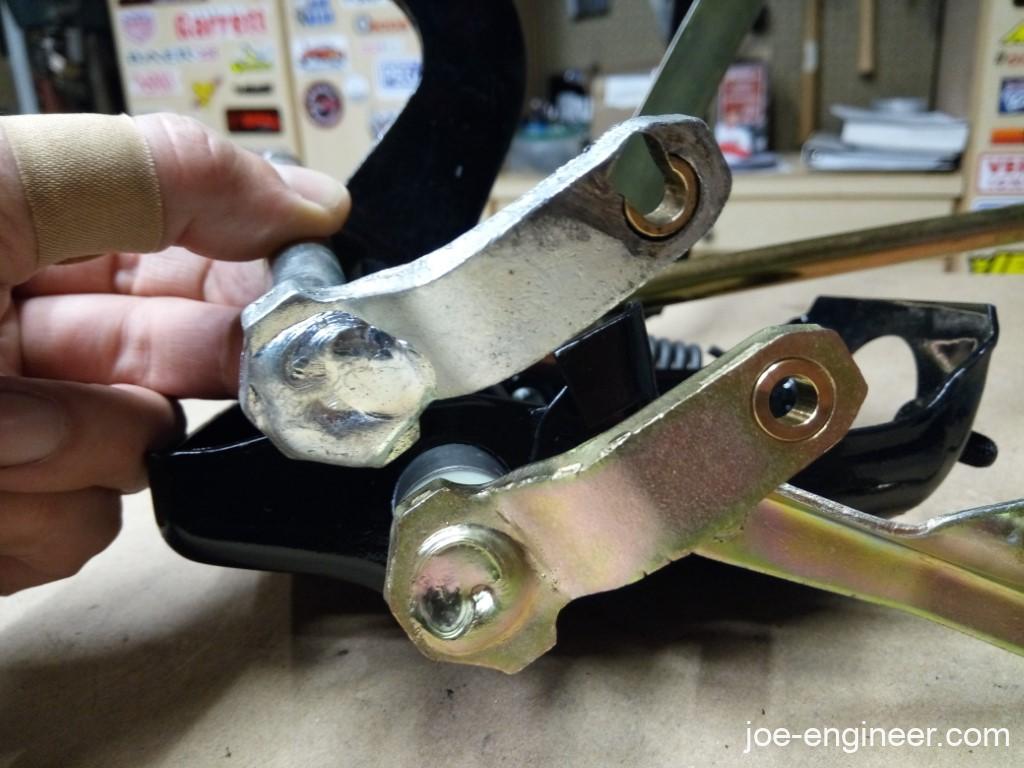
As you can see this clutch arm bushing had failed completely and the arm itself was nearly worn through as well. How many more gear shifts do you think it would have held up for? Imagine trying to adjust the clutch cable with that much play in the linkage. Then people blame the 915 gearbox…
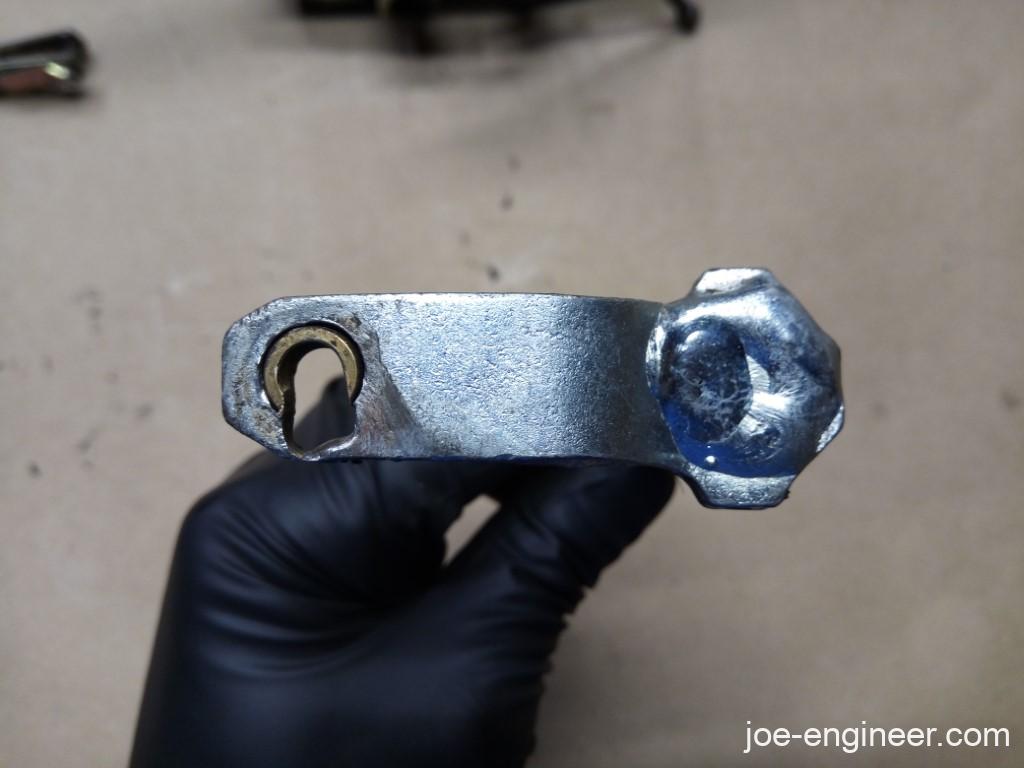
Once you rebuild the cluster and replace this arm and bushing, the clutch adjustment, operation, and gear shifting should greatly improve.
Clutch Arm and Roll Pin
Something you may not notice until you take it apart is a failure of the clutch arm where the roll pin hole is located.
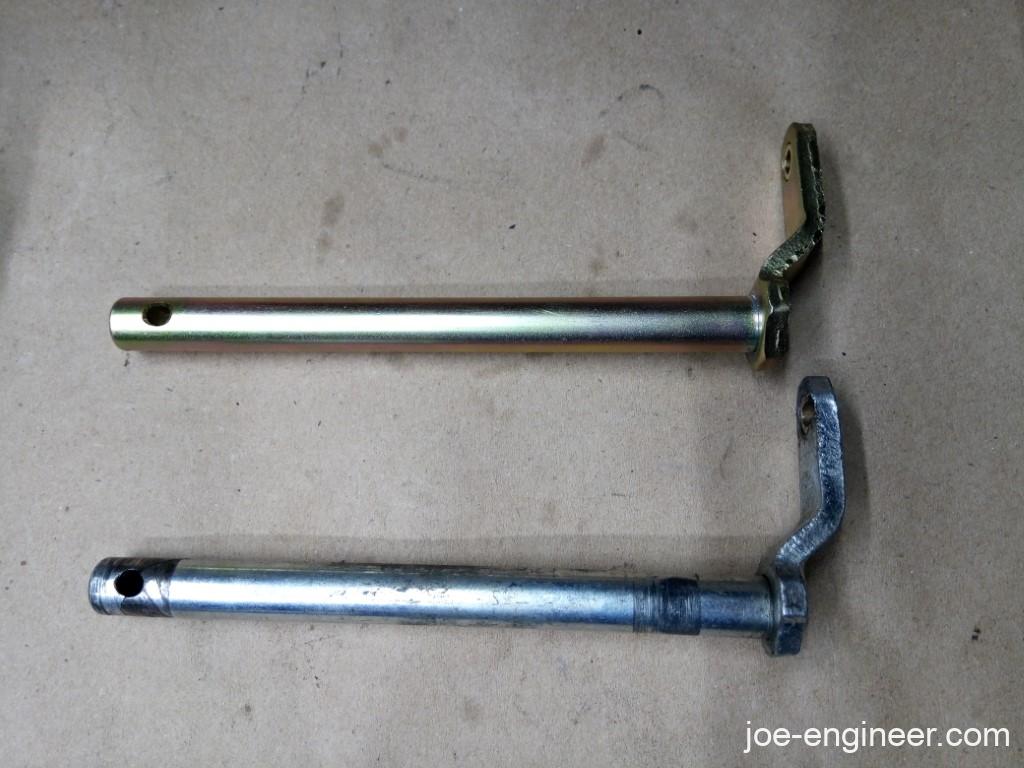
Once you tap out the roll pin holding the clutch pedal to the clutch arm you may find the arm cracked around the roll pin hole itself.
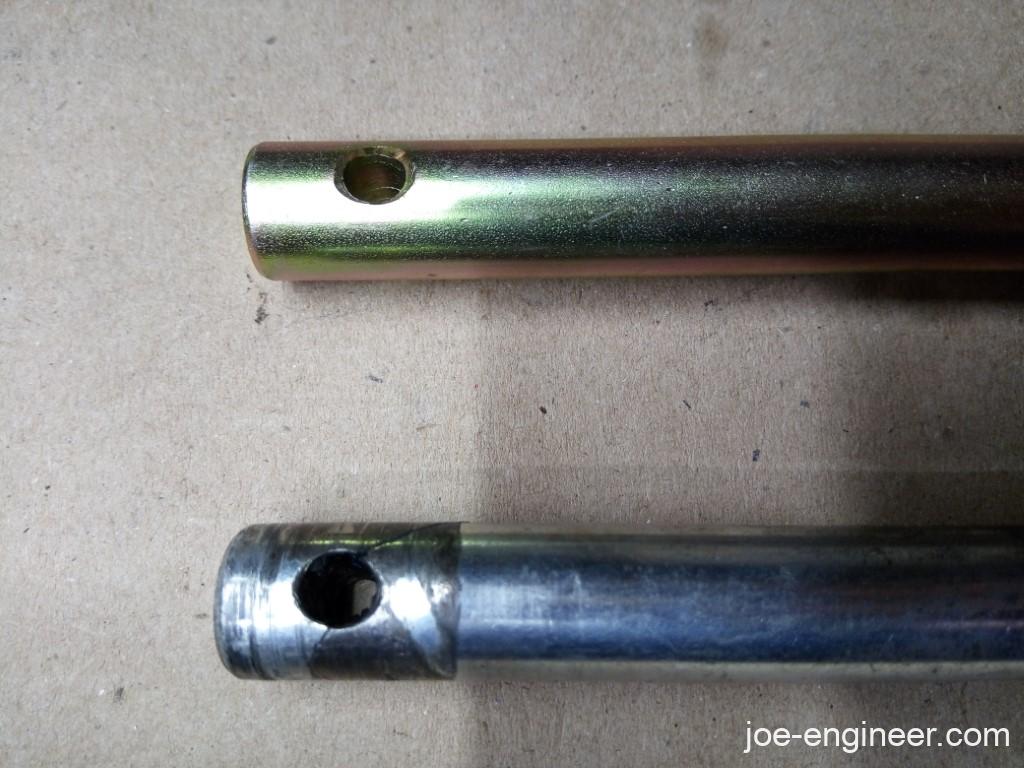
If you are lucky like me, the clutch arm will hold itself together despite being cracked. If you are not lucky, you may go to press the clutch pedal, hear a loud bang, and the pedal might sink to the floor indicating that either the clutch arm broke completely around the roll pin hole, or the roll pin itself sheared off, or both.
Rust
To no one’s surprise, if your floors are rusty due to water intrusion, salted roads, etc. your pedal cluster base might be rusty too. However if your car is a super dry (but neglected) California/Texas car, your pedal cluster base may still be rusty.
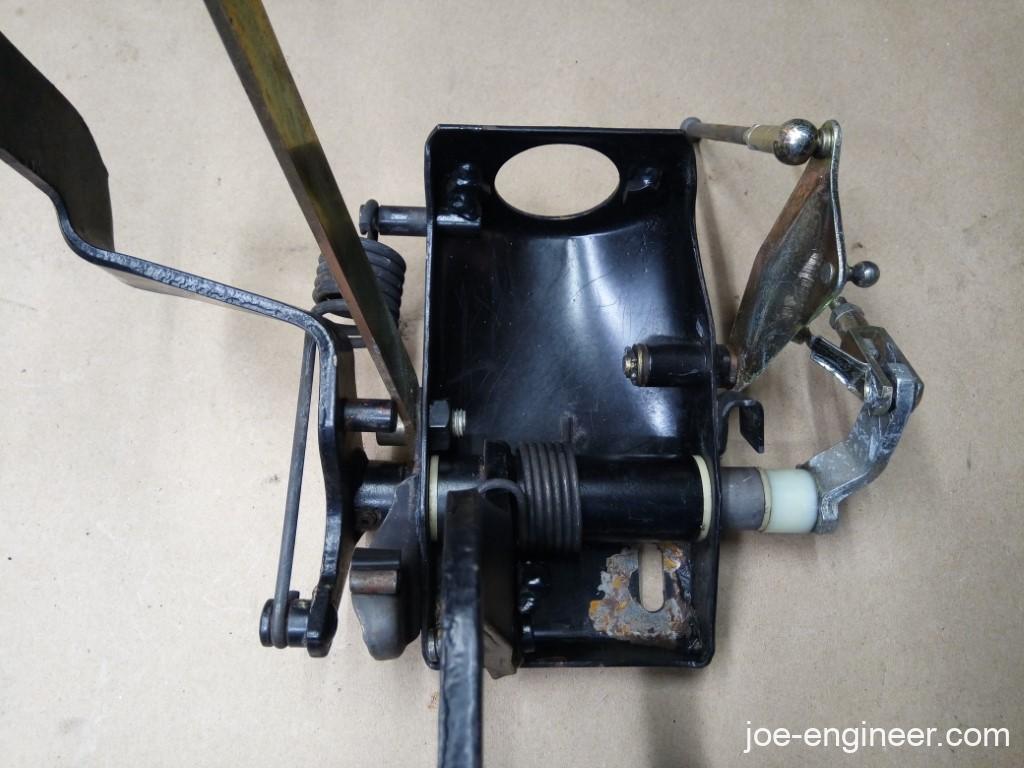
If your car has vacuum-assisted power brakes (1977 and later), brake fluid from a leaky master cylinder in the frunk could dribble down the actuator rod that is connected between the master cylinder and brake pedal. Then the brake fluid collects in the pedal cluster base and eats away at the paint and potentially at the floor paint directly below it too. Too bad it doesn’t eat away decades-old cigarette butts.
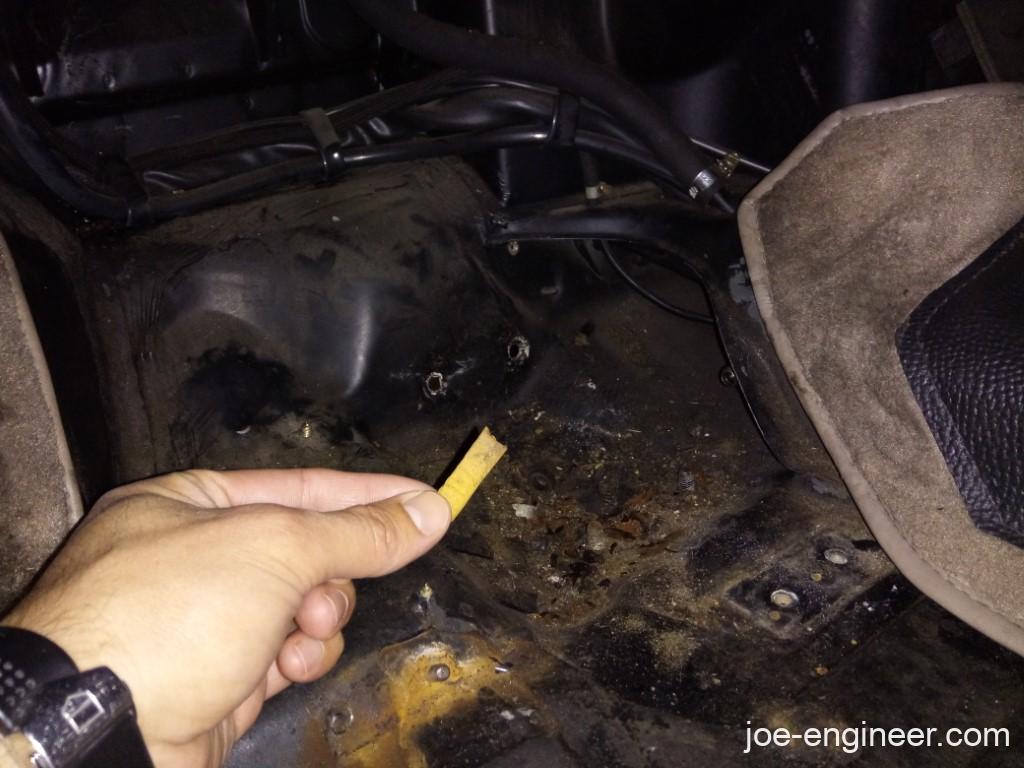
If this is you, its probably time to check under your master cylinder in the frunk. There is a good chance the paint under the master cylinder and on the brake booster housing has also been damaged. It definitely was on mine.
As long as you are rebuilding the pedal cluster unit, its a good time to touch up all the damaged paint on the car and repaint the pedals and base as needed.
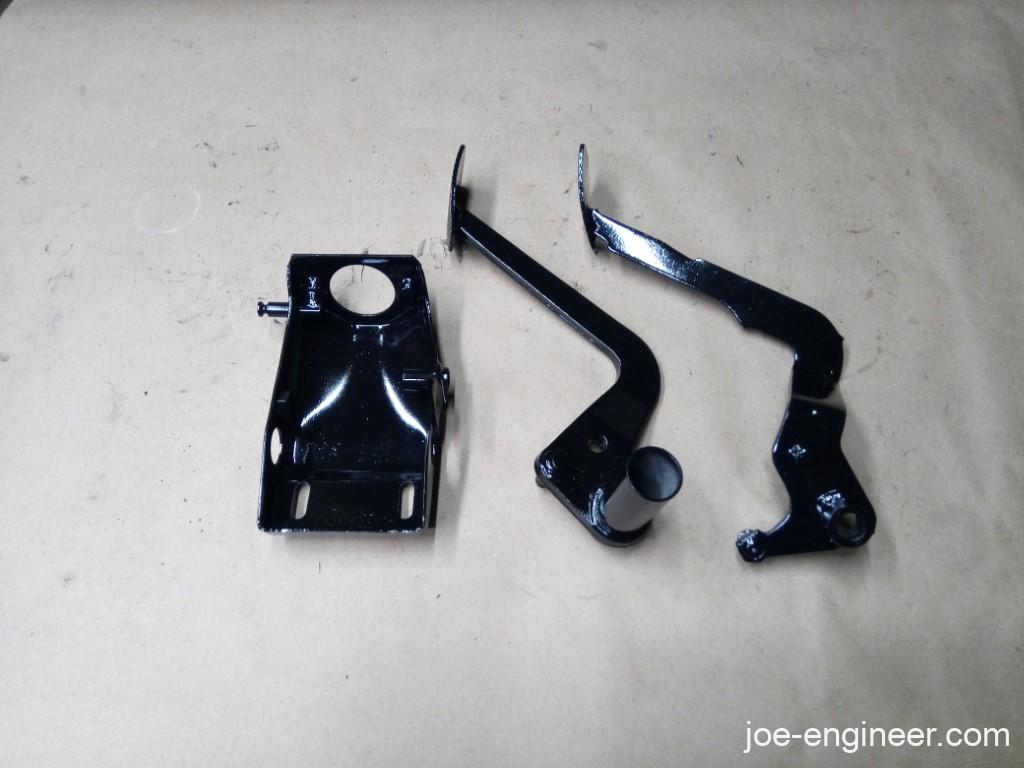
If your master cylinder is leaking, replace it immediately. It is an easier job with the pedal cluster out. I wrote a DIY procedure for that too on FCP’s Blog.
Bushings
There are a bunch of bushings in the pedal cluster and the original plastic ones sometimes crumble into dust. It seems the tiny ones on the accelerator pedal bellcrank often fail and then you have issues with the pedal itself sticking open. That’s not good in any situation so replacing them with new ones is mandatory. Fortunately there is an aftermarket set of bronze bushings that are quite popular with owners who rebuild their cluster. They are very reasonably priced too.
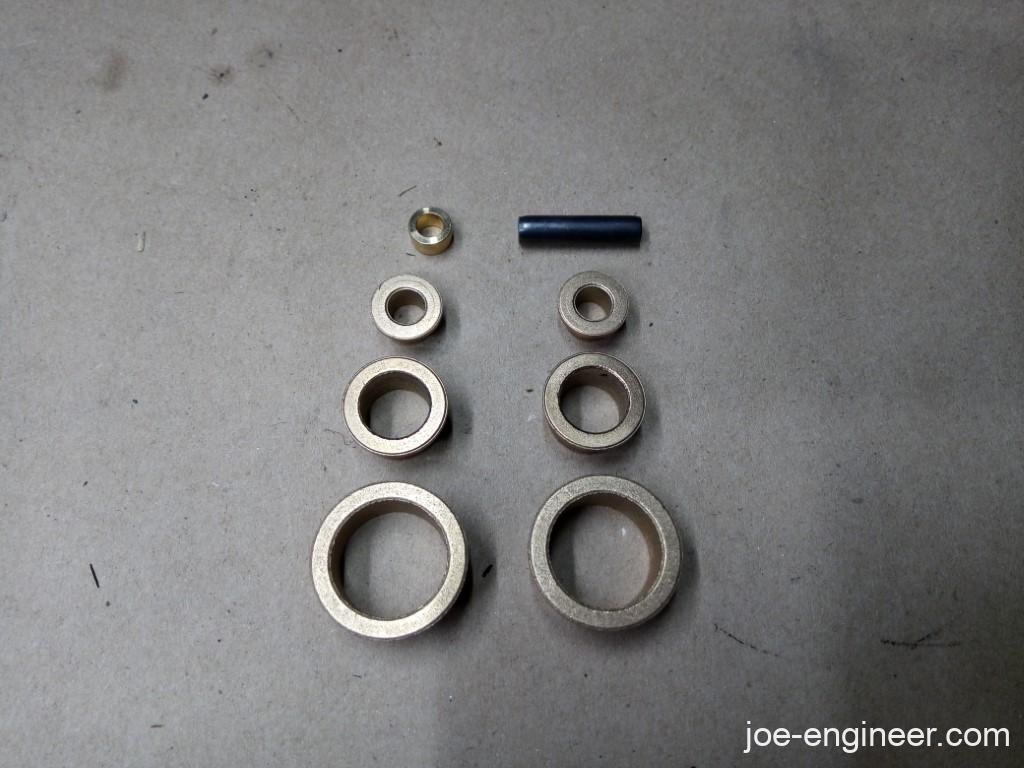
These should last longer than the already quite durable original plastic ones. I used a set in my own cluster rebuild. One bushing that is not included in the kit is a large plastic one on the right side of the clutch arm that sits between the steel base and the clutch arm itself. That one functions more as a spacer and tends to wear mainly on the flat surfaces, unlike the other bushings which wear on their inner and outer cylindrical faces. In any case if this one is in good shape it can probably be reused as it doesn’t see any significant loads.
Clutch Return Spring
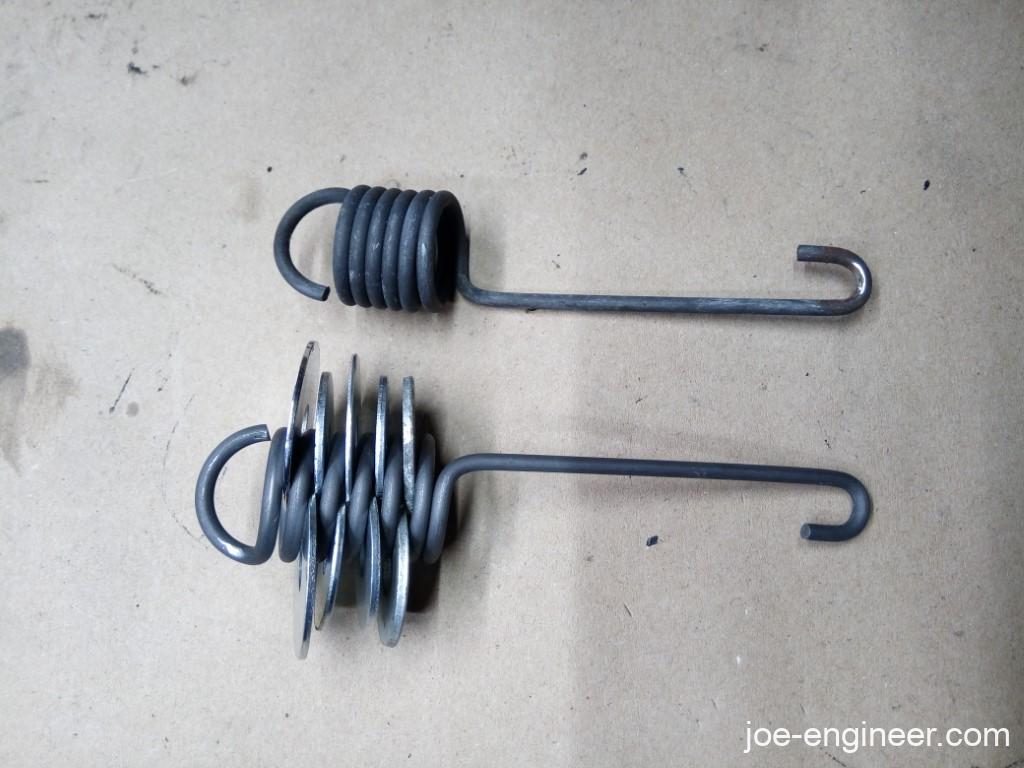
This one did not fail on mine but I am including it because I have read of many failed springs on others’ cars. It is possible they could fail due to rust or simply fatigue and break due to so many cycles of the brittle spring steel. Whether or not it fails, if you are rebuilding your cluster you should probably replace it with a new one. It doesn’t cost much and is worth doing while you have the whole cluster out.
Technically this one can be replaced without rebuilding the whole unit on 1977 and later clusters as it hangs off to the left side.
If you need to replace yours, one cool trick to help hook both ends of the spring into position is to get a big stack of fender washers at your favorite hardware store and slip one in between each coil to lengthen the spring. Then it takes much less force to hook each end on without brute force and there is less risk of getting hurt. Then you can pull each washer out once the spring is installed.
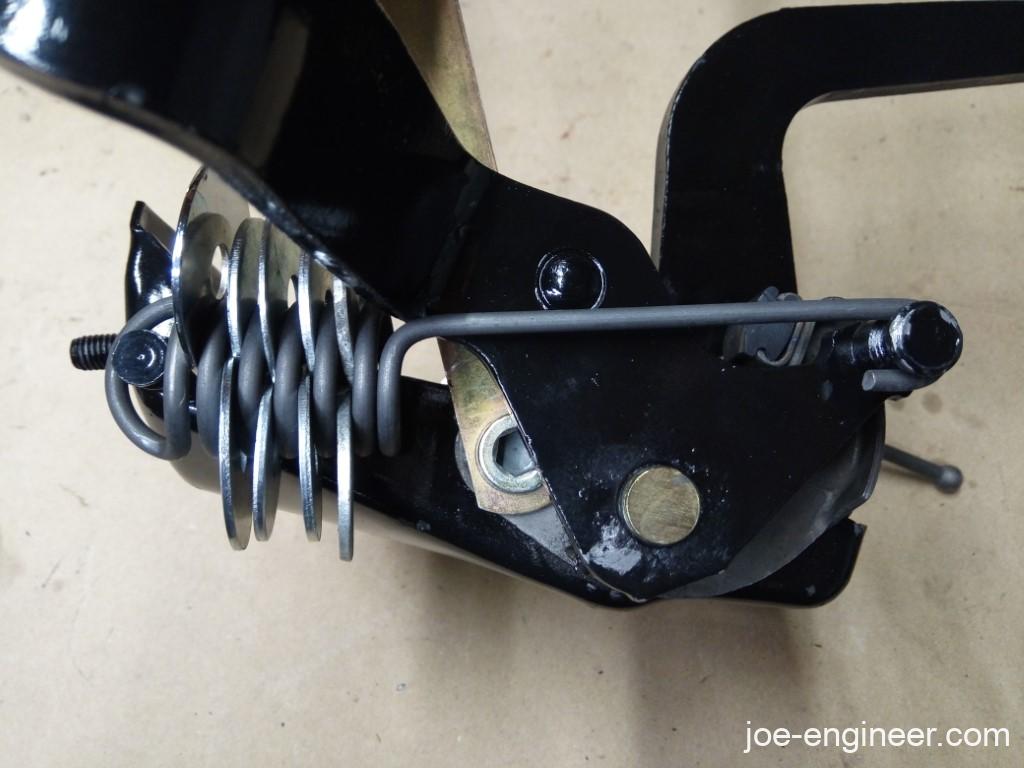
That pretty much captures all the failures that appeared on my pedal cluster although I am sure there are many other creative ways they can fall apart.
The important thing to note is that after you take the time to rebuild your pedals, re-install them, and adjust them correctly, the car should be much easier to drive. Your clutch pedal will travel more smoothly, your brake pedal should be just as firm, if not firmer (if you fixed a leaky master cylinder), and your accelerator pedal should do a better job of returning back to idle without sticking. Best of all, you wont have to worry about the pedal cluster for many many years.
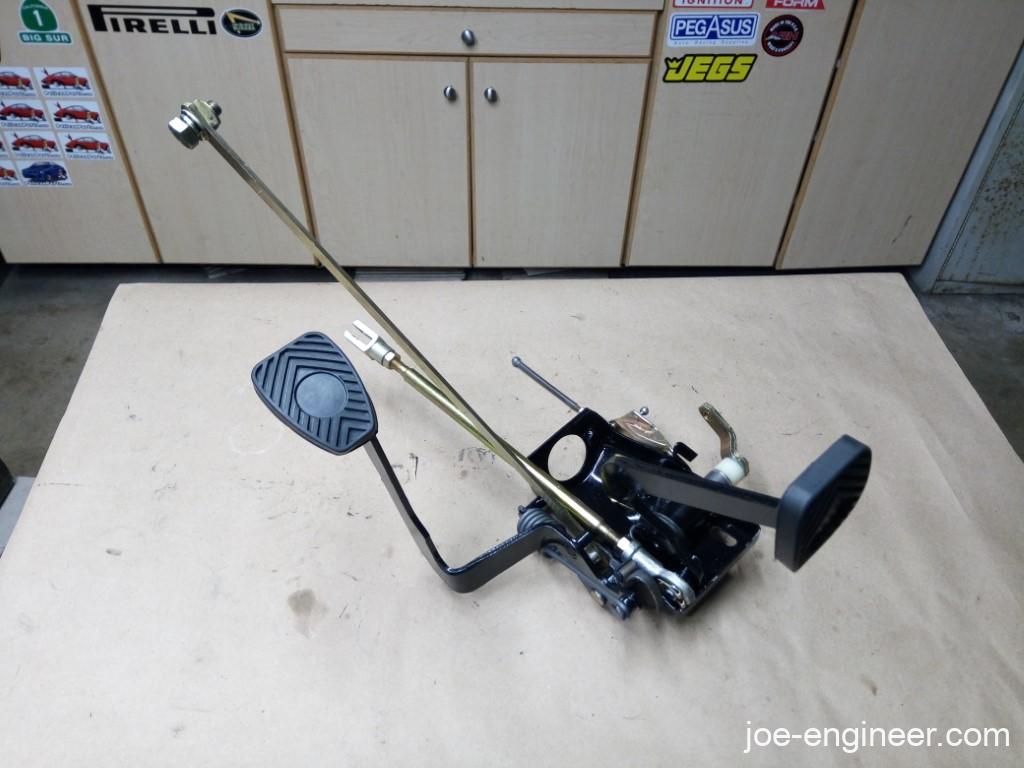
Next time we will move to hand controls and fix an old steering wheel.