
Garage Electrical Upgrade
2021 is the year of new beginnings so I took a big step towards upgrading my home garage capabilities.
I am very thankful that I have a garage to call my own. I have accomplished a lot in this small space including rebuilding my Porsche 911 engine and lots of other mechanical repairs. All my blog, FCP Euro, and YouTube adventures have happened here. So much learning has happened here. I have reached a point where I have outgrown what I can do in this space and I need to make some infrastructure changes to allow my abilities to keep improving at a significant pace.
For years my bottleneck was the single 15A breaker and few outlets powering my garage. As a result I have had to depend on others to get specialized tasks done like welding or machining. This is not usually an issue for big jobs that are worth a competent fabricator’s time but if I ever want to prototype a single small part, it gets difficult (and expensive) to find support. I have had some training in machining and welding so I know I am capable of developing these skills, but if I can’t practice, I won’t get better, ever, at building the things I want to build.
This was the main driver behind deciding to upgrade my garage electrical. I want to have the option of being able to run a decent welder, a milling machine, a lathe, and a compressor if I choose to do so.
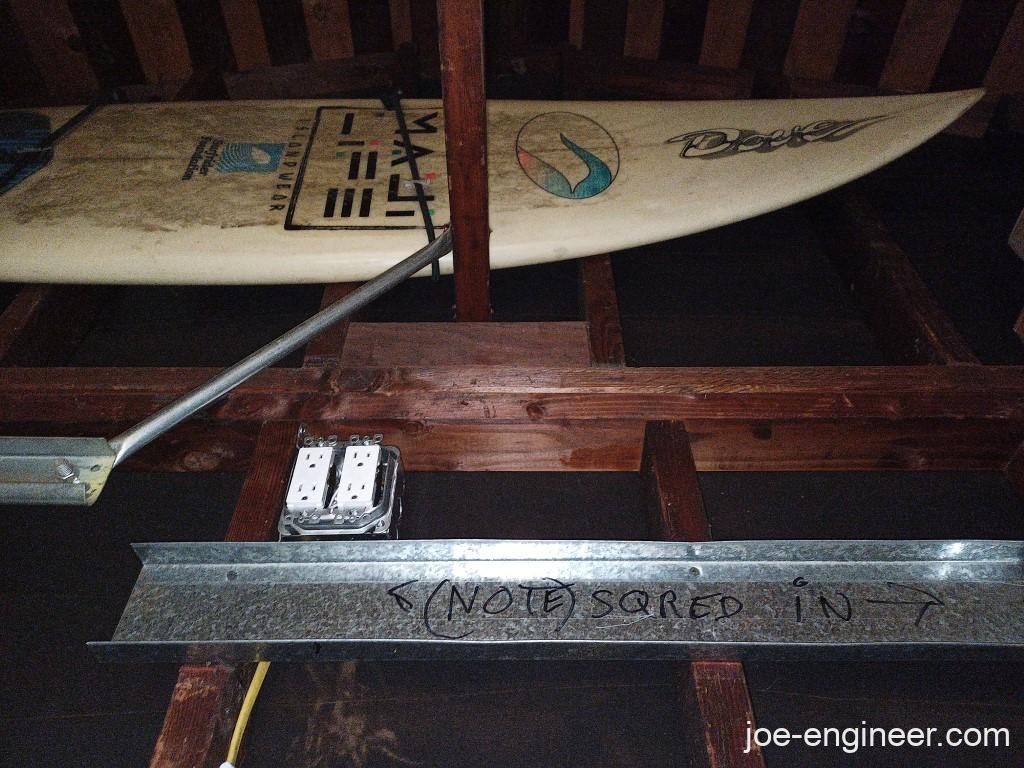
After thinking about my 2-car space, I have decided that the best space for heavy equipment such as a milling machine and a lathe is against the back wall, opposite from the roll-up door. Here we have installed two 220V outlets on 30A breakers, each with a 110V above it for work lights or accessories. Near the corner is a 220V outlet with a 50A breaker that will feed a welder, plasma, or big compressor, as needed. This one is more multi-purpose, hence the higher amperage and location off near the corner.
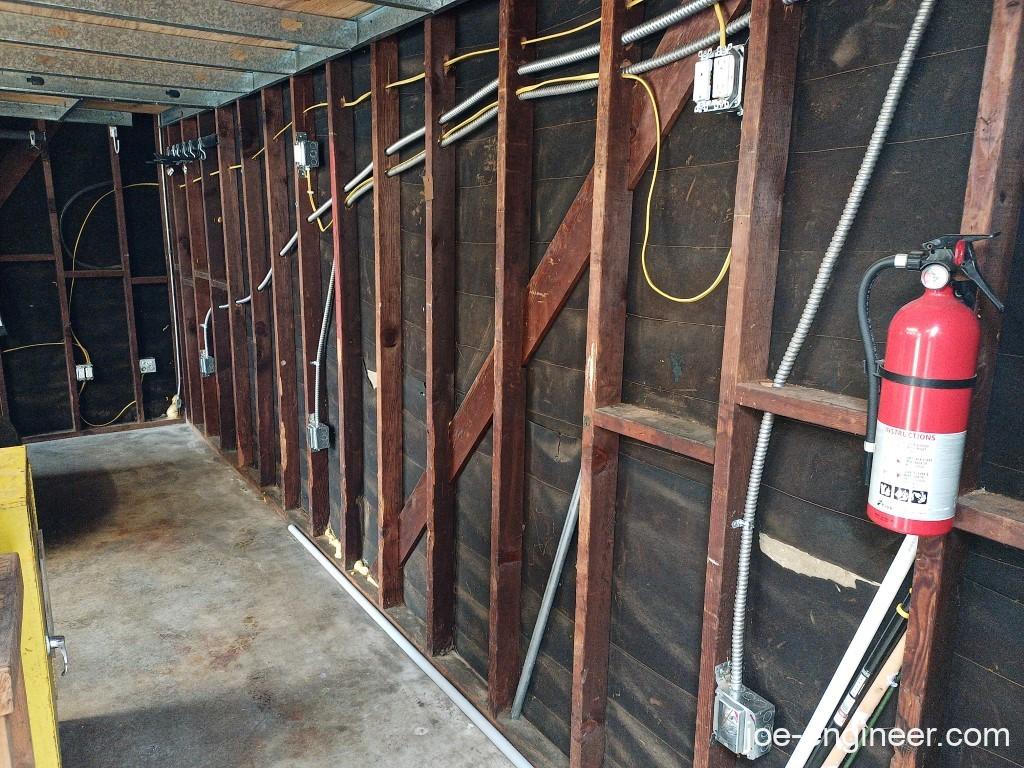
As you have seen in my prior posts and videos, my 2-car space is divided into half shop space and half parking space for the 911. The shop space is the side closest to where the original outlets were in the garage and also has all of the currently available lighting. Now we have added three 110V outlets along the wall closest to the 911, to make plugging in tools or work lighting more convenient. Two exterior facing outlets were also added for backyard convenience.

The best part of this wall is an additional outlet above the dark side of the garage so I can finally add permanent lighting above the car. I cant wait to work on the Porsche with nice bright lights everywhere!
The heart of this upgrade is the new 100A dedicated garage subpanel with individual breakers for each of the 220V outlets and each of the 110V wall blocks. Because this is a detached garage we had to trench between the house panel and garage to run the big cable and conduit needed to power the garage panel and set it up per code.
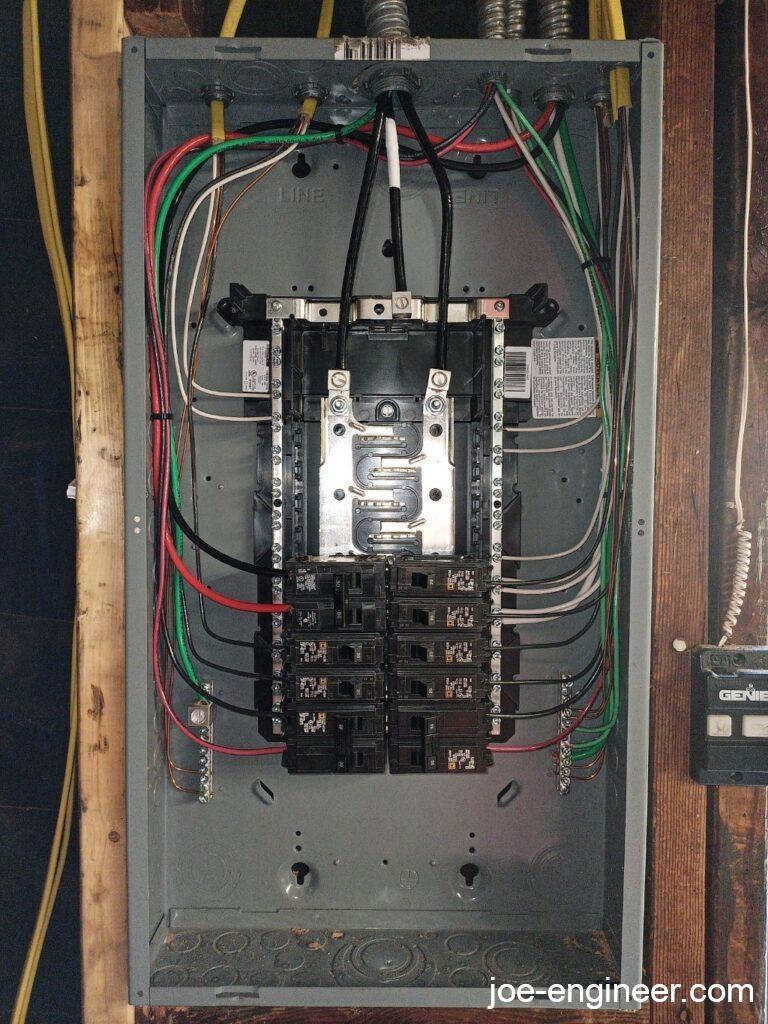
In the past, when I ran my lights and stereo and then flipped my compressor on, I would be plunged into darkness while I fumbled around for a flashlight to go turn my garage breaker back on at the house panel. This is a huge step forward safety-wise as now I have a higher chance of keeping some lights on at all times, unless there is a neighborhood outage of course.

My hope is that I can soon make prototype parts and hopefully show you all more actual Joe Engineer instead of just Joe Porsche-Rebuilder. 🙂
By the way I want this tiny shop space to be as flexible as possible, so most of my equipment needs to be compact, easy to move around and store, and very multi-purpose. So if you see any ideas anywhere that you think I should consider, please shoot me a note!
Next steps are insulation and drywall. Fingers crossed that goes smoothly.